


![]()
This is a sewing pattern and instructions for a hoodie that uses an open-end zipper.
The pattern is designed for cosplay costumes, so it has a structure without lining.
If you want to use this pattern for regular clothing, please draft additional lining pieces by removing the facing area from the main pattern.
The pockets in this pattern are simple. If you prefer bag-style pockets, please draft pocket bag pieces and use them instead.
Since this is an unlined design, please finish the armhole area with self-made bias tape.
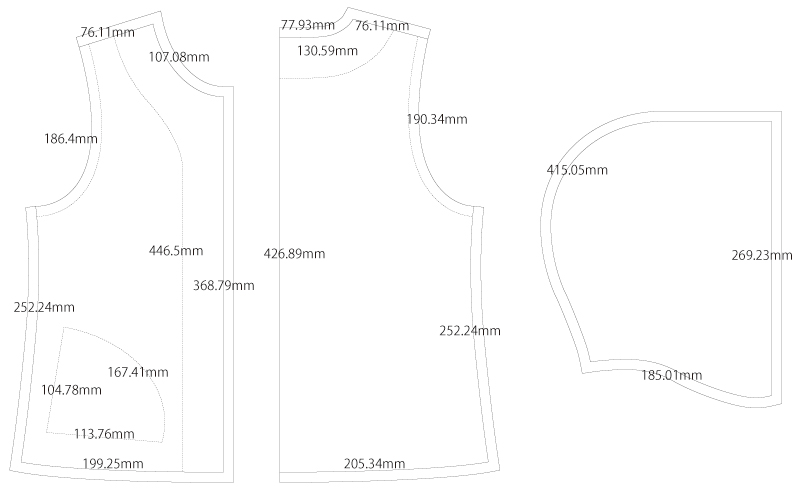
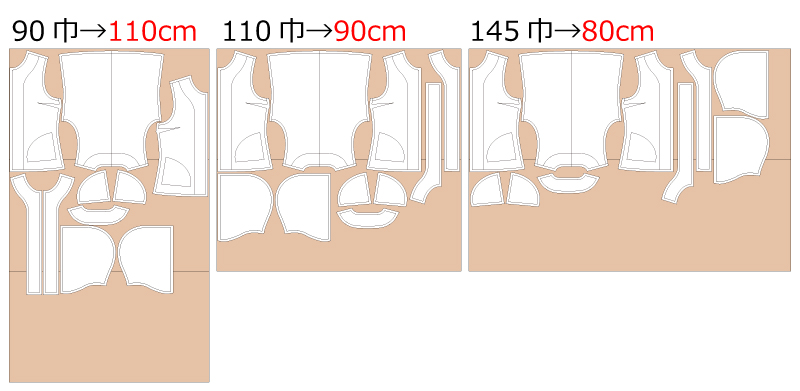
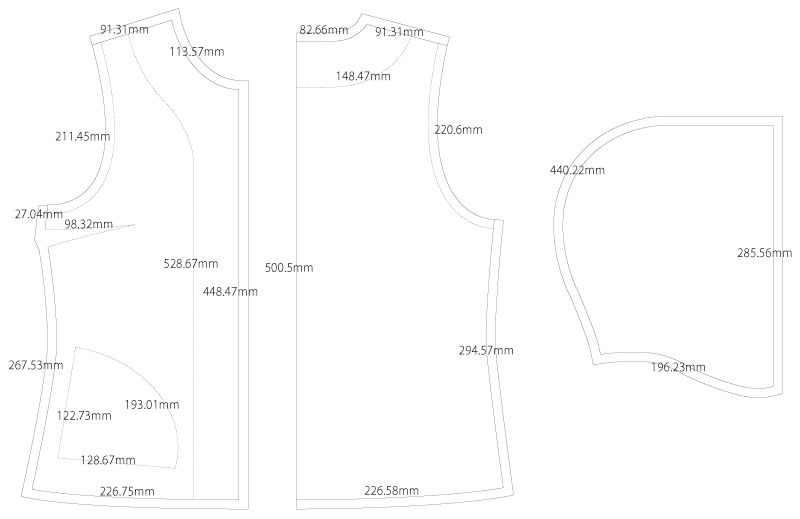
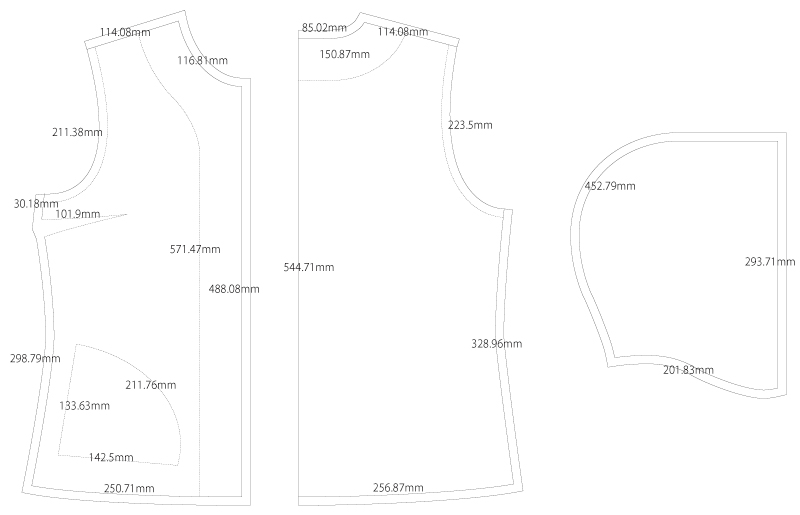
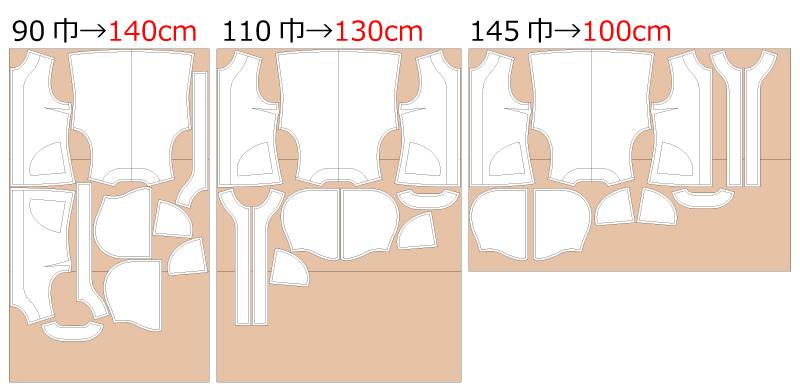
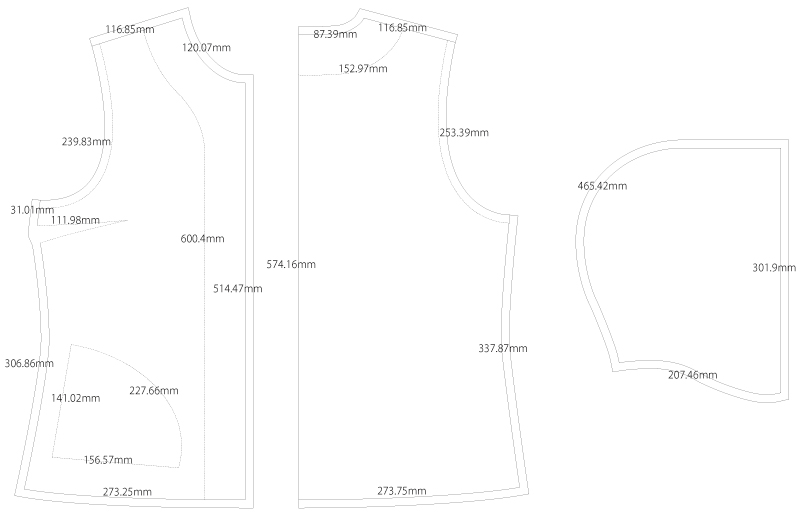
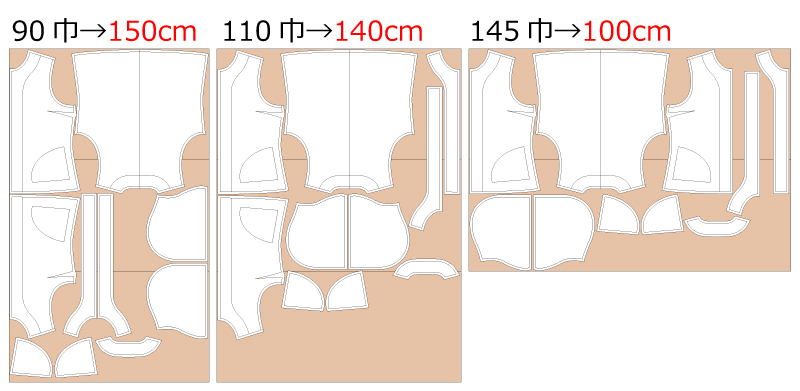
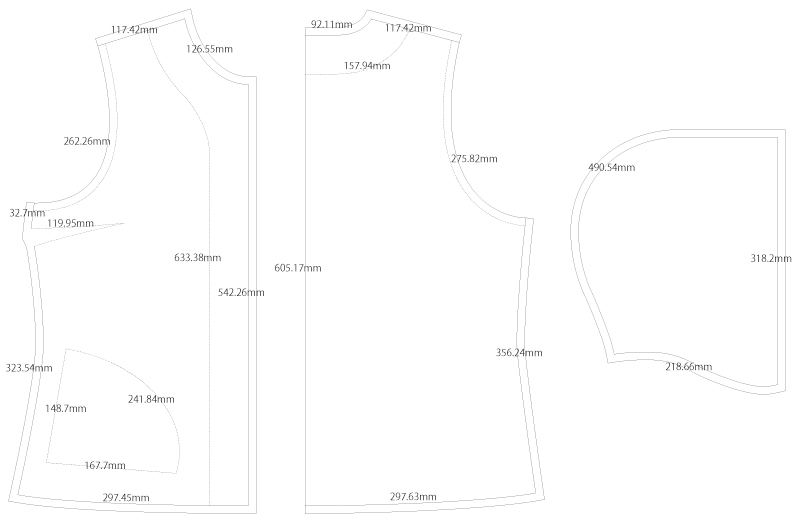
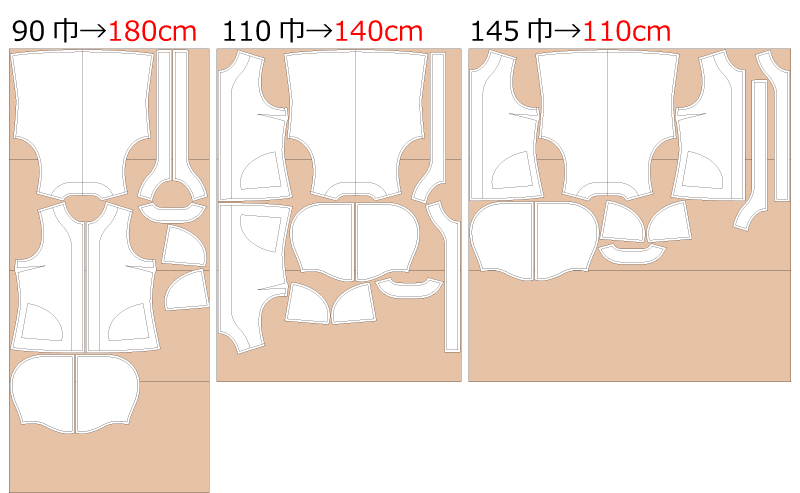
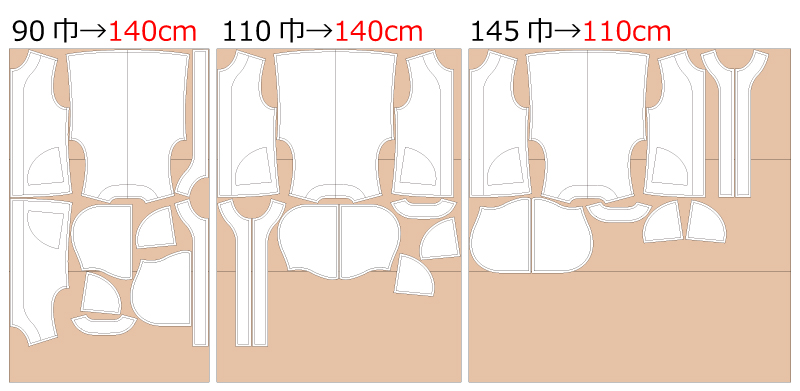
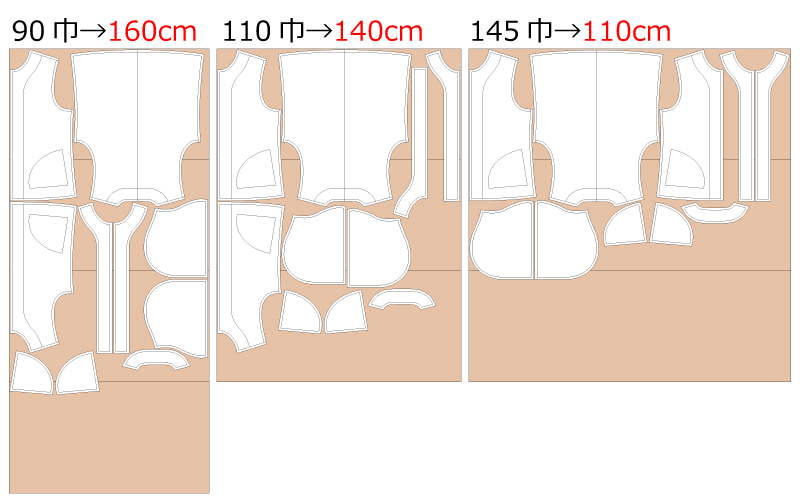
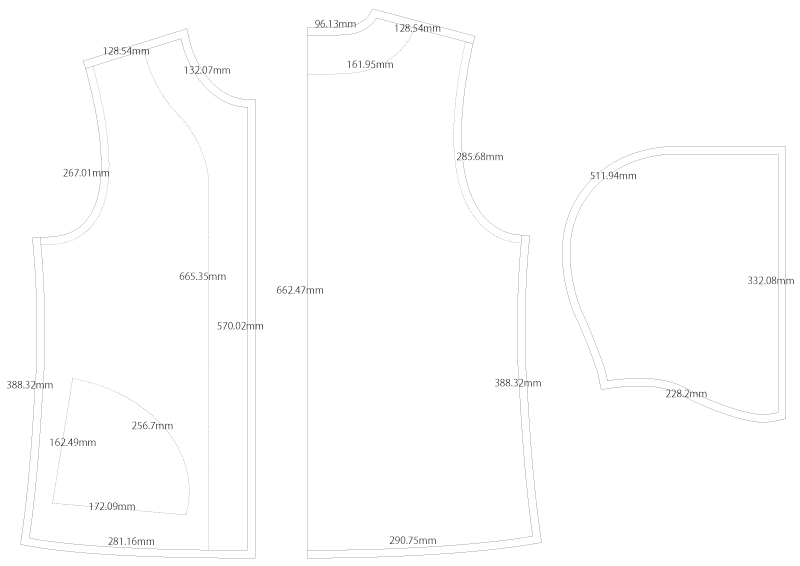
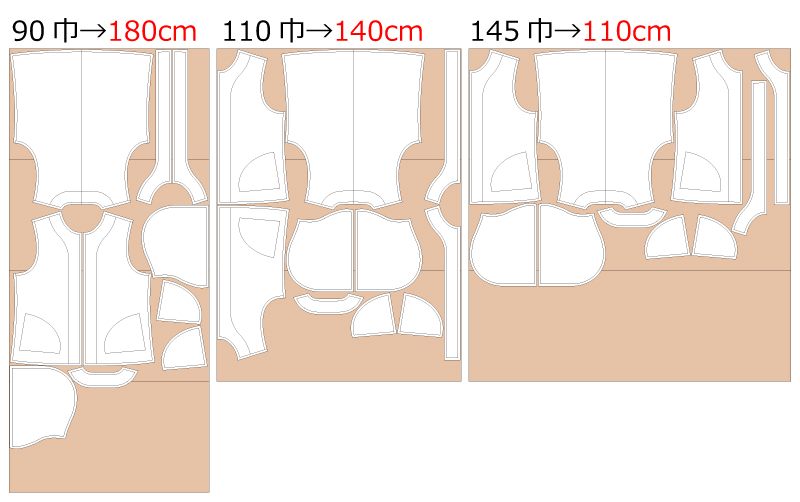
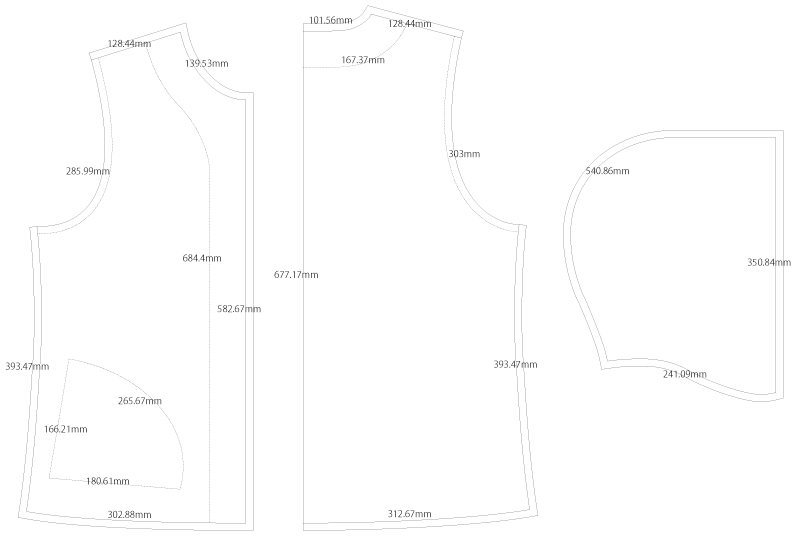
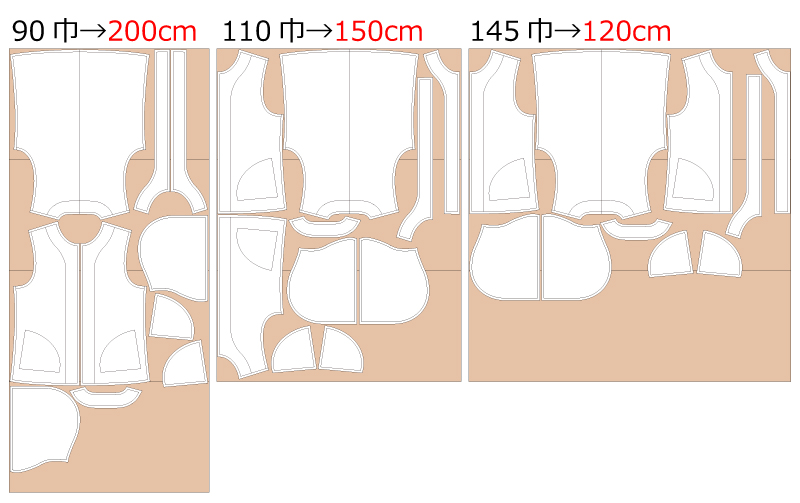
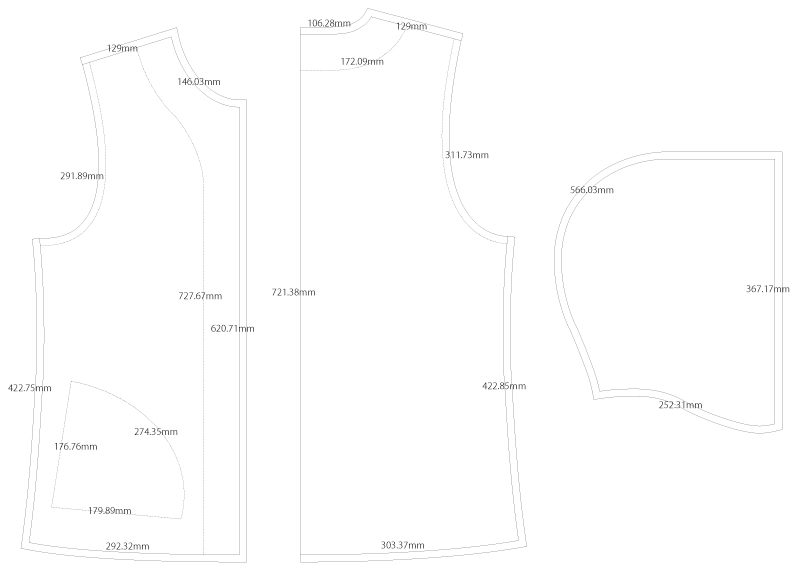
After printing, align the joining marks, tape the sheets together, and cut out the pattern. Seam allowances are already included, so you can use the pattern as it is.

What are “Grainline” and “Cut on fold”? Please refer to this page.
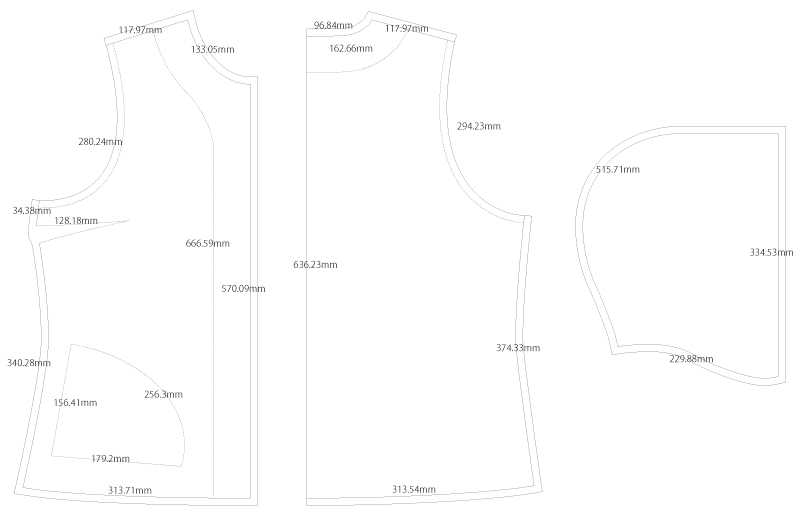
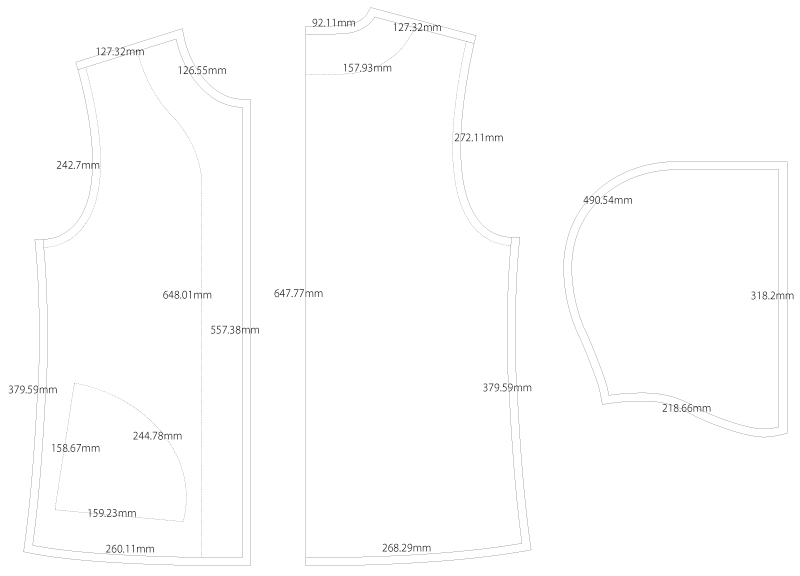
(1) Sew the darts on the front body and press the seam allowances downward with an iron.
*Children’s sizes 100(4) and 120(8), and all men's sizes do not have darts, so this step is not needed.
How to sew darts Please refer to this page.
(2) Serge/overlock the sides and shoulders of the front and back body, sew them together with a sewing machine, and press the seam allowances open with an iron.
(3) Apply interfacing to the front and back facings, sew them together with a sewing machine, and press the seam allowances open with an iron.
(4) Serge/overlock the outer edge of the facings.
(5) Serge/overlock the outer edges of the hood and sew the hood together with a sewing machine. Then serge/overlock the front edge, fold it inward, and sew with a sewing machine.
(6) Press the folding lines on the pockets with an iron, then sew the pockets in place with a sewing machine.
How to sew pockets Please refer to this page.
(7) Place the facings and body right sides together, sandwich the hood between them, and sew with a sewing machine.
How to sew facings and hems Please refer to this page.
*Trim the seam allowance around the neckline to help stabilize the curve.
(8) Sew on the open-end zipper.
How to use stay tape Please refer to this page.
(9) Wrap bias tape around the armholes.
How to make bias tape Please refer to this page.
How to sew bias tape Please refer to this page.
*If you want to add a cord through the hood or hem, extend the seam allowance to about 1 inch (≈2–3 cm) to create a casing for the cord.
![]()
Free Paper Patterns are possible because of your support.
If you use our patterns, please share them on social media and tell your friends.
Your support helps DRCOS continue to provide patterns in the future.
![]()
![]()
Children's-100
bust67cm length36.5cm 6sheets of A4 size (or legal size)


Children's-4
bust26.4in length14.4in 7sheets of letter size

Children's-120
bust75cm length42.5cm 7sheets of A4 size (or legal size)

Children's-8
bust29.5in length16.7in 8sheets of letter size
Children's-140
bust85cm length50cm 9sheets of A4 size (or legal size)
Children's-10
bust33.5in length19.7in 9sheets of letter size
Ladies'-S
bust96cm length54.5cm 10sheets of A4 size (or legal size)

Ladies'-S
bust37.8in length21.5in 11sheets of letter size
Ladies'-M
bust102.5cm length57.5cm 12sheets of A4 size (or legal size)
Ladies'-M
bust40.4in length22.6in 12sheets of letter size
Ladies'-L
bust112cm length60.5cm 12sheets of A4 size (or legal size)
Ladies'-L
bust44.1in length23.8in 14sheets of letter size
Ladies'-LL
bust118cm length63.5cm 13sheets of A4 size (or legal size)
Ladies'-LL
bust46.5in length25in 14sheets of letter size
Men's-S
bust100cm length64.5cm 12sheets of A4 size (or legal size)
Men's-S
bust39.4in length25.4in 14sheets of letter size
Men's-M
bust108.5cm length66cm 13sheets of A4 size (or legal size)
Men's-M
bust42.7in length26in 14sheets of letter size
Men's-L
bust117cm length67.5cm 14sheets of A4 size (or legal size)
Men's-L
bust46.1in length26.6in 16sheets of letter size
Men's-LL
bust123.5cm length72cm 14sheets of A4 size (or legal size)
Men's-LL
bust48.6in length28.3in 16sheets of letter size


