How to sew bias tape
In this article, we will explain how to sew "double type" bias tape.
The bias tape used was made by myself.
See "How to make bias tape" for instructions on how to make it.
To learn how to make bias tape with gold, silver, or other synthetic fibers, see Secret trick! How to make bias tape .
Bias tape is often used to hide seam allowances at hems, "armholes," and other areas. It is not only used for straight lines, but also for curved lines, corners, and other tricky parts.
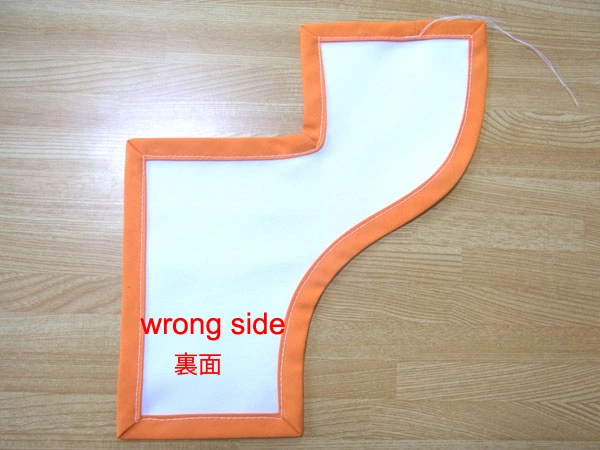
What do I do about the corners? What about the curves? What do I do with the bias tape after the first lap? This time, we will bias the entire circumference of the fabric in a unique way, as shown in the photos below.
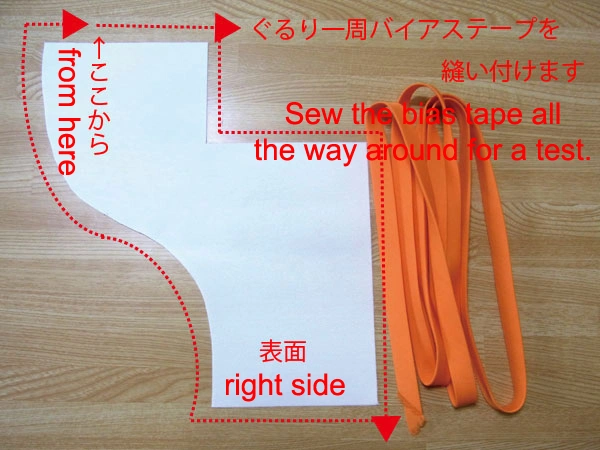
As you can see in the photo, corners, inner curves, and seam allowance treatment can be a little difficult to handle. Please refer to the following steps.
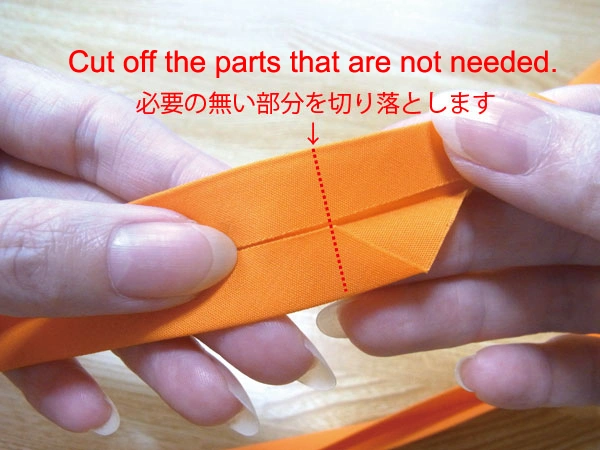
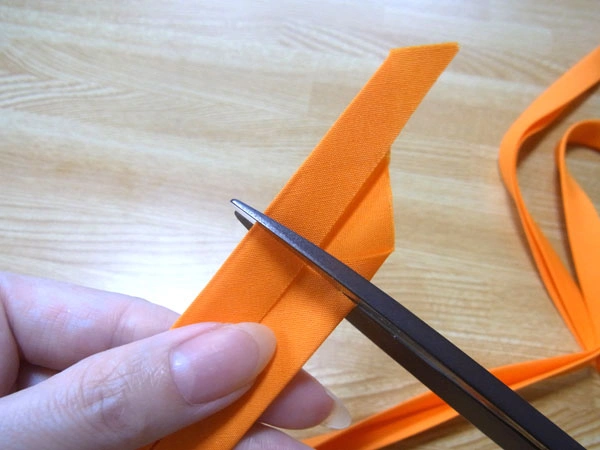
First, cut off the portion of the bias tape that is not needed at the start using fabric scissors.
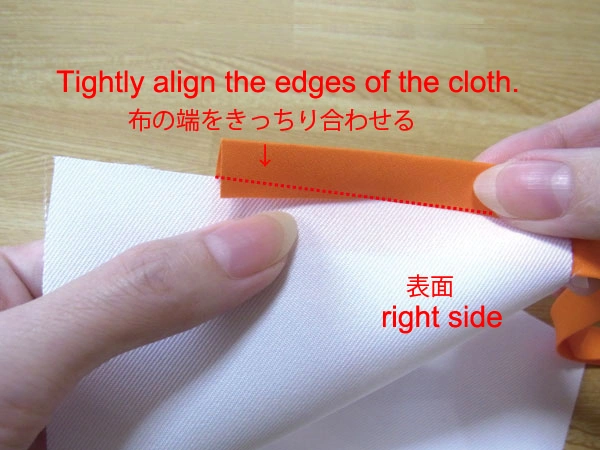
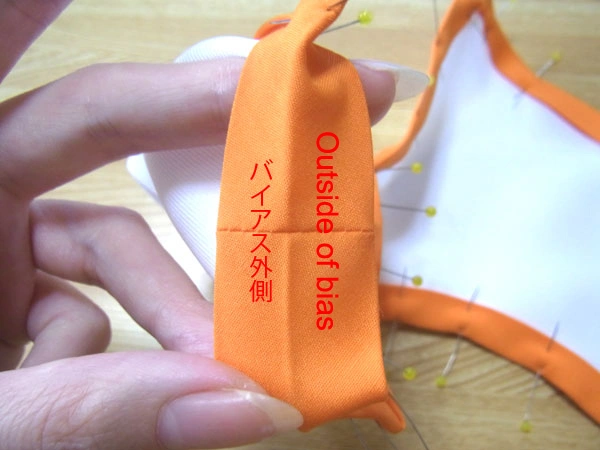
Wrap the bias tape around the beginning of the stitch.
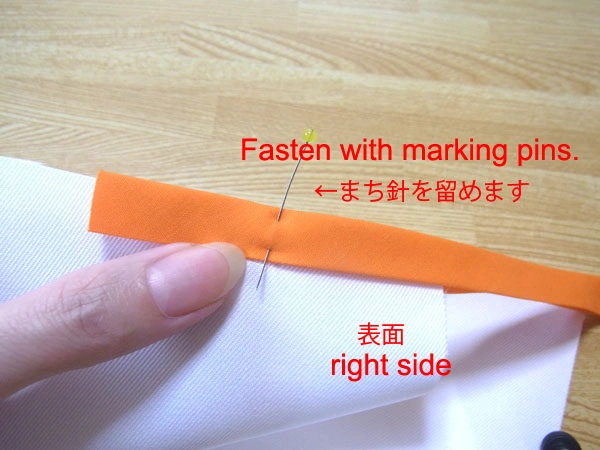
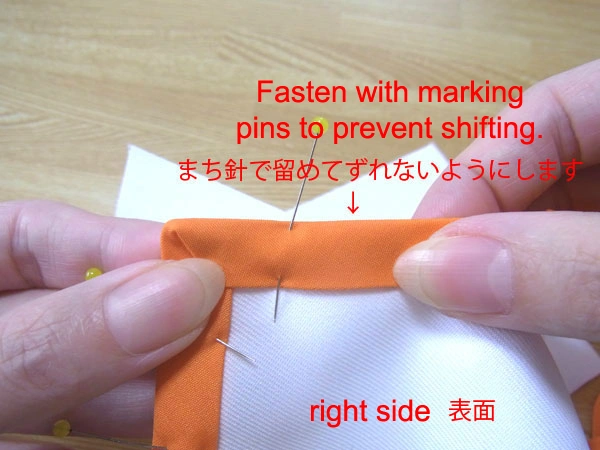
Match the edge of the fabric to the folded part of the bias tape.
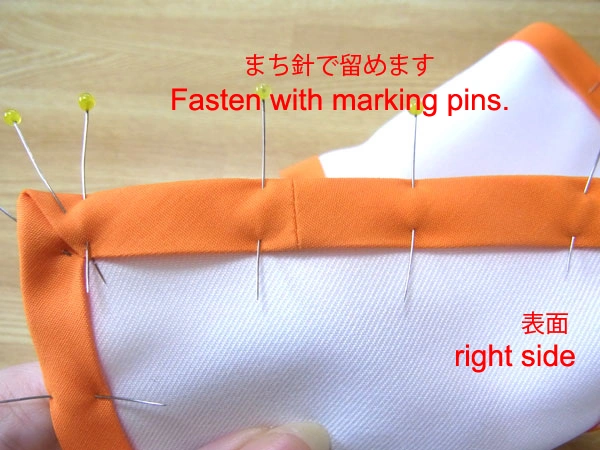
Once aligned, fasten with a marking pin.
Firmly secure the bias tape on the reverse side using marking pins.
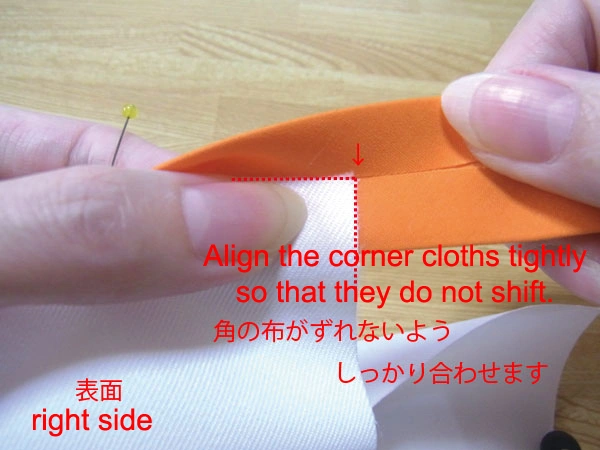
The next step is to deal with the corners.
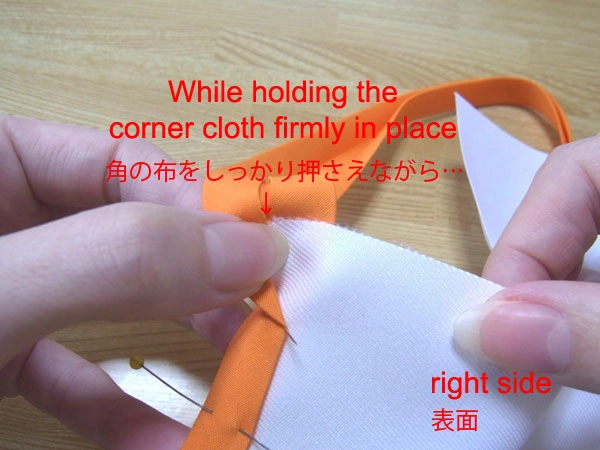
Align the fabric with the folded portion of the bias tape as shown in the photo, and bend the bias tape 90 degrees while holding it firmly so that the tape and fabric do not shift.
If there is no misalignment in the corners, secure it by fastening it once with a marking pin.

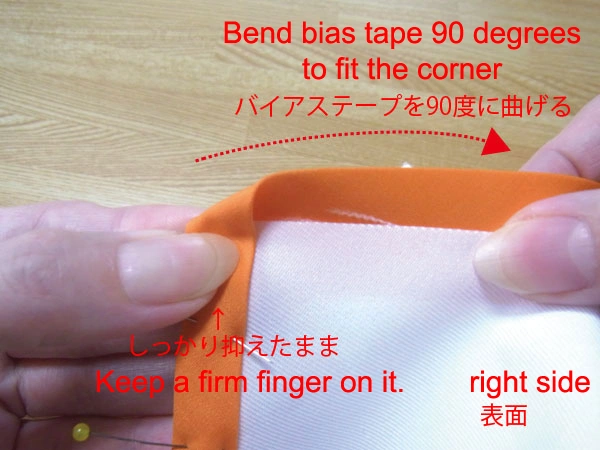
Press the unnecessary seam allowance into the corner in the direction of the arrow.
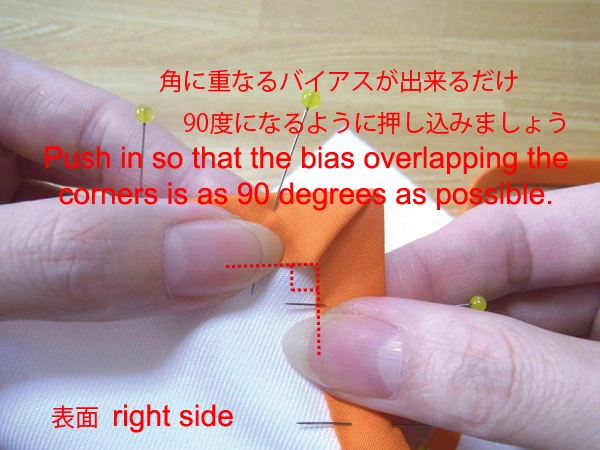
Push it in a little at a time, watching how it goes.
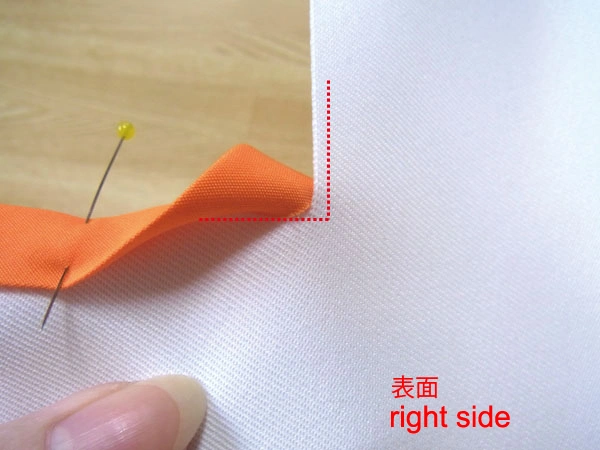
Adjust the corners so that they are 90 degrees as much as possible, as shown in the photo.
The fabric and bias tape in the corners may shift during this process.
If this happens, please remove the marking pin and align the fabric and bias tape again.
It is not easy to handle the corners beautifully at first, but it is one of the steps to a satisfactory result. Please try your best.
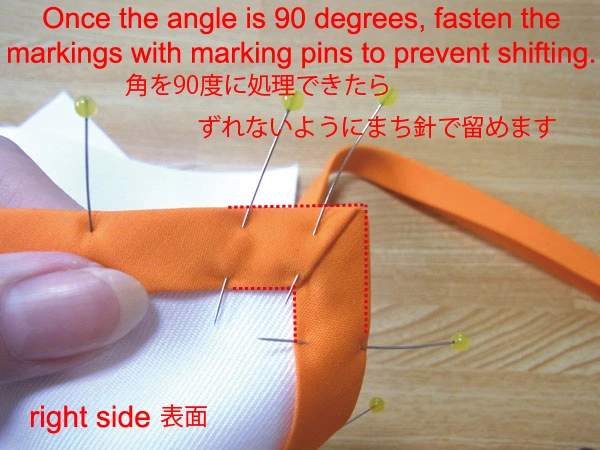
Once the corners have been successfully processed, fasten them with marking pins.
Only "bias tape on the front side" and "fabric" can be fastened with marking pins at this time. Here is the point!
Do not put marking pins through the bias tape on the reverse side.
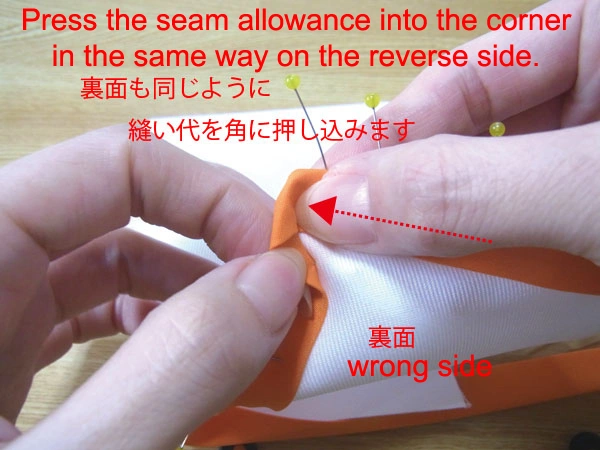
Turn the fabric over, this time treating the bias tape on the back side of the corners.
Push the bias tape in the direction of the arrow.
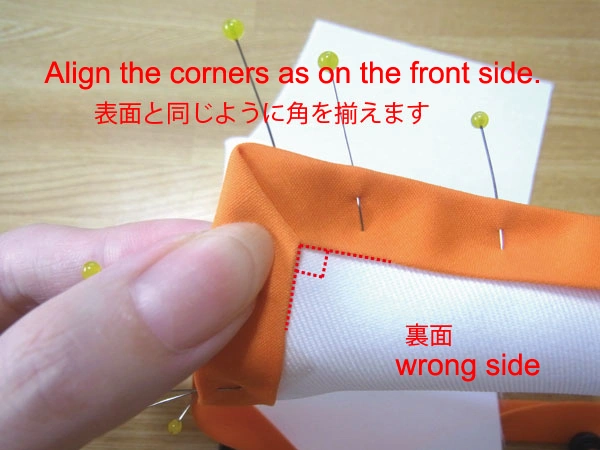
Adjust the corners so that the bias tape on the back side has the same 90-degree angle as the front side.

Fasten firmly with marking pins.
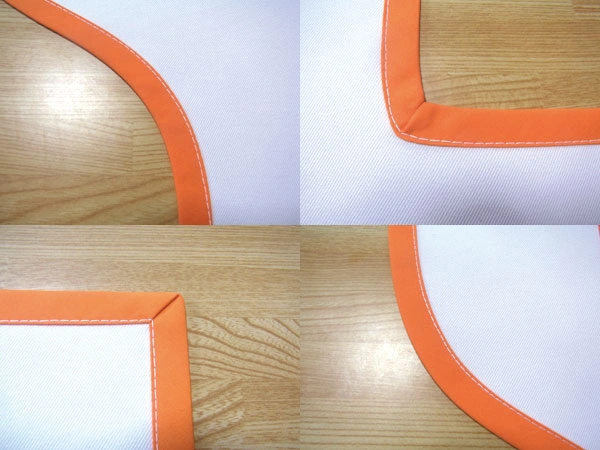
As you may have noticed, the bias tape on the corners is handled on the front and back sides, tucked on opposite sides as shown in the photo.
This is to distribute the thickness of the bias tape and make it as flat as possible, which is the key to a clean finish!
The next step is to deal with the dented corners. This is the difficult part.
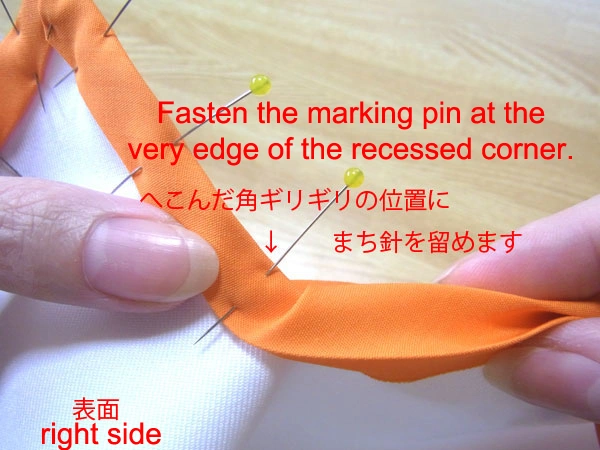
Fasten the marking pin in front of the concave corner as shown in the photo. Fasten firmly so that it does not shift.
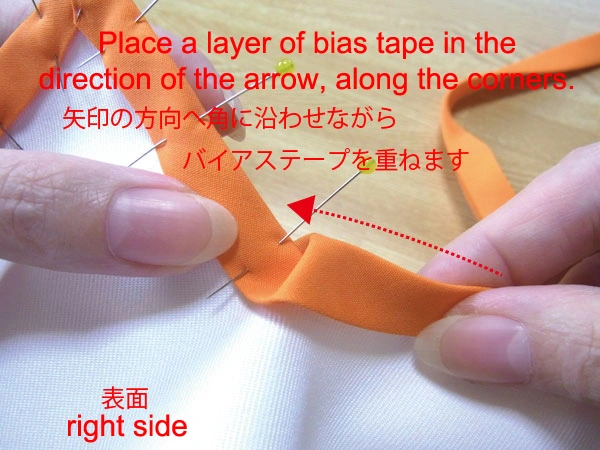
Layer the bias tape in the direction of the arrow with slack in the bias tape.

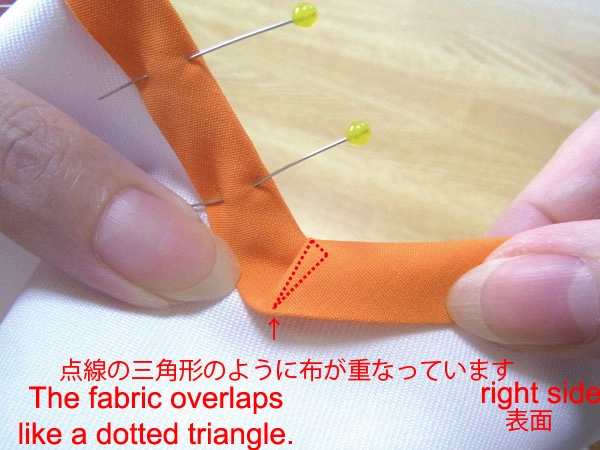
Try decreasing or increasing the amount of looseness while watching the overlap.
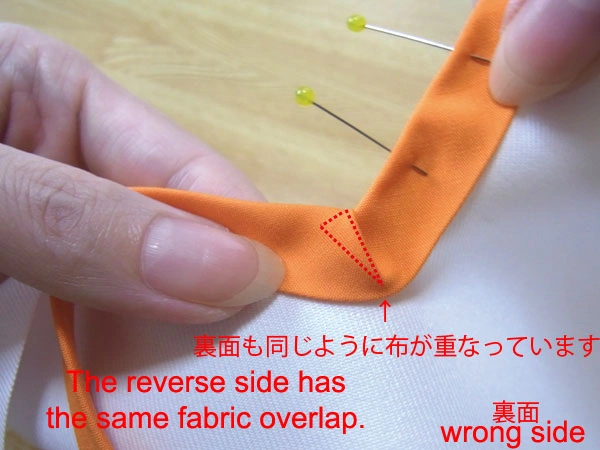
The reverse side has the same bias tape overlap and bias tape along the dented corners.
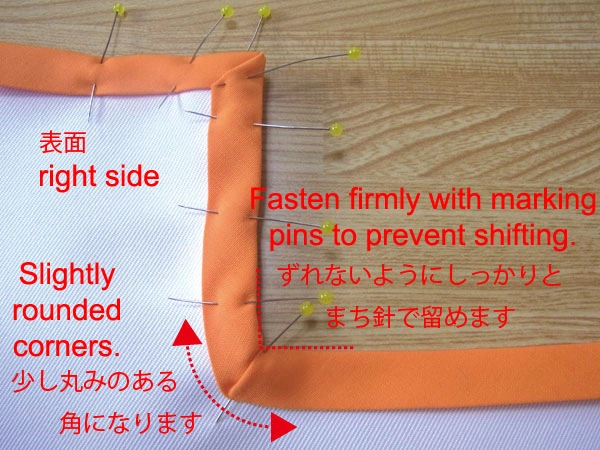
Once the angle of the corner is determined, fix it firmly in place with a marking pin.
The dented corners will inevitably result in slightly rounded lines because the bias tape will be slightly pulled.

Next, I will explain how to sew the bias on the curves.
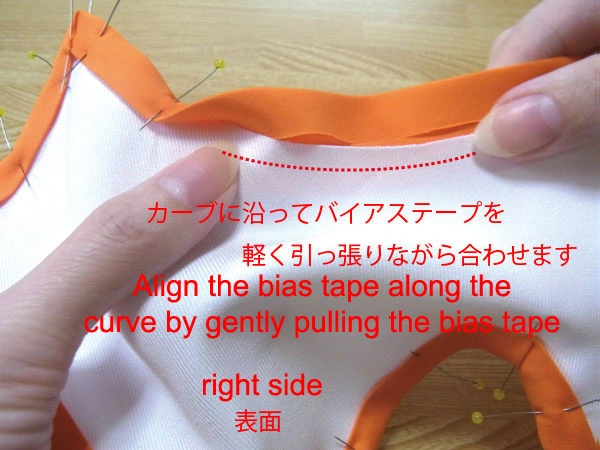
Match the warped curves by pulling the bias tape a little.
Too much pull will cause the fabric to twitch, so watch the surface to make sure it matches.

Once aligned, fasten with a marking pin.
Can you see the bias tape being pulled a little? It's a little hard to tell...
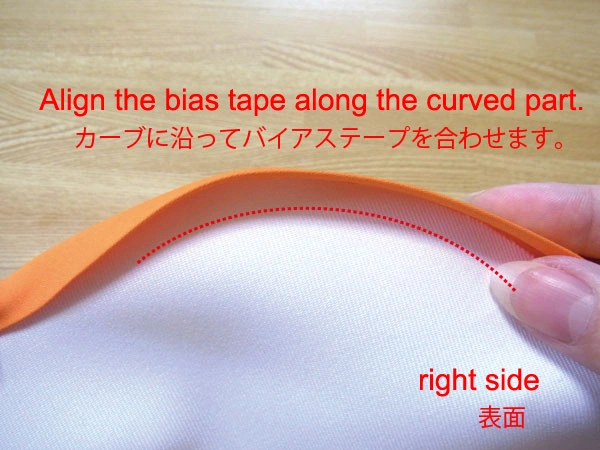
Next is a bulging curve.
Align the bias tape so that it naturally wraps around the curve.
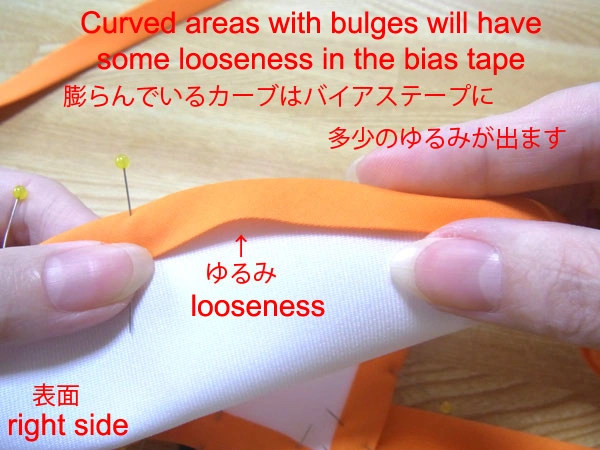
The bulging curves will create "slack" on the surface of the bias tape.
The curve in the photo is not so big, so you can wrap it naturally, but if it is a tight curve, pull the bias tape a little and fasten it with a marking pin.
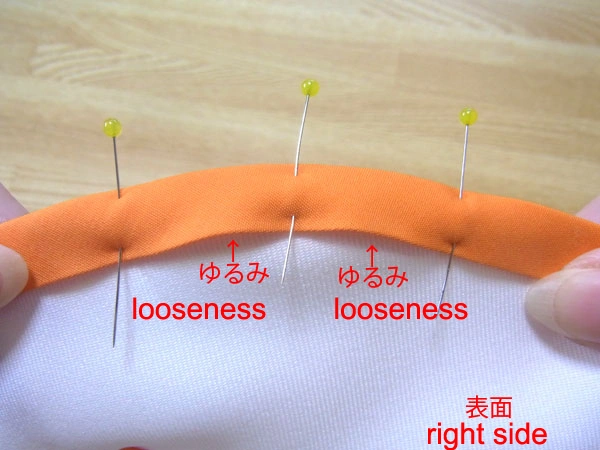
Fasten the bias tape with marking pins.
Can you see the "slack" between the fabric and the bias tape?
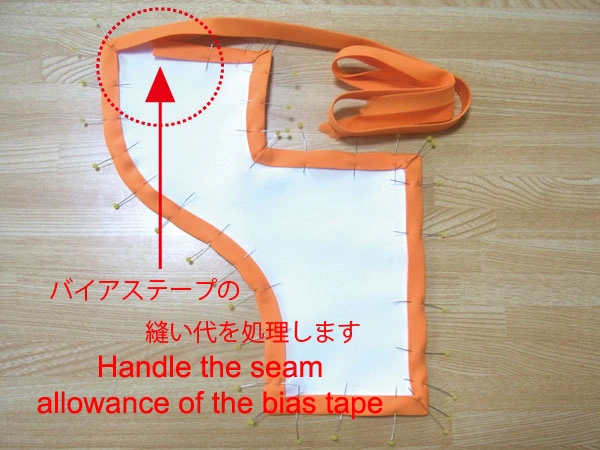
Once you have finished wrapping the bias tape around the curve, you should handle the beginning of the bias and the end of the bias.
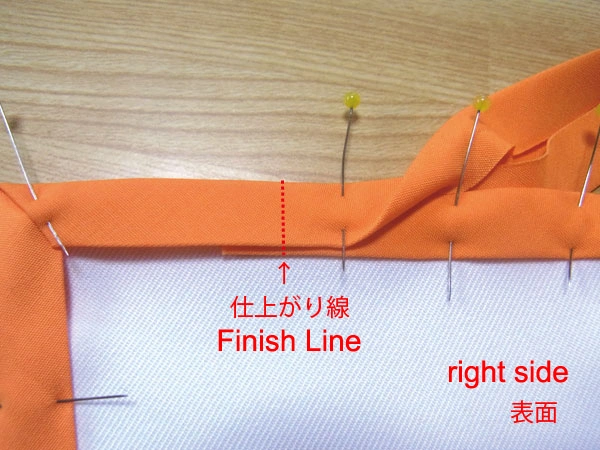
For the sake of clarity, I have used marking pins to fasten them on top of each other.
The red dotted line area is the "finished position".

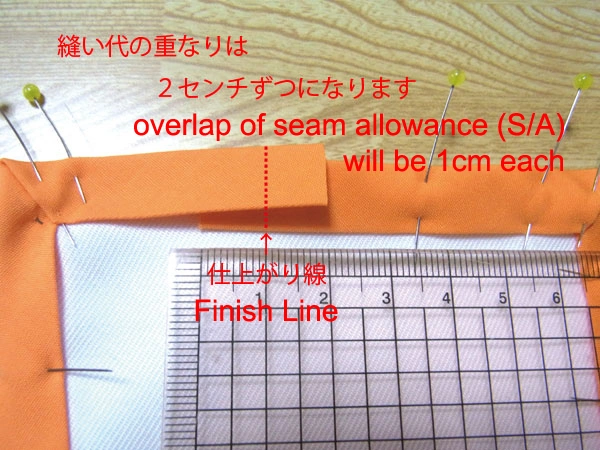
We will explain this by placing the ruler down.
Bias tapes are processed by sewing them together, so they require a "seam allowance" for each other.
They overlap by two centimeters, and the middle centimeter of the overlap is the "finished position".
The solid red line is the bias tape cut line.

After properly measuring the length, cut the bias tape with fabric scissors.
After cutting, continue to overlap the bias tape to ensure that the length is correct.
If the seam allowance is sewn too long, there will be more bias tape than fabric, and if the seam allowance is sewn too short, there will not be enough bias tape.
Please measure and cut accurately.
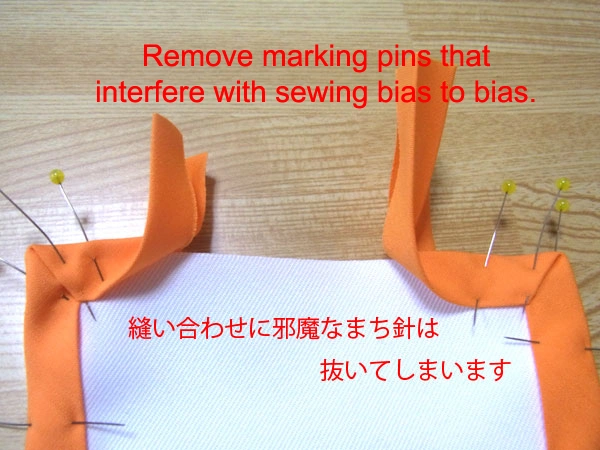
Now let's sew the bias tapes together.
Please remove the marking pin that interferes with the sewing process.
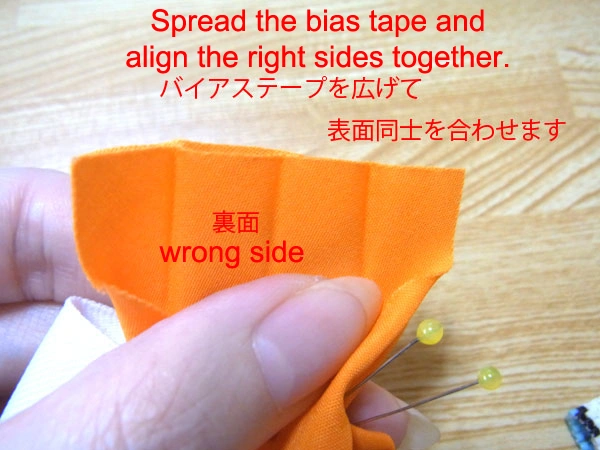
Spread the bias tape and align right sides together.
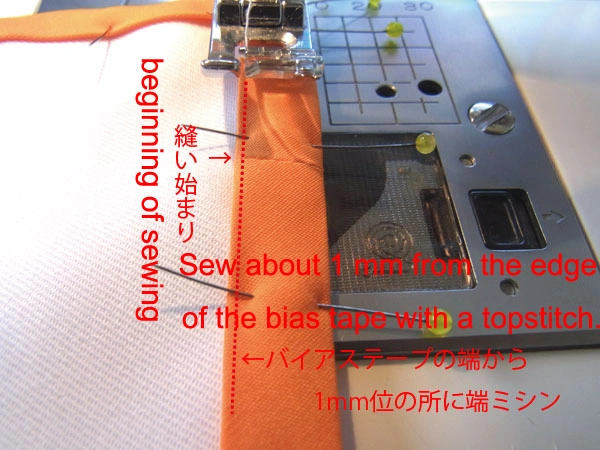
Sew all the way around, so there is no need to backstitch at the beginning of sewing. Sew about 1 mm from the inside edge of the bias with a sewing machine.
At this time, the ironed shapes should also be spread out and aligned for a beautiful finish.

This time the seam allowance is set at 1 cm.

Reverse stitches are not required at the beginning and end of sewing.
It is better to sew a slightly smaller seam width to prevent unraveling.
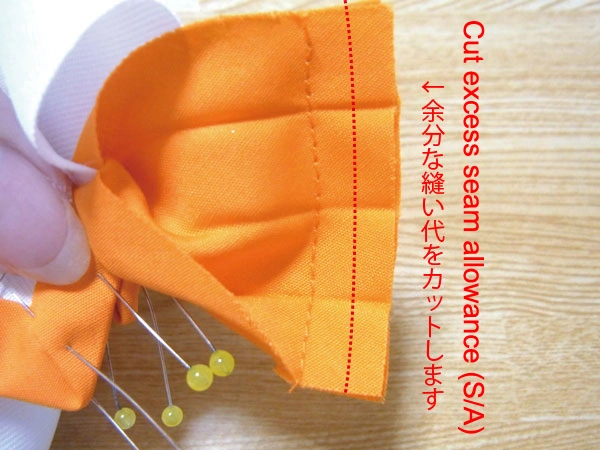
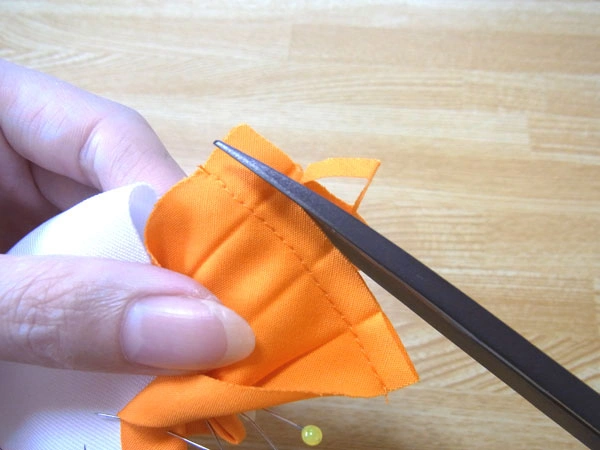

When you have finished sewing, cut the excess seam allowance.
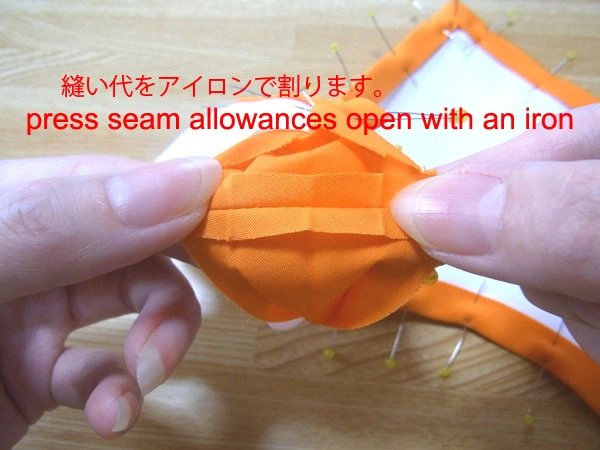
Press seam allowances open with an iron.
There was no room to iron the seams in the photo, so I split them open by hand.
If there is space, iron firmly.
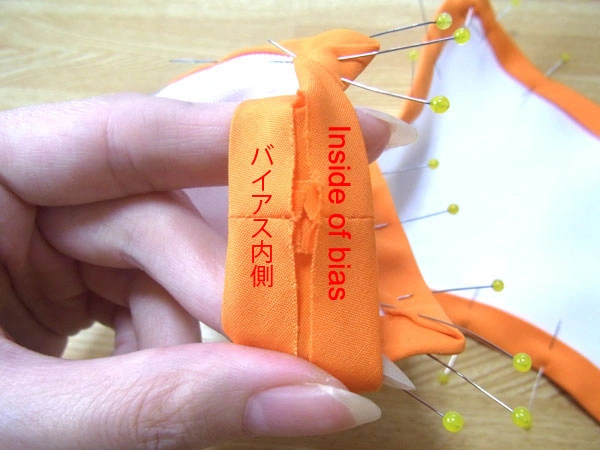
The bias tape is now connected.
Fasten the finished bias tape with marking pins.
I measured properly, cut the bias tape and sewed it together, so it fits the fabric perfectly.

Now let's sew from the place where the bias tape was sewn together.
Sew all the way around, so there is no need to backstitch at the beginning of sewing. Sew about 1 mm from the inside edge of the bias with a sewing machine.
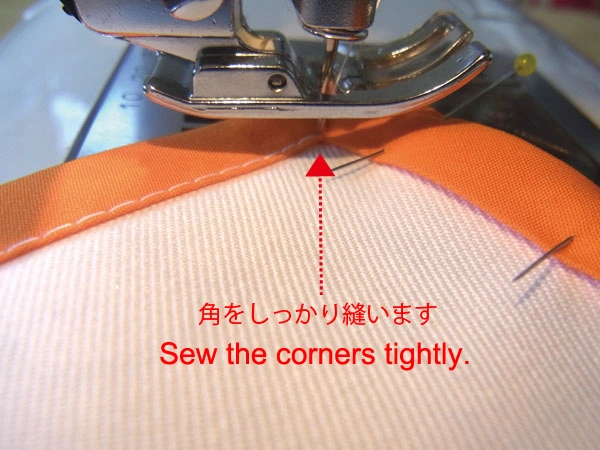
Sew down firmly where the bias tape overlaps at the corner.
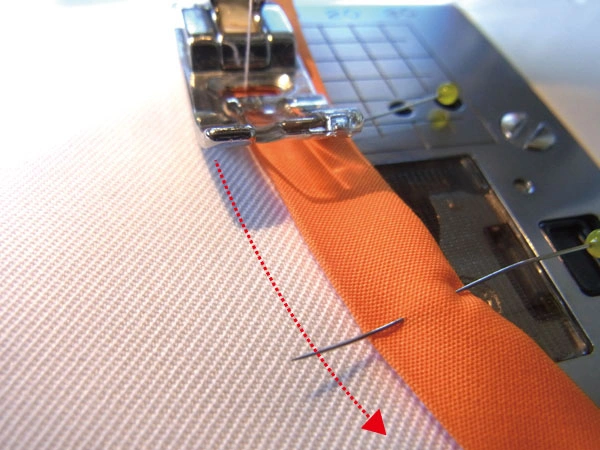
This is the curved portion of the warped line.
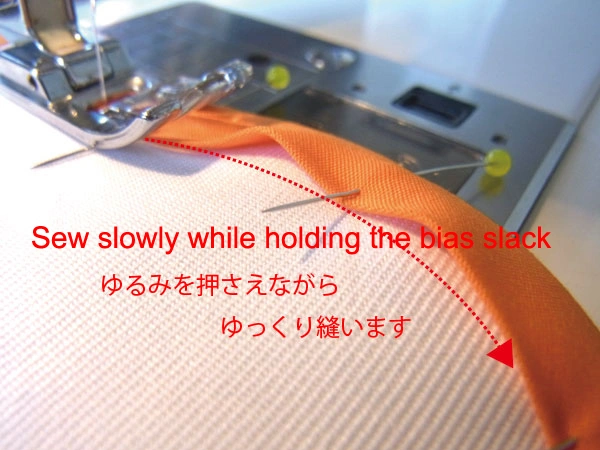
Sew while holding down the loose bias tape at the bulging curve.
Sew carefully to avoid chewing the bias tape.
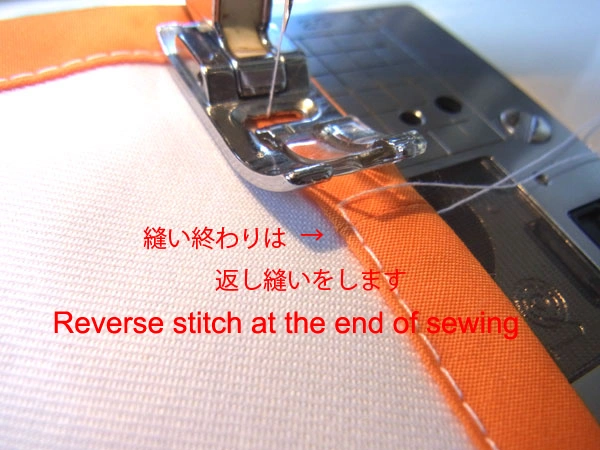
Now that we are back at the beginning of the sewing process, we will do the final backstitch.
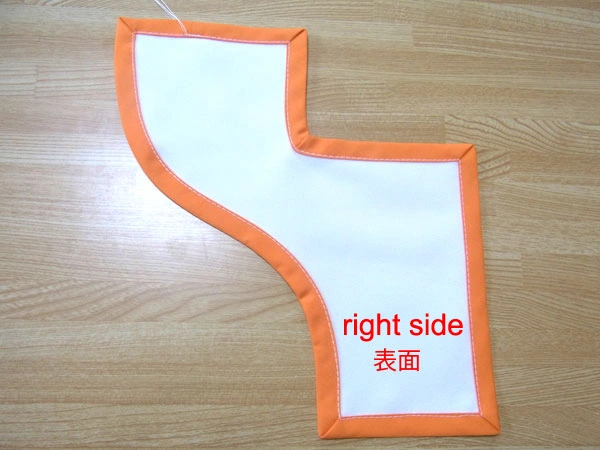
I finished sewing one round.
If you look at the reverse side and the stitches have not fallen off, you are done!

After completion, iron from the reverse side to settle the shape.
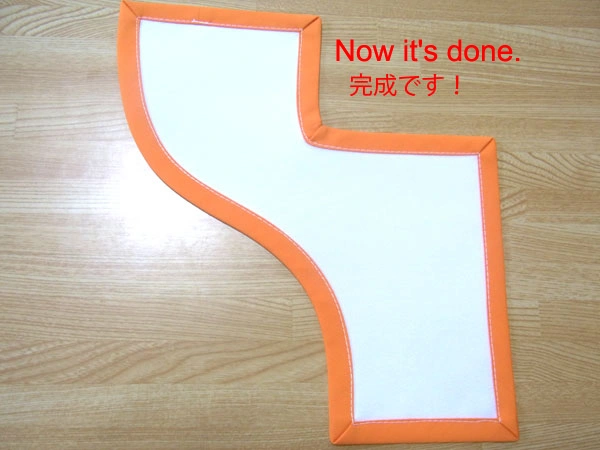
Now it's complete.
The seams may fall out of the bias tape on the reverse side or the corners may be distorted until you get used to it, but you will be able to handle it well after a few times.
If you think you don't like sewing double bias tape because the back seam falls out...! Shift it and make it! "How to make bias tape" to make your own bias tape that prevents the back side from falling off!


