


![]()
The pattern has clean, well-defined lines, giving it a very cool and sharp shape.
As it is a collarless design, the construction process is simple.
This pattern is simplified so it can be easily made for cosplay costumes, rather than being a basic everyday vest, so the construction method differs from standard garment-making techniques.
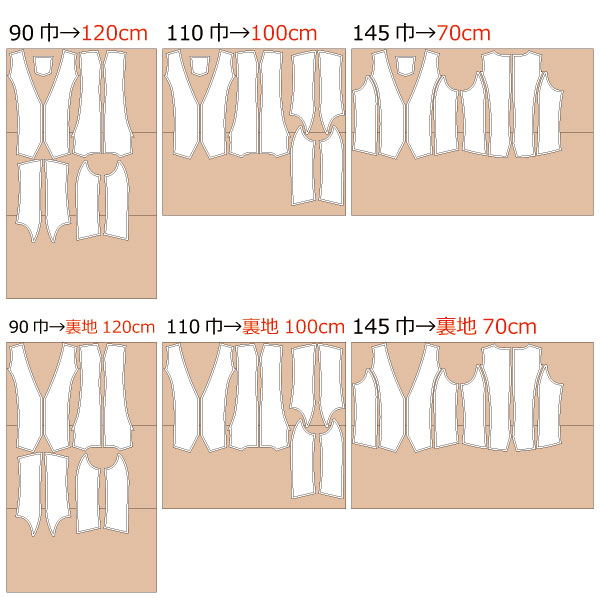
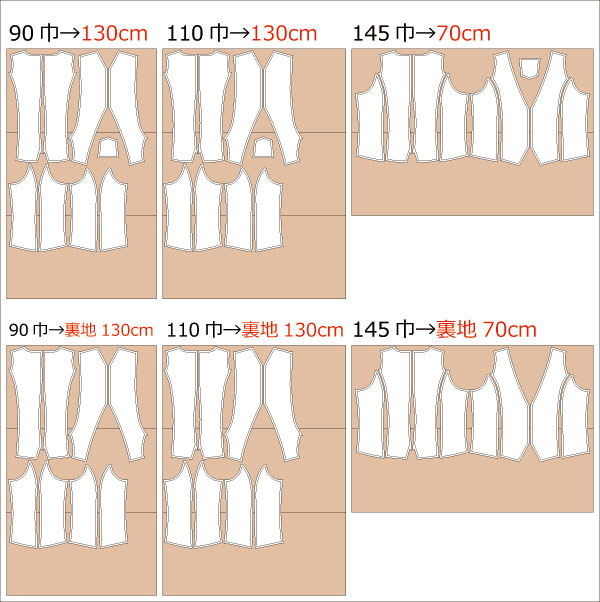
When making this pattern for everyday clothing, please separate the facing and lining into individual pattern pieces.
The sizing is designed to be slightly loose. If you prefer a slimmer fit, we recommend adjusting the pattern to take it in slightly for a more stylish look.
If you use fabric that is difficult to press with an iron, after turning the garment right side out, topstitch around the entire garment and armholes to help it settle neatly.
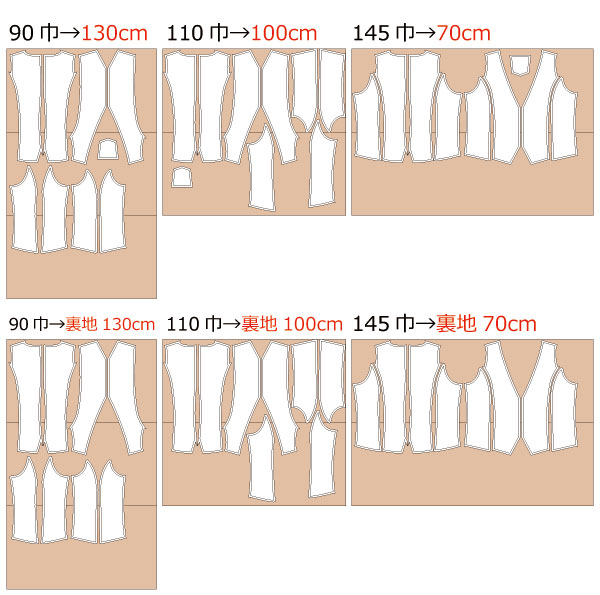
The men's size pattern differs from the women's size pattern, with a gentler chest line and less waist shaping.
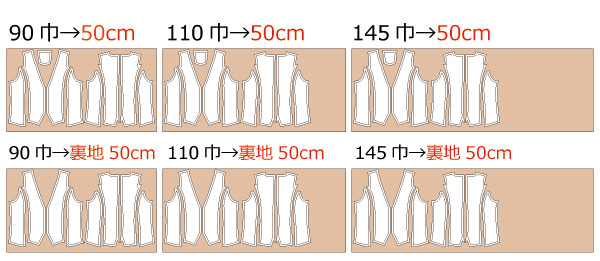
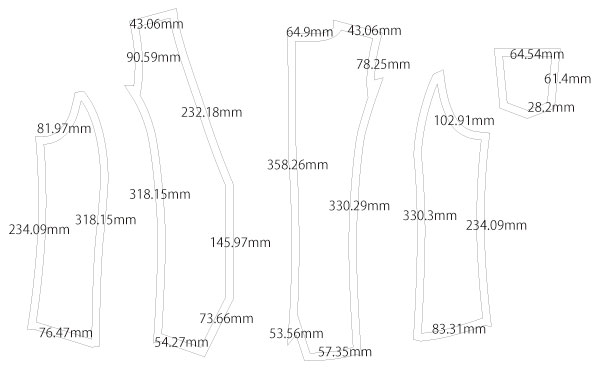
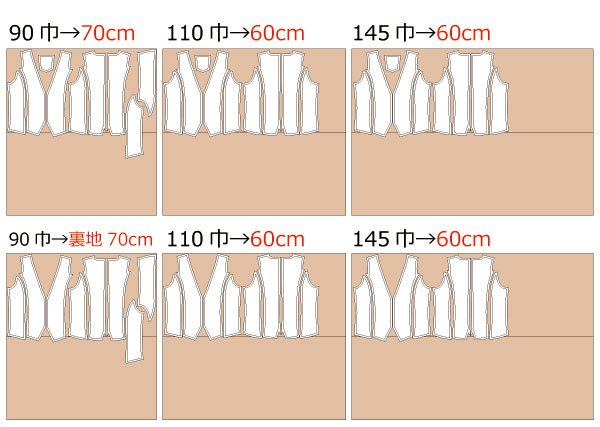
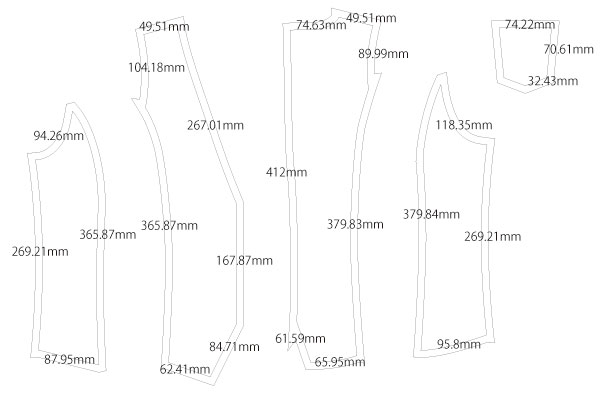
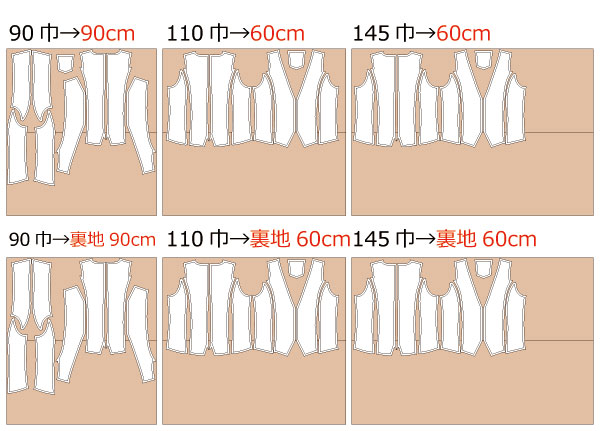
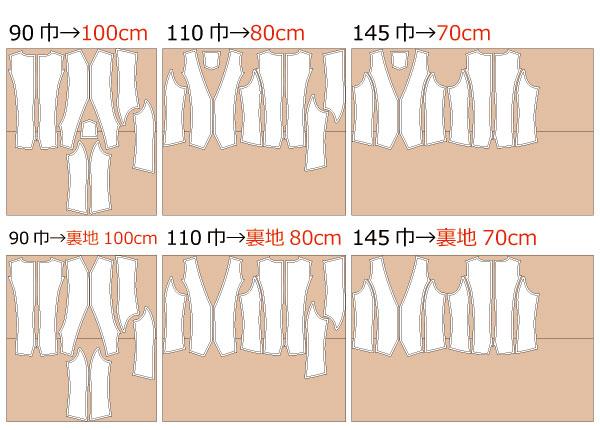
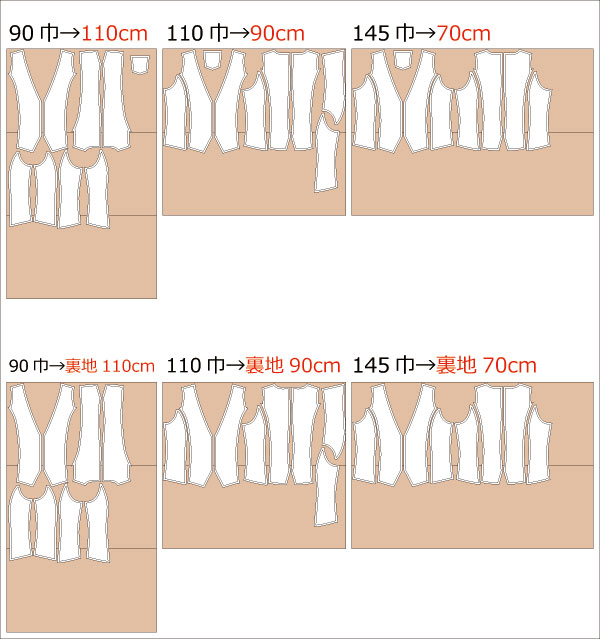
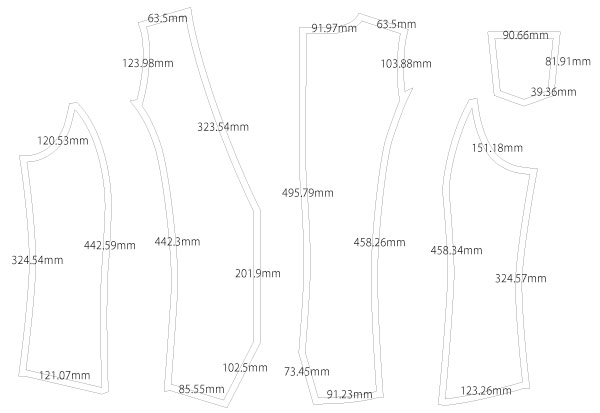
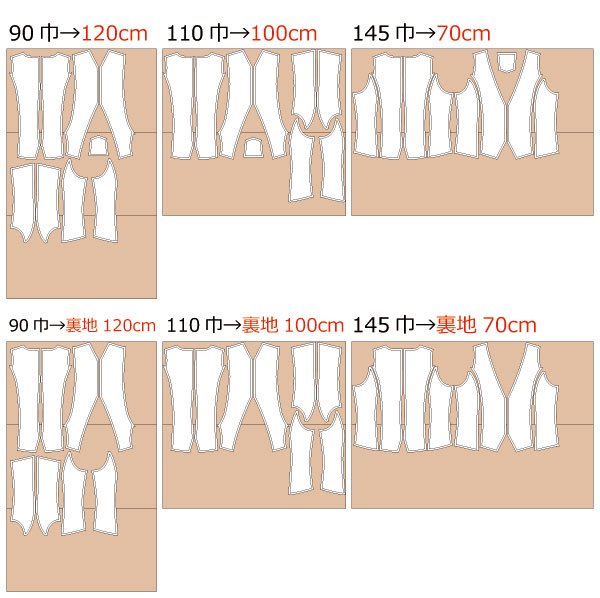
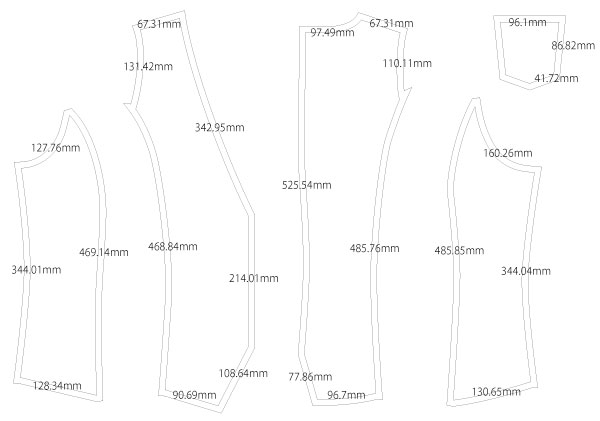
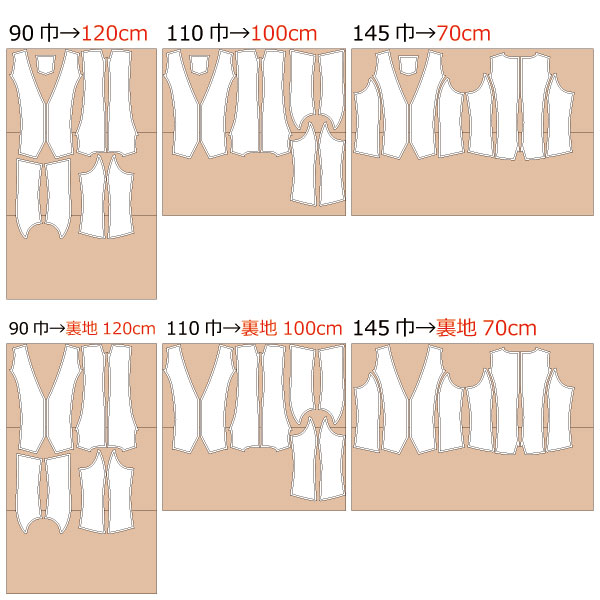
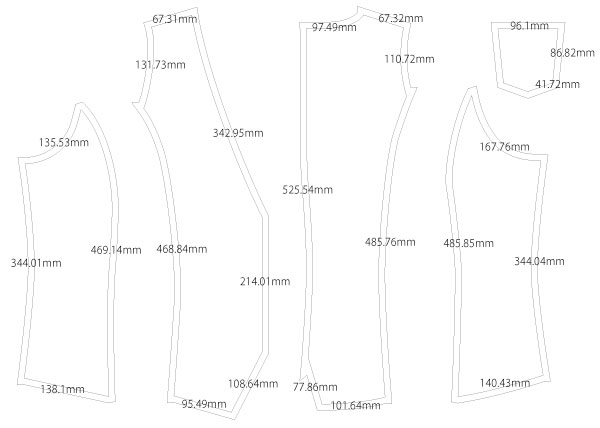
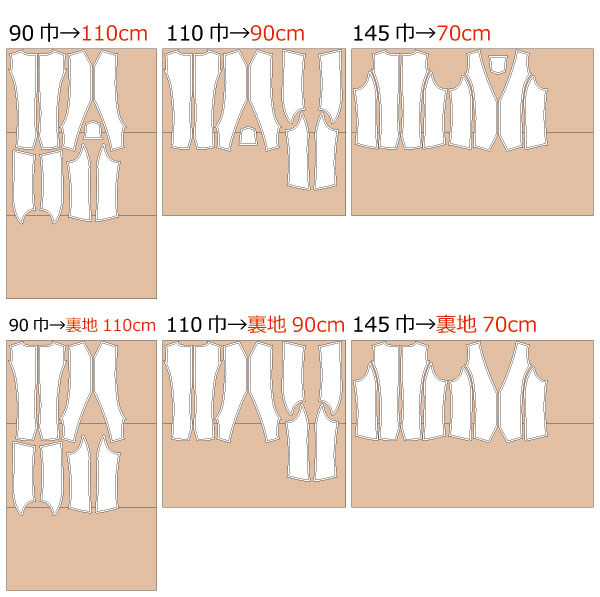
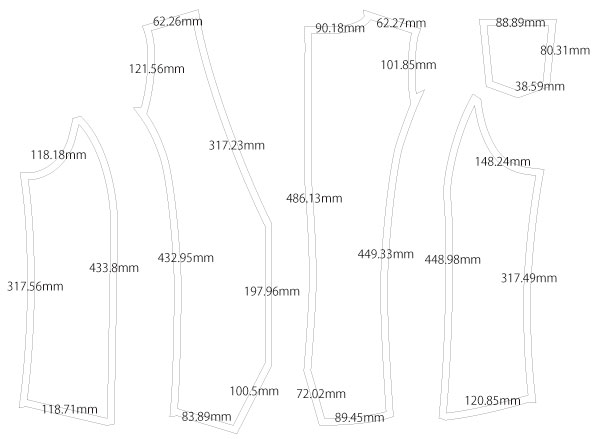
After printing, align the joining lines, tape the pieces together, and cut them out. Seam allowances are already included, so the pattern can be used as is.

(1) Sew the front piece and the front side piece together with a sewing machine, press the seam allowances open with an iron, and attach the pocket.
How to sew pockets Please refer to this page.
(2) Sew the center back, back side pieces, side seams, and shoulders together in this order using a sewing machine, then press the seam allowances open with an iron to shape the garment.
(3) Assemble the lining in the same way and press the seam allowances open with an iron.
(4) For both the outer fabric and the lining, fold the seam allowance of the armholes inward by 0.5 inch and press with an iron.
(5) Place the outer fabric and lining right sides together and sew around the entire perimeter.
*Leave an opening of about 6 inches for turning the garment right side out when sewing around the perimeter.
*Press the seam allowance of the opening inward by 0.5 inch in advance.
*Leaving the opening at the button area is recommended, as it is a straight section and easier to turn.
(6) Trim the seam allowances in tight or bulky areas, leaving about 0.1 inch, then turn the garment right side out and press with an iron.
(7) Topstitch around the entire perimeter of the garment, including the turned opening.
(8) Stitch around the armholes with a sewing machine to secure them.
(9) Make buttonholes and attach buttons at the marked button positions.
How to make buttonholes Please refer to this page.
How to sew on buttons Please refer to this page.
![]()
Free Paper Patterns are possible because of your support.
If you use our patterns, please share them on social media and tell your friends.
Your support helps DRCOS continue to provide patterns in the future.
![]()
![]()
Children's-100
bust60.5cm waist53cm 4sheets of A4 size (or legal size)

Children's-4
B23.8in W20.9in 5 sheets of letter size

Children's-120
bust69.5cm waist61cm 6sheets of A4 size (or legal size)
Children's-8
B27.4in W24in 5 sheets of letter size
Children's-140
bust78.5cm waist69cm 7sheets of A4 size (or legal size)
Children's-10
B30.9in W27.2in 6 sheets of letter size
Ladies'-S
bust87cm waist74cm 8sheets of A4 size (or legal size)
Ladies'-S
B34.3in W29.1in 8 sheets of letter size
Ladies'-M
bust94cm waist78cm 8sheets of A4 size (or legal size)
Ladies'-M
B37in W30.7in 9 sheets of letter size
Ladies'-L
bust99.5cm waist82cm 9sheets of A4 size (or legal size)
Ladies'-L
B39.2in W32.3in 9 sheets of letter size
Ladies'-LL
bust106cm waist89cm 9sheets of A4 size (or legal size)
Ladies'-LL
B41.7in W35in 9 sheets of letter size
Men's-S
bust92.5cm waist81cm 8sheets of A4 size (or legal size)
Men's-S
B36.4in W31.9in 9 sheets of letter size
Men's-M
bust99.5cm waist87.5cm 9sheets of A4 size (or legal size)
Men's-M
B39.2in W34.4in 9sheets of letter size
Men's-L
bust108.5cm waist95cm 9sheets of A4 size (or legal size)
Men's-L
B42.7in W37.4in 10 sheets of letter size
Men's-LL
bust115cm waist101.5cm 9sheets of A4 size (or legal size)
Men's-LL
B45.3in W40in 10 sheets of letter size


