


![]()
Comments are made using translation software.
This is a pattern for a vest with swallowtails, as requested.
It includes lining, with dummy pockets for the chest pockets, and both side pockets are welt pockets for added simplicity.
The swallowtail section is elongated with cosplay purposes in mind, so when making it, please adjust the length if it seems too long when pinned to your body in the paper form.
While the tailor collar section might pose a bit of a challenge, the rest of the construction process is relatively simple, mostly involving sewing and turning inside out, so the difficulty isn't as high as it may appear.
This pattern is also suitable as a base for modifications such as changing the pockets to welt pockets or altering the design significantly.
To ensure a clean body line, the pattern has been redrafted with three-dimensional shaping, resulting in a visibly clean line when worn.
After printing, paste it according to the pasting line,Cut and use.
The pattern has a seam allowance, so it can be used as is.

I'm not so good at English.
So all explanations/instructions were translated using AI.
This is not always perfect and I apologise for any parts that are difficult to follow.
(1) Apply all fusible interlinings.
* Cut the "front facing" lapel section and attach it to the "Front bodice" lapel section.
(2) Stitch together the "Front bodice," "Front bodice side," side of the "Back bodice," and the side of the "Back bodice" with the Back bodice center line. Then, stitch the shoulders together and press seam allowances open with an iron.
* Make cuts or shape as necessary to smooth out any puckered areas.
(3) Stitch the "front facing" to the "Front bodice lining" and press seam allowances open with an iron.
(4) Similarly to step (2), stitch the side and shoulder of the "lining" to shape the lining.
(5) Sew the "dummy pocket" at the dummy pocket position and the "pocket" at the pocket position.
(6) Align the "Collar" to the collar stop position and sew it onto the right side and lining.
* Attach the "Collar" with fusible interlining to the right side and without to the lining.
(7) Fold the armhole section of the right side and lining inward by 1cm (or 0.5in) and press with an iron to shape.
(8) Stitch around from the notch mark on the part to be turned over to the collar stop position.
* Before turning over, make notches in areas where the fabric hangs over the seam allowance.
(9) Once the shape is properly pressed with an iron, secure the edges with topstitching.
(10) Fold the "Collar" back and lightly press the lapel section with an iron to shape.
(11) Align the armhole sections and secure with topstitching.
If you cannot see the SHOP due to 403 error
![]()
![]()
Children's 140 size
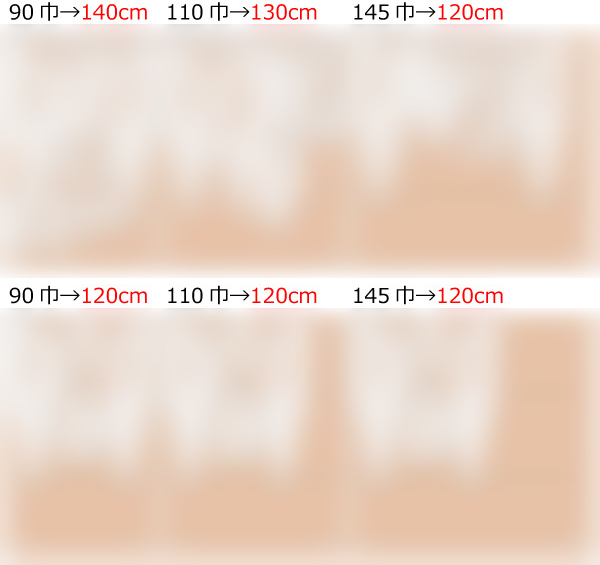
bust77cm waist61cm length106cm A4 paper size 16 sheets

Children's 10 size
bust30.3in waist24in length41.7in letter paper size 16 sheets

Ladies' S size
bust87cm waist66.5cm length114cm A4 paper size 18 sheets
Ladies' S size
bust34.3in waist26.2in length44.9in letter paper size 19 sheets
Ladies' M size
bust94cm waist77.5cm length117cm A4 paper size 19 sheets
Ladies' M size
bust37in waist30.5in length46.1in letter paper size 21 sheets
Ladies' L size
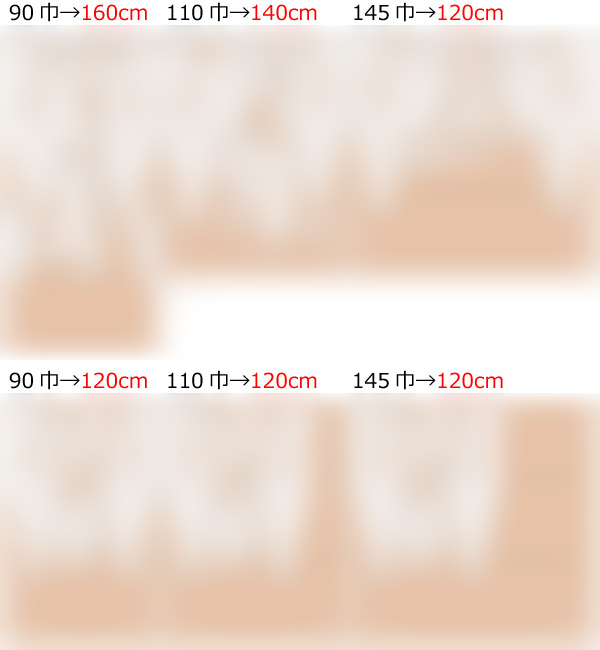
bust102cm waist84.5cm length118.5cm A4 paper size 20 sheets

Ladies' L size
bust40.2in waist33.3in length46.7in letter paper size 23 sheets
Ladies' LL size
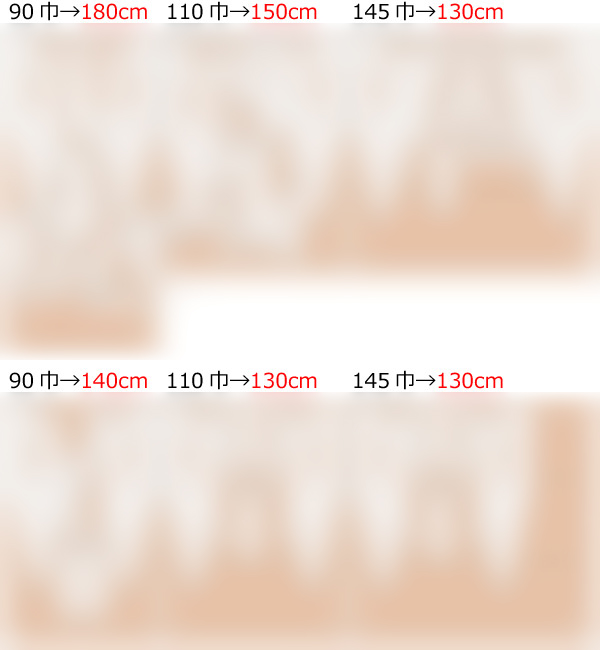
bust108cm waist90cm length122cm A4 paper size 23 sheets
Ladies' LL size
bust42.5in waist35.4in length48in letter paper size 23 sheets
Men's L size
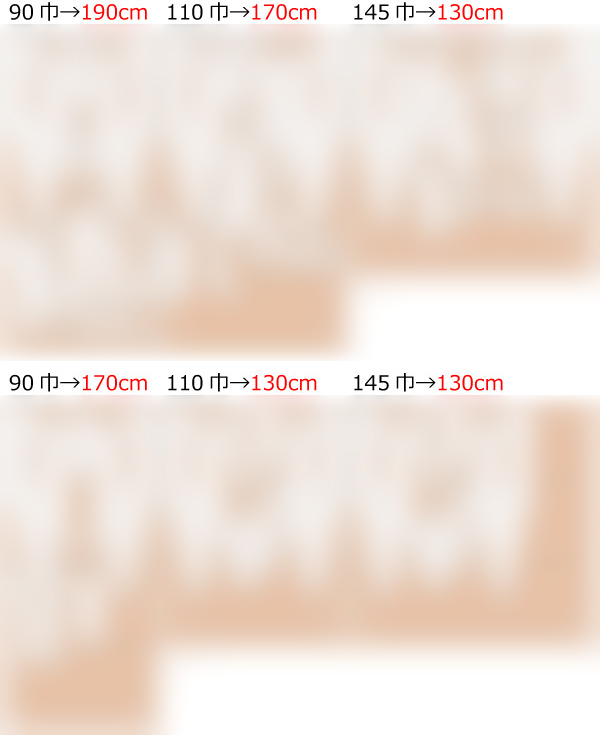
bust112cm waist91cm length143cm A4 paper size 27 sheets
Men's L size
bust44.1in waist35.8in length56.3in letter paper size 28 sheets
Men's LL size
bust117cm waist100cm length153cm A4 paper size 29 sheets
Men's LL size
bust46.1in waist39.4in length60.2in letter paper size 32 sheets


