


![]()
This is a sewing pattern and tutorial for a tunic-length hoodie finished with ribbing at the cuffs and hem.
The main body is made with knit fabric, and the cuffs and hem are decorated with rib knit, giving the hoodie a slightly relaxed and rounded silhouette.
The design has a cute and feminine look, making it suitable for everyday wear or comfortable loungewear.
Because this hoodie uses an open-end zipper and ribbing at the hem, the construction would normally require many steps. However, this pattern includes a simplified method that finishes the hem by sandwiching the rib between the layers, making the process much easier.
If you already understand how facings, rib knit, and open-end zippers work together, you may sew it using the standard method. If not, please use the simplified sandwich method for an easier finish.
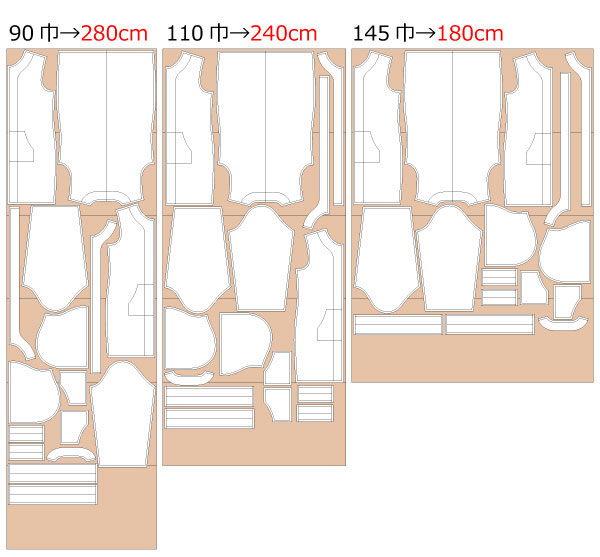
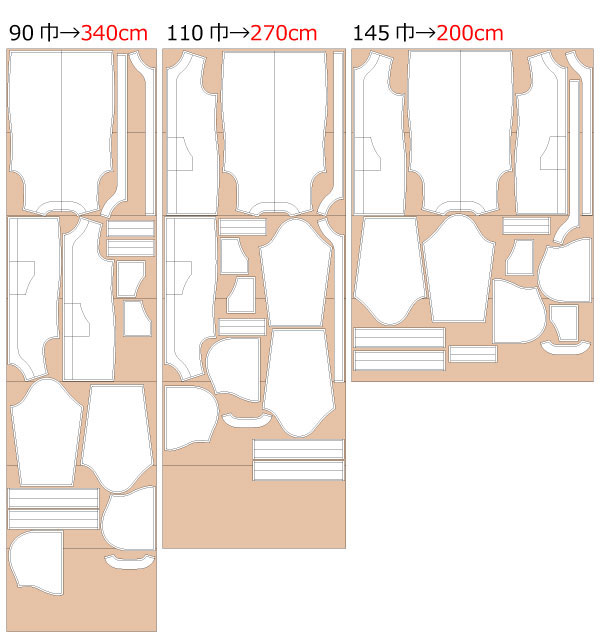
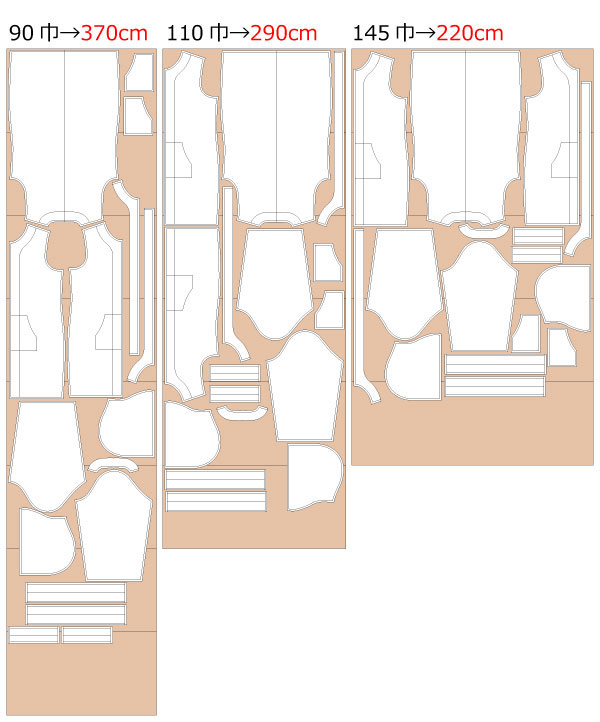
Since this is a tunic-length hoodie, you will need a longer open-end zipper. Please check the pattern pieces before purchasing your zipper to confirm the required length. For Women’s M size, an 80 cm zipper is used after trimming it slightly.
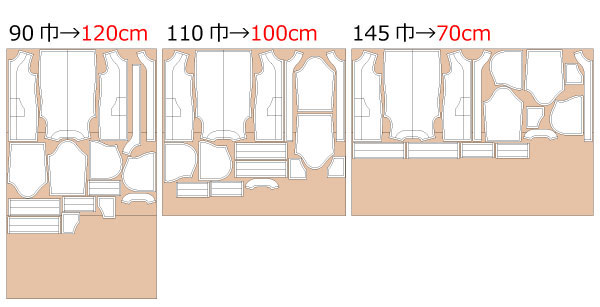
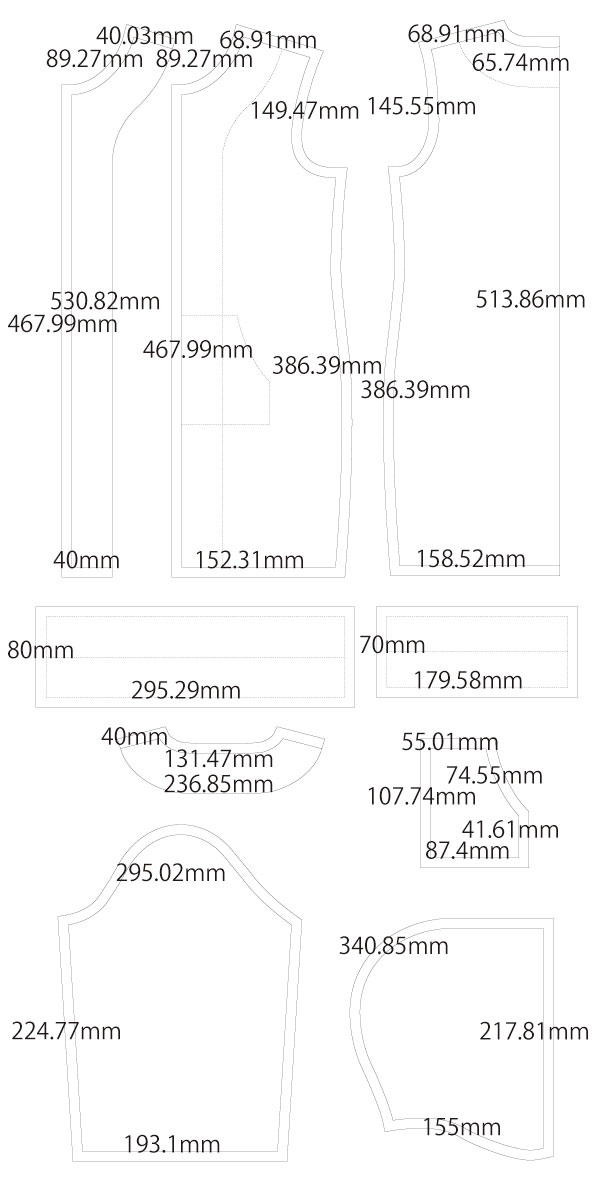
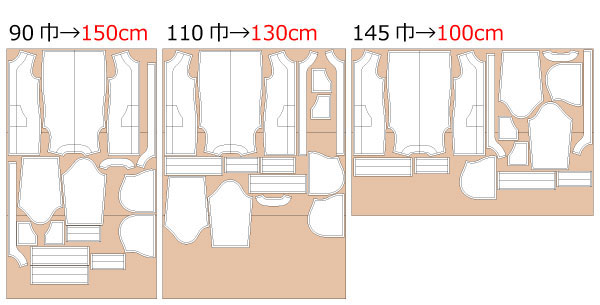
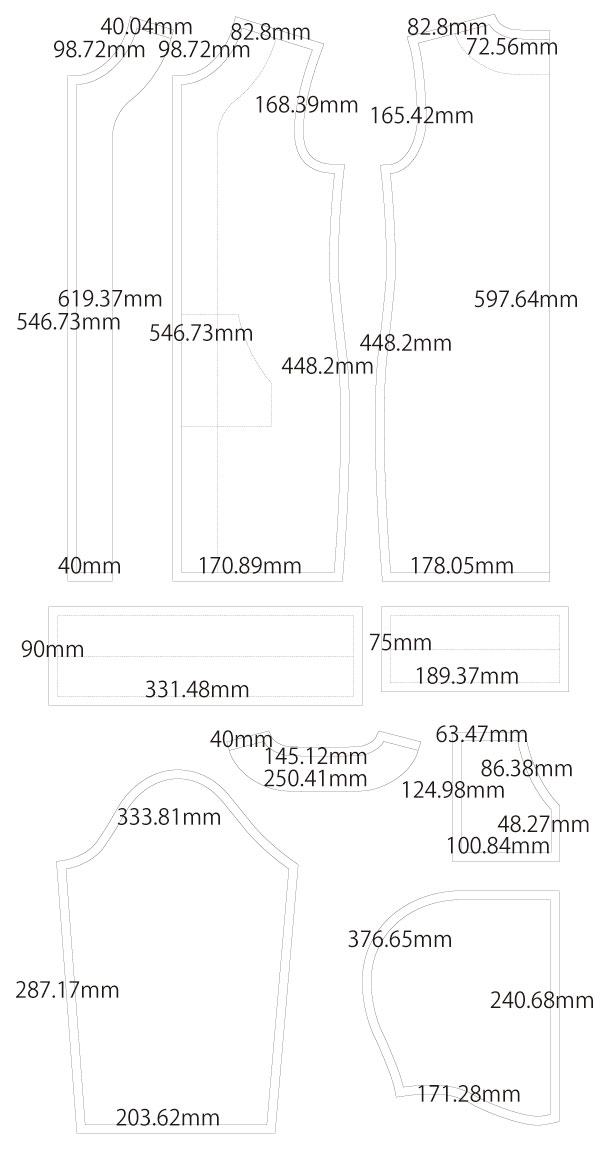
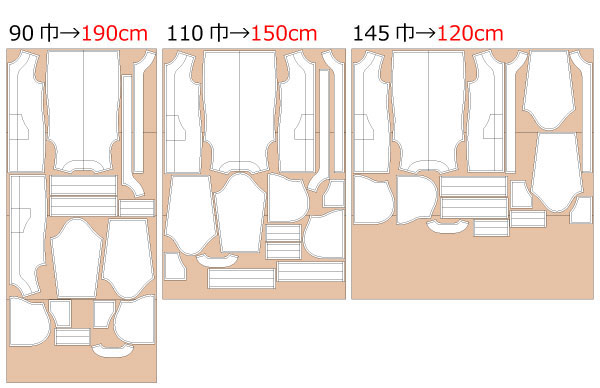
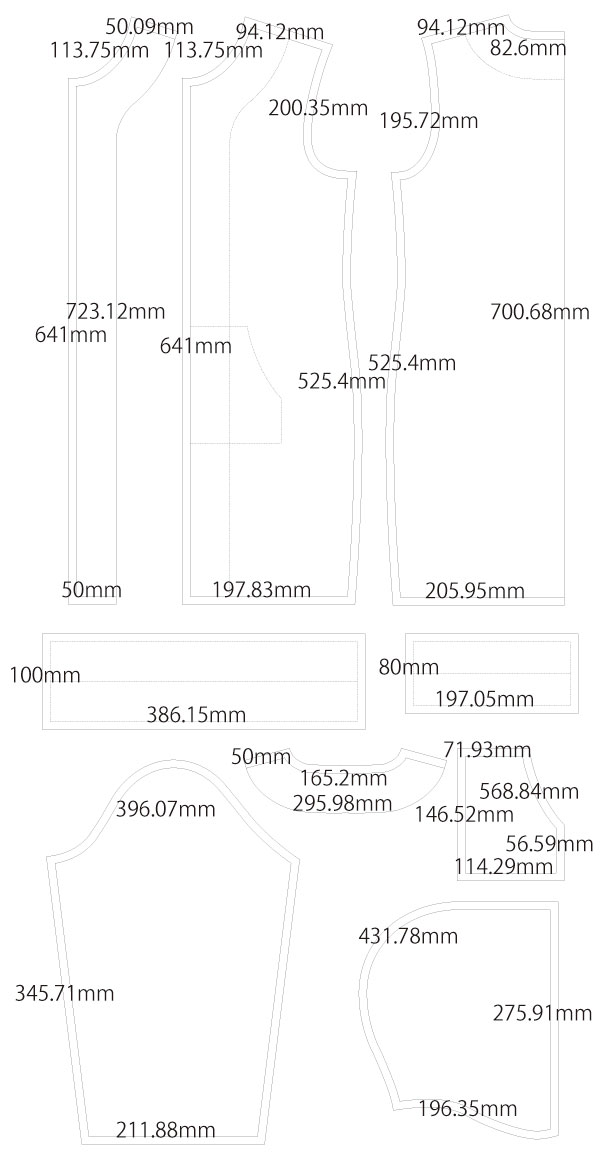
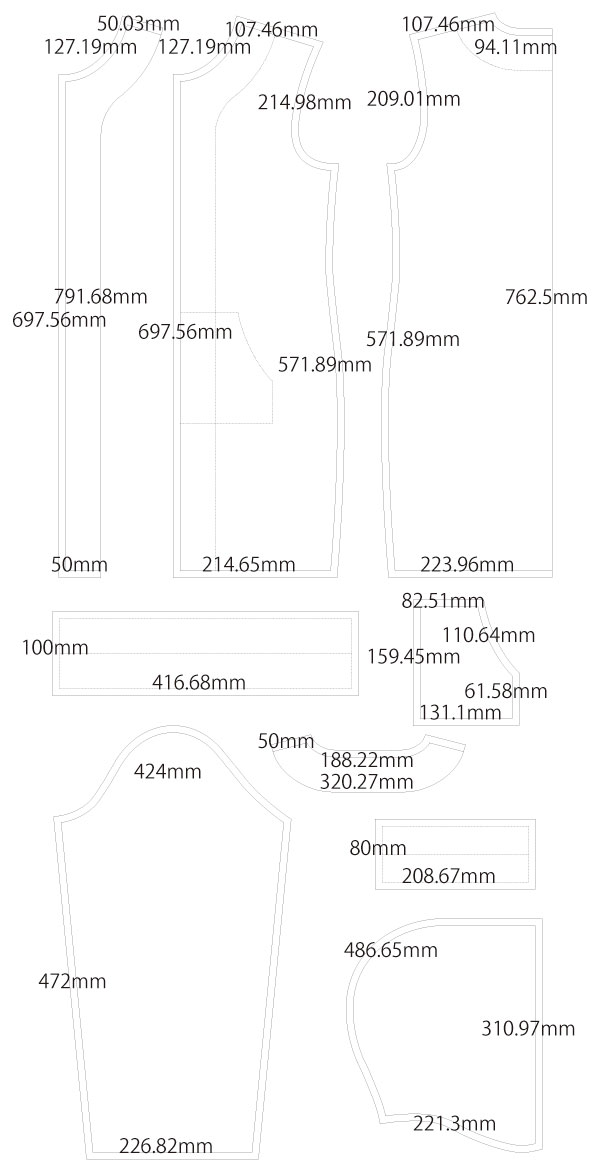
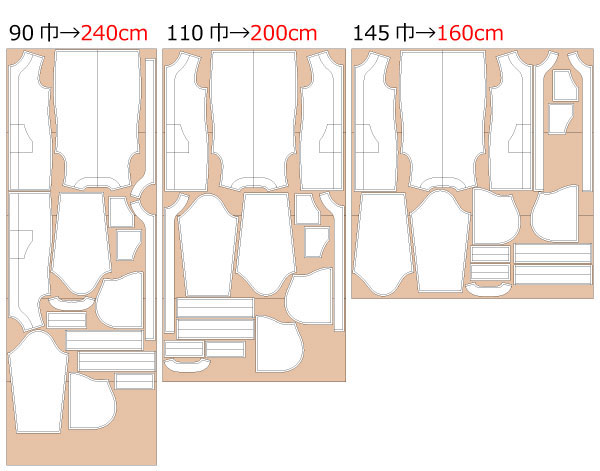
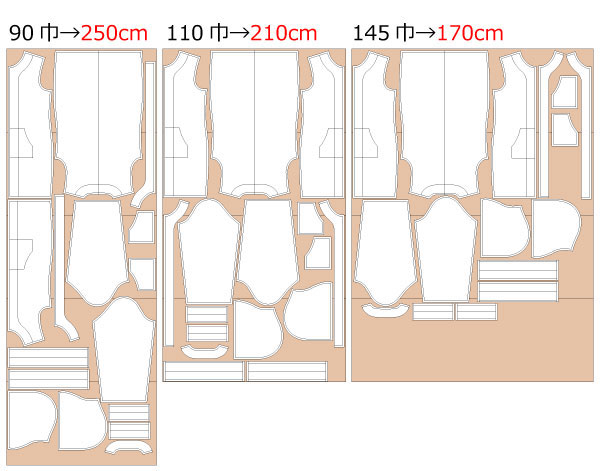
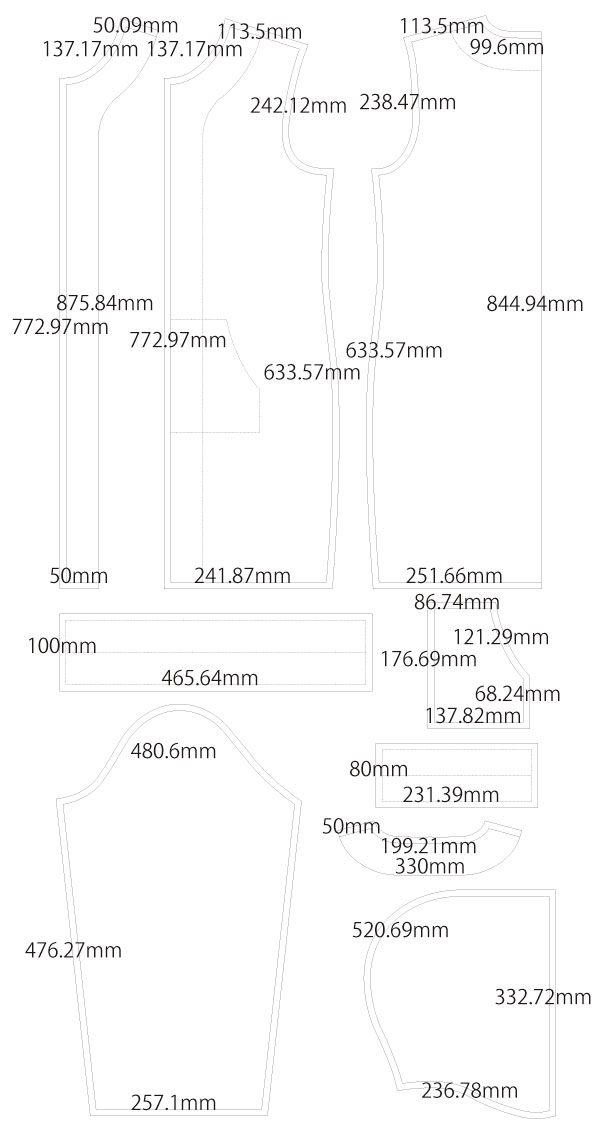
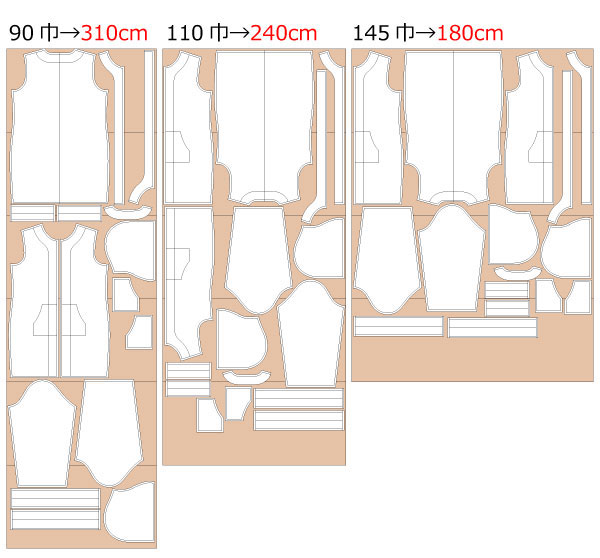
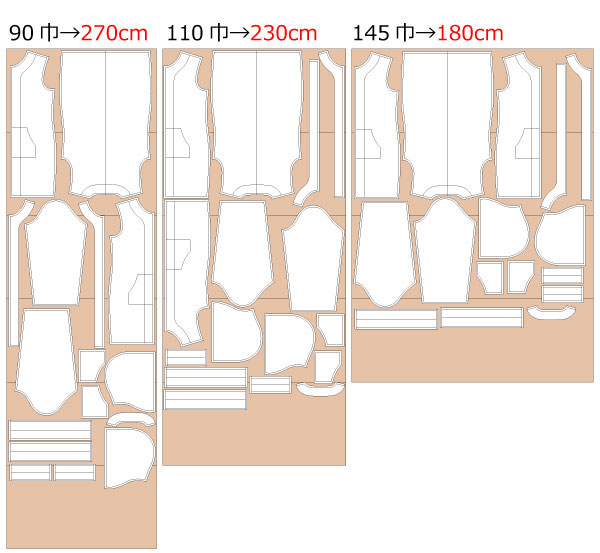
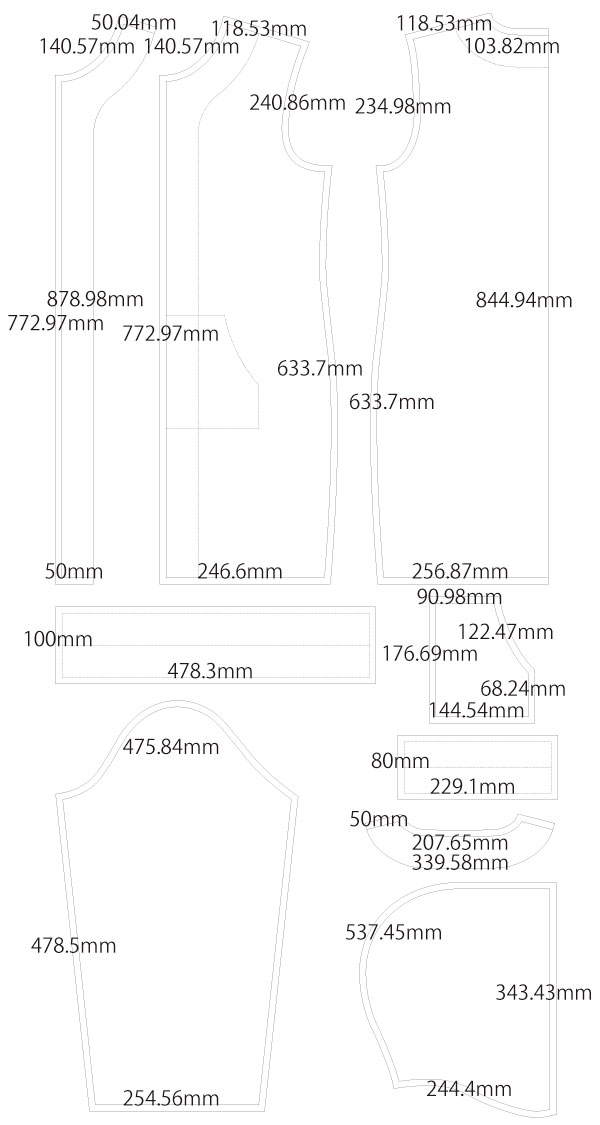
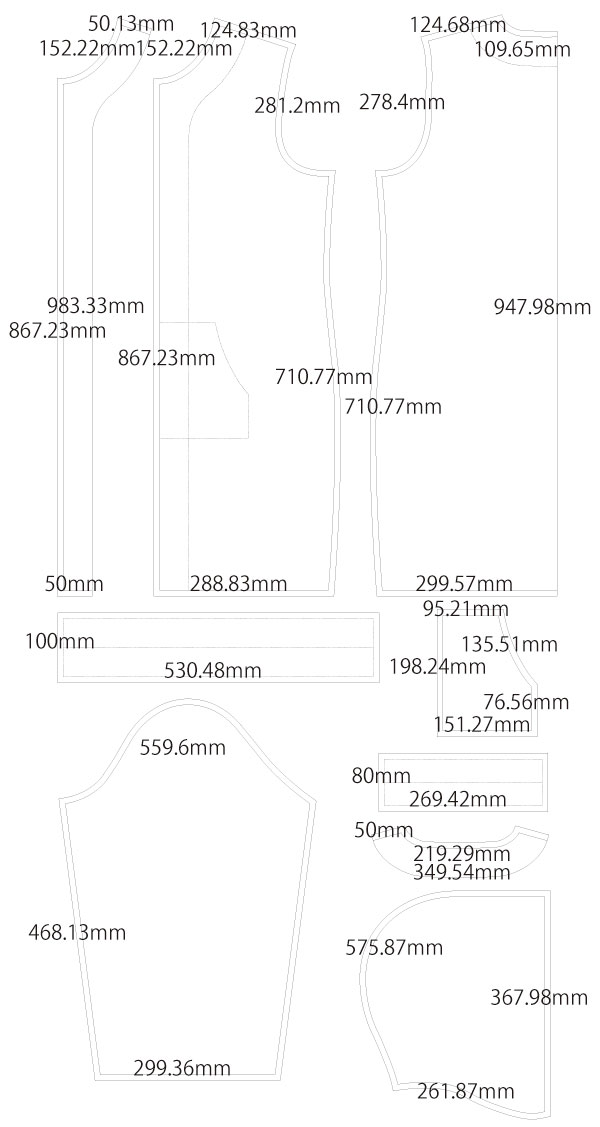
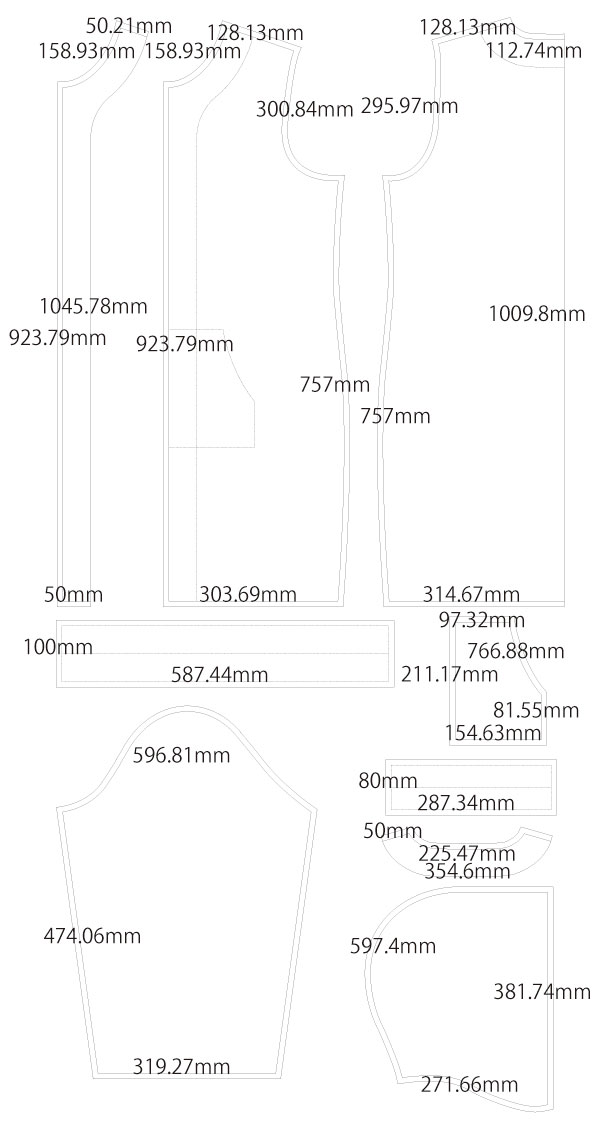
After printing, please align and tape the joining lines, then cut out the pattern. Seam allowances are already included, so you can use the pieces as they are.


What are “Grainline” and “Cut on Fold”? Please refer to this page.
(1) Serge/overlock around the pocket, fold the pocket opening by about 0.4 inch (1 cm), and sew it with a sewing machine.
How to Serge/Overlock (regular sewing machine & overlock machine) Please refer to this page.
How to Sew Pockets Please refer to this page.
(2) Fold and press the pocket (except the part that will be tucked inside the Facing), shape it with an iron, and sew it to the pocket placement on the body.
(3) Sew the shoulders and sides of the front and back bodies together, then serge/overlock the seams.
(4) Sew the hood pieces together, serge/overlock the edges, and press the seam allowances to one side.
(5) Serge/overlock the front edge of the hood, fold it by about 0.4 inch (1 cm), and sew with a sewing machine.
(6) Apply interfacing to the Facing, sew the Facing pieces together, press seam allowances open, and serge/overlock the outer edge.
(7) Join the two hem ribs, press seam allowances open, and press along fold lines (1) to (3) in order to shape the rib.
*When folding along crease line (3), shift the front layer forward by about 1 mm to prevent the back layer from slipping when sewing.
*For details about shifting and folding, refer to: How to Sew Sleeves and Sleeve Cuffs
(8) Sandwich the hood and open zipper between the Facing and the body, and sew them together.
*At this step, be sure to leave about 1.6 inches (4 cm) of the zipper extending downward past the ribbing.
(9) Attach the hem rib while sandwiching the body hem and the zipper tape inside the rib.
(10) Sew the sleeve sides together, serge/overlock the seam allowances, and press them open.
How to Sew Sleeves and Sleeve Cuffs Please refer to this page.
(11) Sew the rib cuffs into a loop.
(12) Attach the rib cuffs to the sleeves while stretching to match, then serge/overlock the seam allowance.
(13) Sew the sleeves to the body using a sewing machine, and serge/overlock the armholes.
*This is a simplified method for installing an open-end zipper with a ribbed hem, different from the original method.
*If you are familiar with installing open-end zippers with ribbed hems, please use the conventional sewing method.
![]()
Free Paper Patterns are possible because of your support.
If you use our patterns, please share them on social media and tell your friends.
Your support helps DRCOS continue to provide patterns in the future.
![]()
![]()
Children's-100
shoulder width26cm bust62cm length55.5cm 9sheets of A4 size (or legal size)

Children's-4
bust24.4in length21.9in 10sheets of letter size

Children's-120
shoulder width30cm bust70cm length64cm 12sheets of A4 size (or legal size)
Children's-8
bust27.6in length25.2in 12sheets of letter size
Children's-140
shoulder width34cm bust81cm length75cm 16sheets of A4 size (or legal size)
Children's-10
bust31.9in length29.5in 16sheets of letter size
Ladies'-S
shoulder width39cm bust88cm length81cm 19sheets of A4 size(or legal size)

Ladies'-S
bust34.6in length31.9in 20sheets of letter size
Ladies'-M
shoulder width40cm bust96cm length85cm 21sheets of A4 size(or legal size)

Ladies'-M
bust37.8in length33.5in 21sheets of letter size
Ladies'-L
shoulder width41cm bust103cm length89.5cm 22sheets of A4 size(or legal size)
Ladies'-L
bust40.6in length35.2in 22sheets of letter size
Ladies'-LL
shoulder width42cm bust110cm length93.5cm 23sheets of A4 size(or legal size)

Ladies'-LL
bust43.3in length36.8in 25sheets of letter size
Men's-S
shoulder width43cm bust101cm length89.5cm 22sheets of A4 size (or legal size)
Men's-S
bust39.8in length35.2in 23sheets of letter size
Men's-M
shoulder width44cm bust109cm length93.5cm 23sheets of A4 size(or legal size)

Men's-M
bust42.9in length36.8in 24sheets of letter size
Men's-L
shoulder width45cm bust118cm length99.5cm 25sheets of A4 size(or legal size)
Men's-L
bust46.5in length39.2in 27sheets of letter size
Men's-LL
shoulder width46cm bust124cm length106cm 28sheets of A4 size(or legal size)
Men's-LL
bust48.8in length41.7in 29sheets of letter size


