


![]()
Comments are made using translation software.
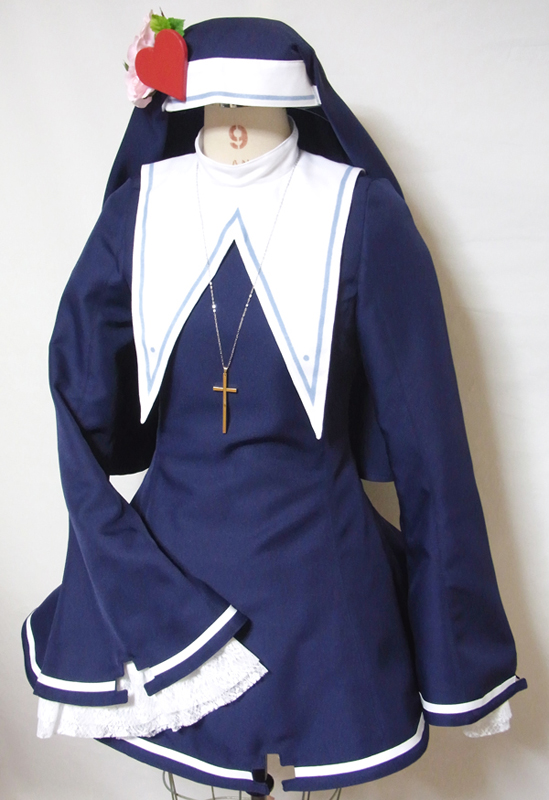
The skirt has a 270-degree flare, so it looks beautiful as it is, but wearing a panier underneath will also make it beautifully spread out, so I highly recommend it.
I believe this base pattern is ideal for princess-line dresses.
The neckline is rounded, making it a simple construction with facings.
The sleeves are designed as bell sleeves.
It looks incredibly cute when worn with a panier underneath.
After printing, paste it according to the pasting line,Cut and use.
The pattern has a seam allowance, so it can be used as is.


I'm not so good at English.
So all explanations/instructions were translated using AI.
This is not always perfect and I apologise for any parts that are difficult to follow.
* If the seam allowance (S/A) is difficult to shape with an iron, secure it with topstitching.
(1) Apply fusible interlining to the "facing" with an iron.
(2) Connect the "facing", press open the seam allowance (S/A) with an iron, and serge/overlock the outer part.
![]() How to Serge/overlock (sewing machine & overlock sewing machine)
How to Serge/overlock (sewing machine & overlock sewing machine)
(3) Serge/overlock all sides, shoulders, and both sides of the "Sleeve" on the "Body".
(4) Stitch the back center line of the "Back bodice" up to the sewing stop position, then press open the seam allowance (S/A) with an iron.
(5) Apply stay tape at the zipper position and sew on the zipper.
(6) Stitch all sides and shoulders of the "Body", then press the seam allowances open with an iron.
(7) Serge/overlock the hem of the "Body", then fold it up 1cm (0.5in) with an iron and sew on a sewing machine.
* Using iron-on adhesive tape like Dyna Tape for the hem also yields a clean finish.
(8) Stitch the sides of the "Sleeve", divide the seam allowance (S/A) with an iron, serge/overlock the "Sleeve" hem, then fold it up 1cm (0.5in) with an iron and sew on a sewing machine.
(9) Attach the "Sleeve" to the "Body" and serge/overlock the armhole.
(10) Attach the "facing" to the "Body", make notches in the seam allowance (S/A), then turn it inside out, and shape with an iron.
If you cannot see the SHOP due to 403 error
Price: ¥600 (JPY)
Approx. USD — / EUR — (for reference)
![]()
![]()
Children's 140 size
shoulder width 32.5cm bust 73cm waist 61.5cm length 65.5cm A4 paper size 14 sheets
Sleeve parts 43 size


Children's 10 size
shoulder width 12.8in bust 28.7in waist 24.2in length 25.8in letter paper size 15 sheets
Sleeve parts 43 size

Ladies' S size
shoulder width 37.5cm bust 80.5cm waist 68cm length 71cm A4 paper size 18 sheets
Sleeve parts 45 size
Ladies' S size
shoulder width 14.8in bust 31.7in waist 26.8in length 28in letter paper size 18 sheets
Sleeve parts 45 size
Ladies' M size
shoulder width 38.5cm bust 85cm waist 71.5cm length 75cm A4 paper size 20 sheets
Sleeve parts 47 size
Ladies' M size
shoulder width 15.2in bust 33.5in waist 28.1in length 29.5in letter paper size 20 sheets
Sleeve parts 47 size
Ladies' L size
shoulder width 39cm bust 96cm waist 81.5cm length 78.5cm A4 paper size 23 sheets
Sleeve parts 52 size
Ladies' L size
shoulder width 15.4in bust 37.8in waist 32.1in length 30.9in letter paper size 24 sheets
Sleeve parts 52 size
Ladies' LL size
shoulder width 40cm bust 105.5cm waist 91cm length 82.5cm A4 paper size 23 sheets
Sleeve parts 56 size

Ladies' LL size
shoulder width 15.7in bust 41.5in waist 35.8in length 32.5in letter paper size 26 sheets
Sleeve parts 56 size
Men's L size
shoulder width 43cm bust 109.5cm waist 94cm length 88.5cm A4 paper size 25 sheets
Expanded sleeve parts 56 sizes to 107.7%

Men's L size
shoulder width 16.9in bust 43.1in waist 37in length 34.8in letter paper size 26 sheets
Expanded sleeve parts 56 sizes to 107.7%
Men's LL size
shoulder width 44cm bust 114.5cm waist 98cm length 94cm A4 paper size 27 sheets
Expanded sleeve parts 56 sizes to 113.2%

Men's LL size
shoulder width 17.3in bust 45.1in waist 38.6in length 37in letter paper size 29 sheets
Expanded sleeve parts 56 sizes to 113.2%


