How to sew Welt pocket
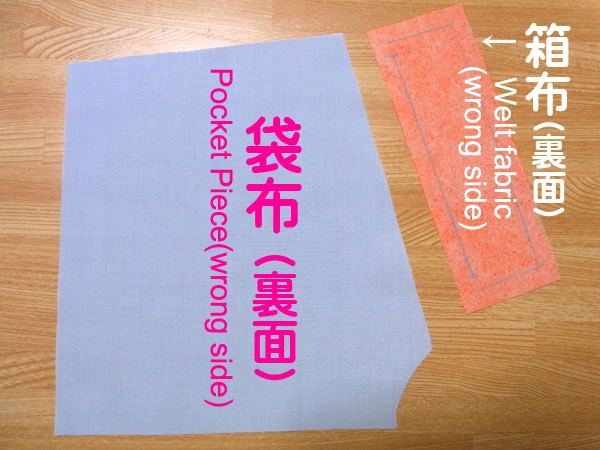
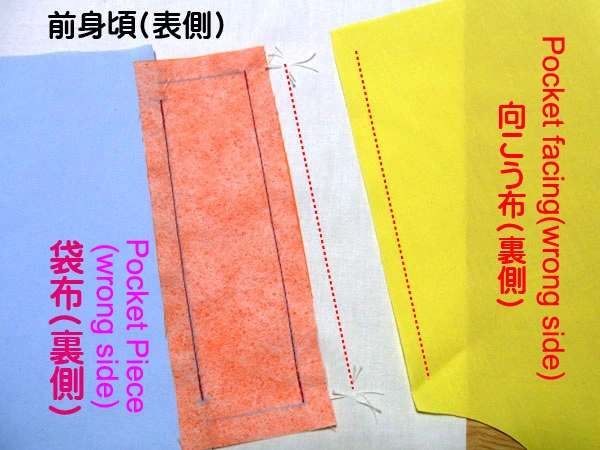
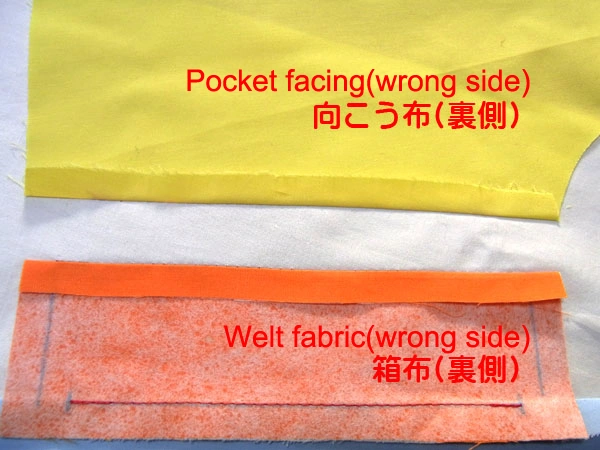
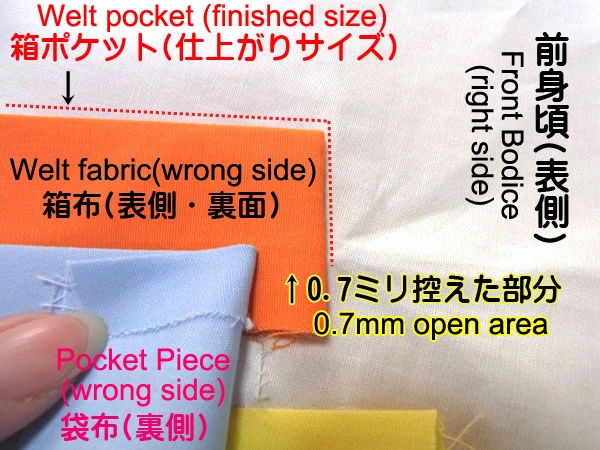
First, sew together the Welt Fabric and Pocket Piece that will be the pocket opening. Attach fusible interlining to the welt fabric.
Draw a 1 cm seam allowance line on the reverse side of the Welt fabric as shown in the image.

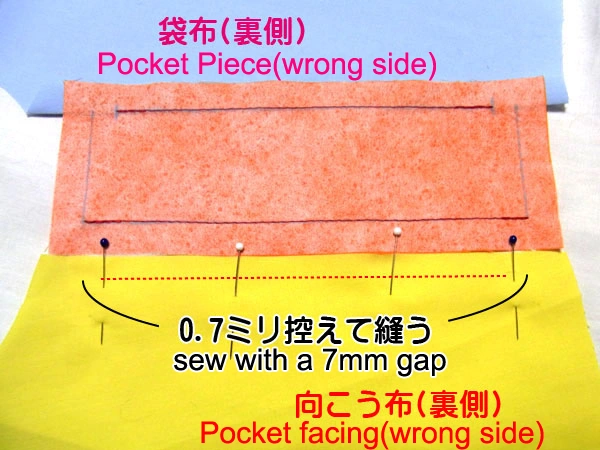
Sew the Pocket Piece and Welt fabric together. At this time, sew with a 0.7 cm gap as shown in the image.
It is easier to understand if you use a Heat Erase Pen to draw a line with a 0.7 cm gap from the beginning.
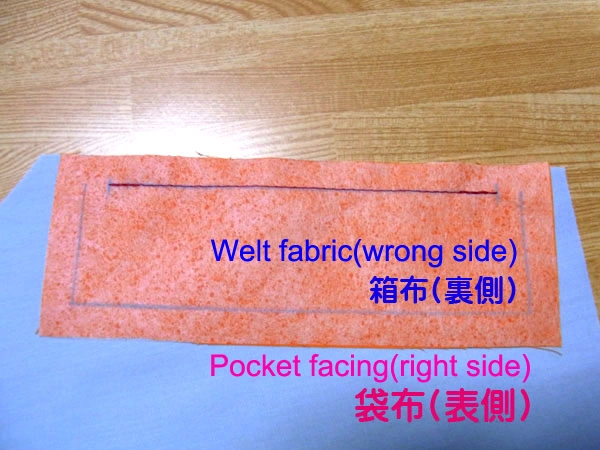
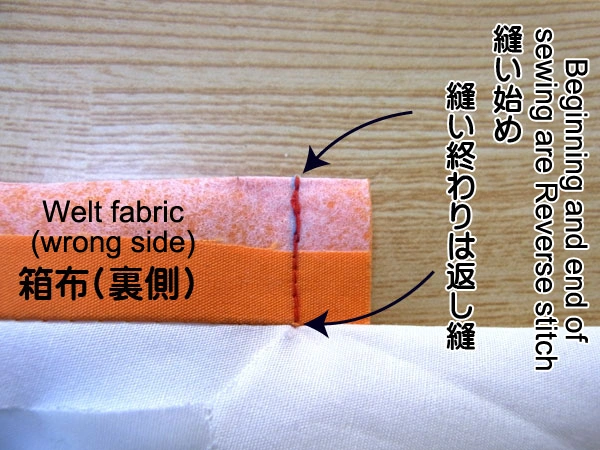
Sew with a 7mm gap. Reverse stitches should be made at the beginning and end of sewing.
After the Pocket Piece and Welt fabric are sewn together, iron the seam allowance to the Pocket Piece side.
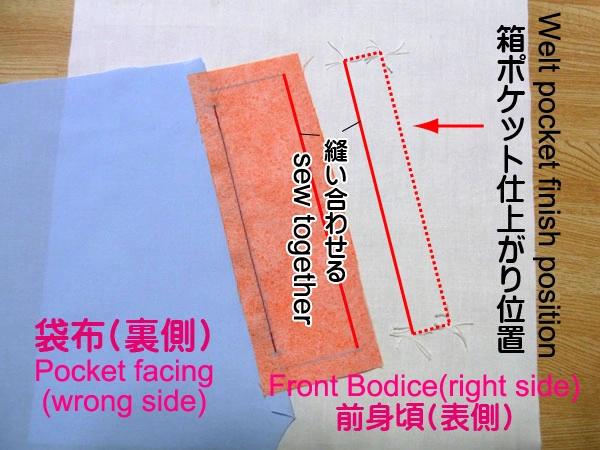
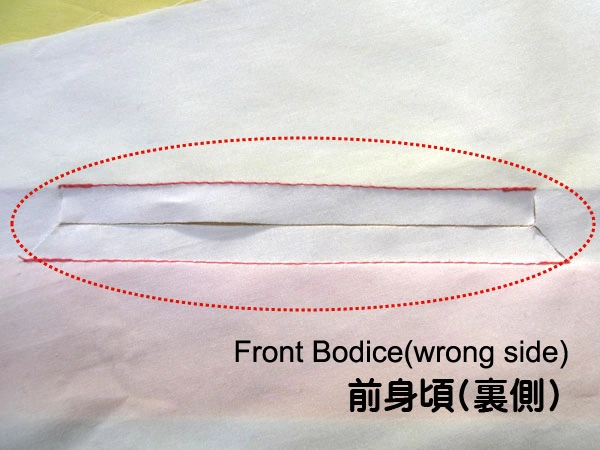
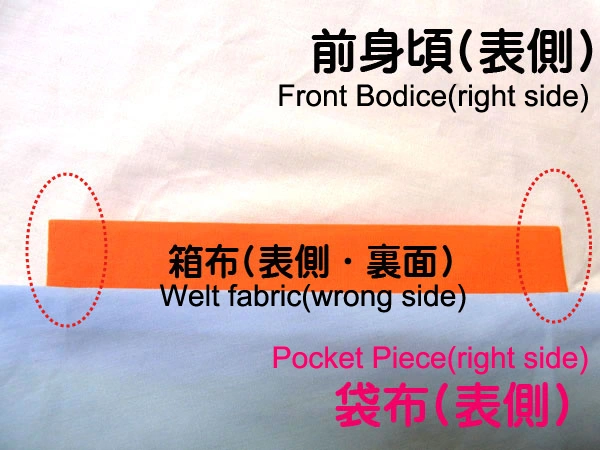
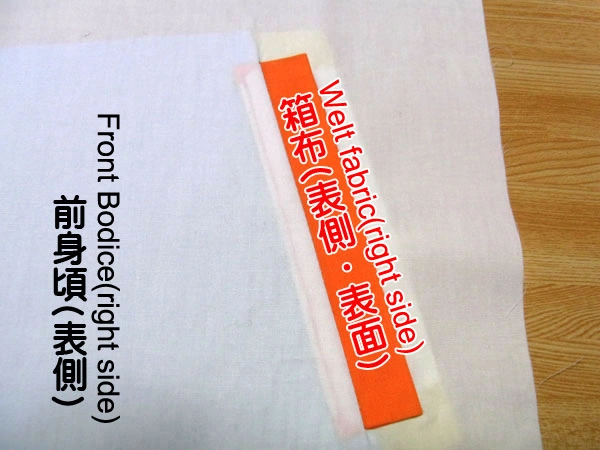
Next, sew the welt fabric to the "front bodice".
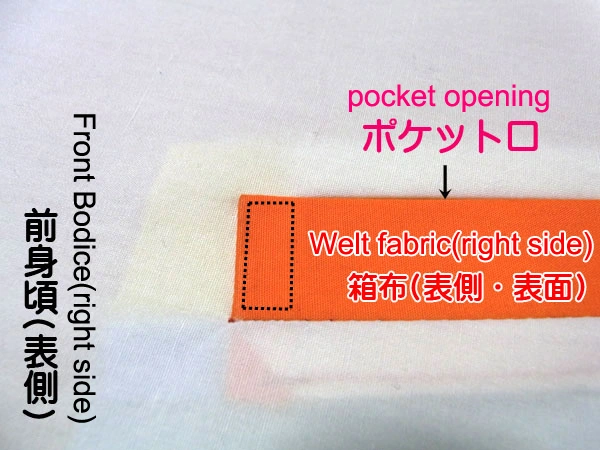
The area circled by the square is the finished position of the welt pocket.
Stitch together the solid red lines.
It may be a little difficult to align the markings, but make sure to align the markings tightly and fasten them with marking pins to prevent misalignment.
Welt fabric is sewn onto the "front bodice". The reverse stitches at the beginning and end of sewing are also tight in this part.
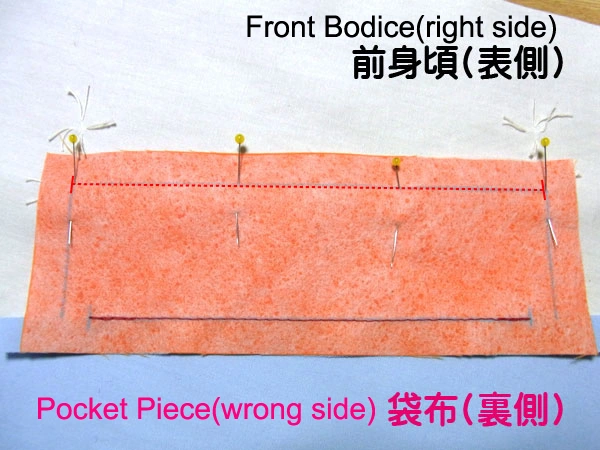
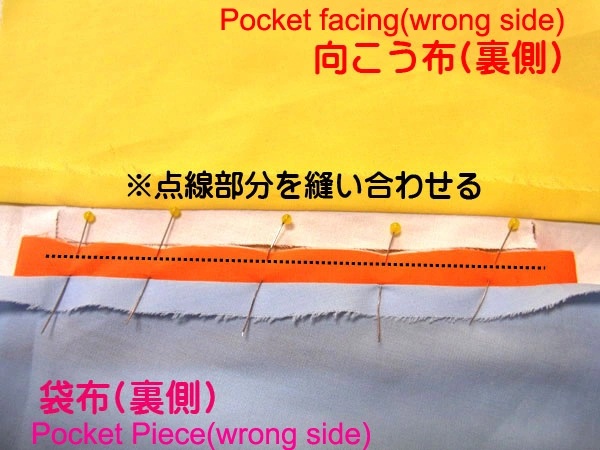
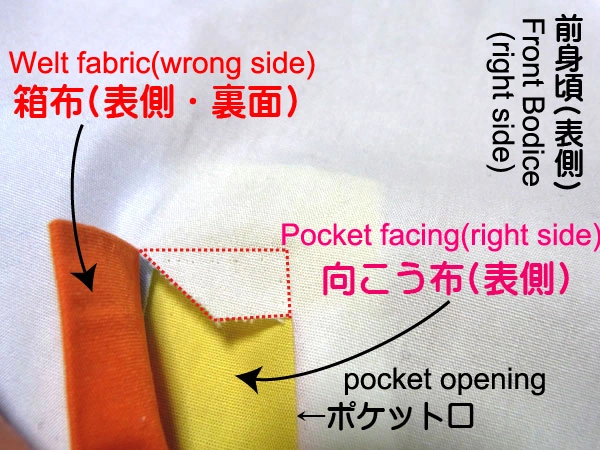
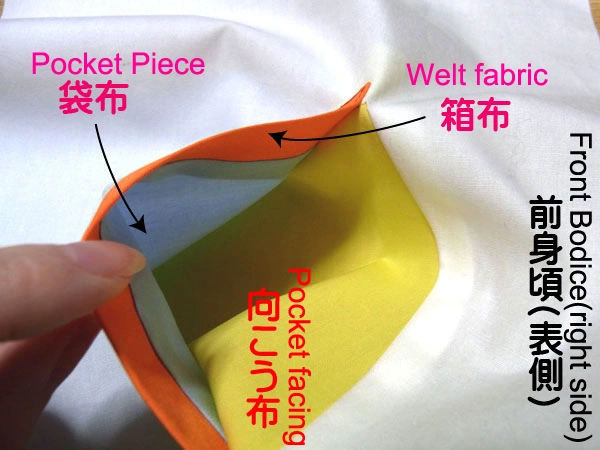
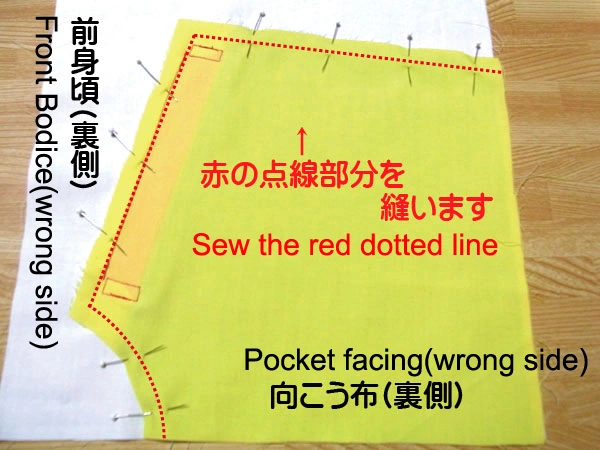
Next, sew the pocket facing to the "front bodice". "Pocket facing" is the fabric that can be seen on the other side when the pocket opening is unfolded.
Align the red dotted line in the image and fasten with a marking pin.
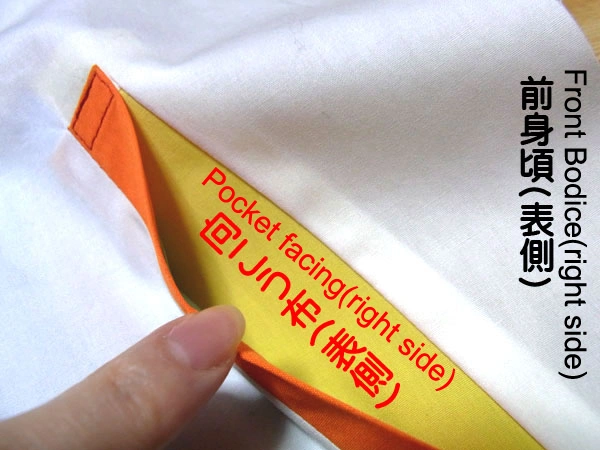
Start and finish sewing here too, leaving 0.7 cm between stitches. Reverse stitch well.
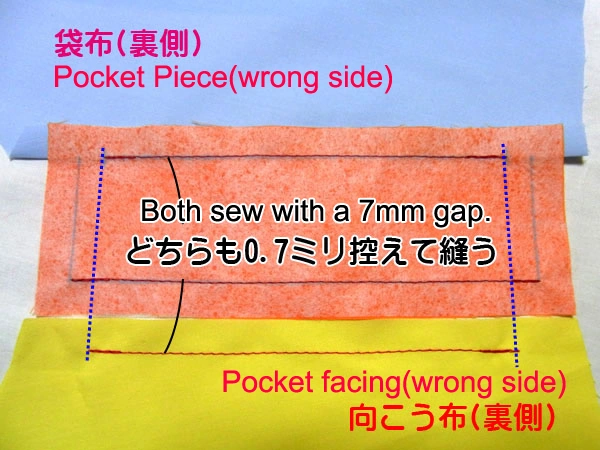
As you can see in the image, I sewed the first welt fabric part and the pocket facing with a 7mm gap.
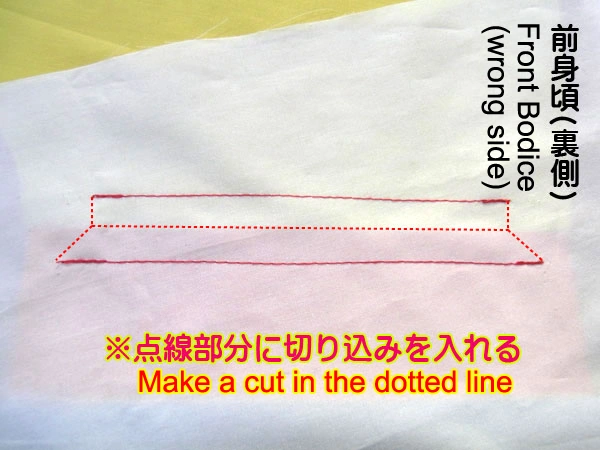
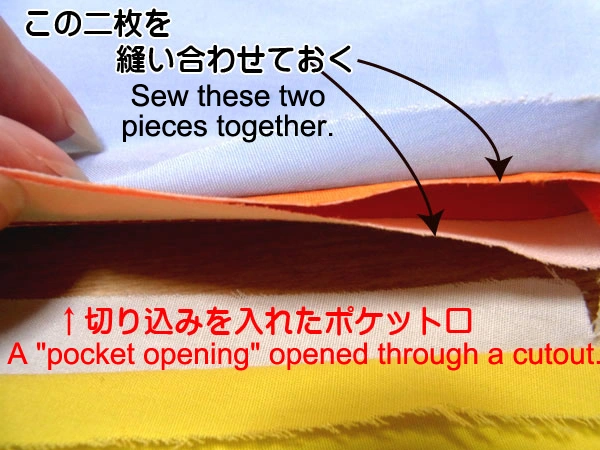
Make an incision in the "Front bodice". The dotted line is where the incision is to be made.
To avoid cutting the seam allowance of the pocket facing and welt fabric, iron down the seam allowance as shown in the image.
The cutter was used to cut from the back side of the "Front bodice".
The cutout should be placed in the middle of the seam line and the seam line.
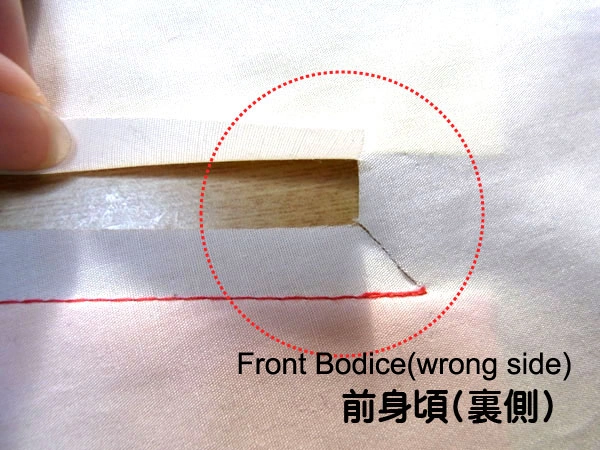
How to cut the corners. First, make a cut in the center of the piece in line with the short seam line, and then make a right-angle cut.
The other side should be cut diagonally to the long seam line.
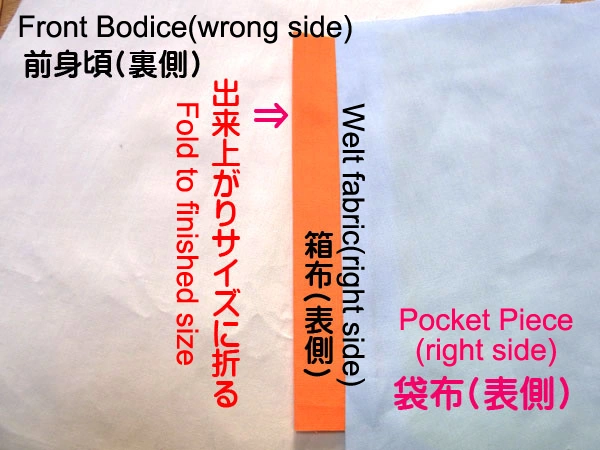
After cutting, pull out the Pocket Piece on the reverse side, fold the Welt fabric to the finished size, and iron it.

Turn the welt fabric over and fold it at the finished position and fasten it with a marking pin as shown in the image. Sew the red dotted line with a sewing machine.
Reverse stitch firmly at the beginning and end of sewing.

Sew the other side in the same way.
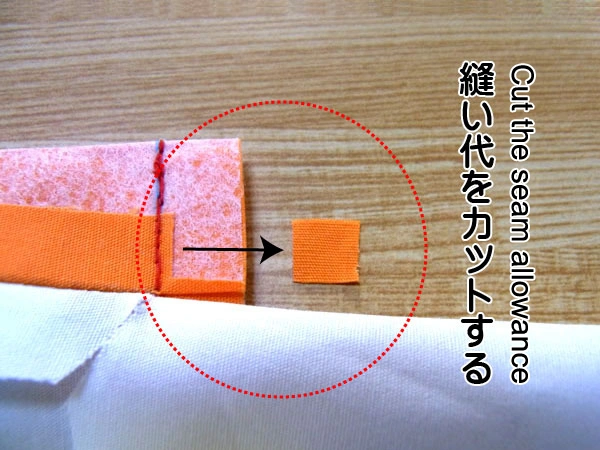
After sewing is finished, the seam allowance is to be processed. If the seam allowance is too thick, it will be echoed on the surface, so cut off the part you don't need as shown in the image.
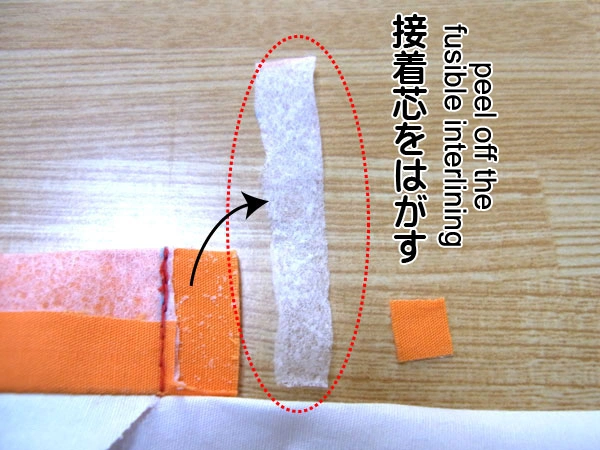
It is difficult to do because it is a little detailed, but remove the fusible interlining from the seam allowance. This will reduce the thickness considerably.
When both ends of the seam allowance have been taken care of, turn it over to the front side. The corners should be trimmed with an awl or similar.
Here is a close-up of the corners. The bag cloth is opened 0.7 cm as shown in the image.
Turn up the Pocket Piece and sew the body and seam allowance of the Welt fabric together.
Fasten with a marking pin to prevent shifting, and sew the black dotted line.
Be careful not to sew the seam allowance of the Pocket Piece when sewing it together.
Pull the Welt fabric from the incision to the front side.

Iron back the folded pocket facing seam allowance in the direction of the arrow.
Sew both ends of the pocket opening from the front side.
The bottom of the welt fabric looks like this, with a 0.7 cm gap to be sewn here.

Reverse stitch and sew tightly.

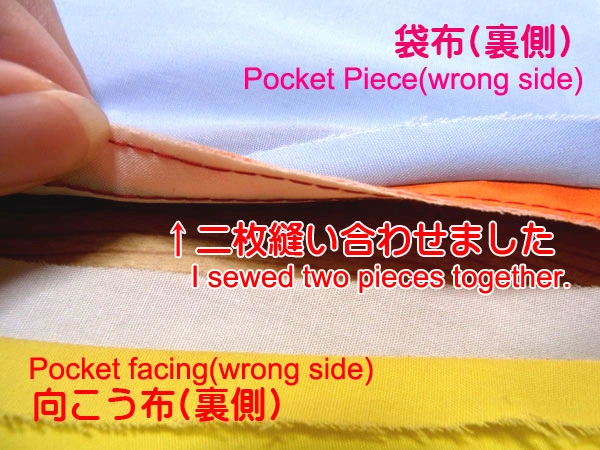
I sewed both ends together.

The part that had been left open 0.7 cm was also sewn down firmly here.
The pocket opening looks like this. Pocket facing is visible.
The inside looks like this! Pocket facing and Pocket Piece make a neat pocket.
As it is not baggy at this point, sew Pocket facing and Pocket Piece together.
Sew the red dotted lines together, but do not sew to the body.
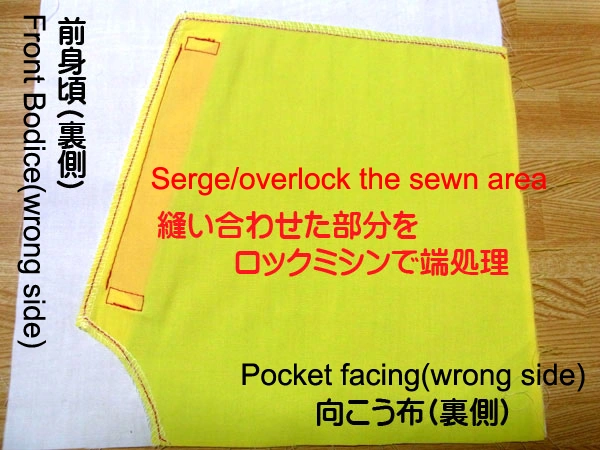
Serge/overlock the red dotted lines after sewing them together. Either a lock sewing machine or a zigzag stitch can be used.
This time, the welt pocket is sewn together at the side of the body. The process is the same even if it is not sewn at the side.


