How to make a collar
Everyone tends to think that collars are difficult to make! But if you follow the basics and sew carefully, you can make a stylish one.
Let's try it!
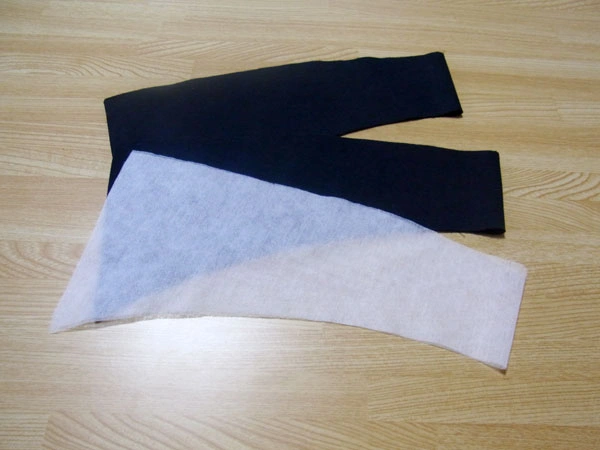
Outer fabric, lining, and fusible interlining! If you prefer a collar without stiffness, you can skip the interlining.
Be sure to use fusible interlining for thin fabrics or when you want to add firmness!
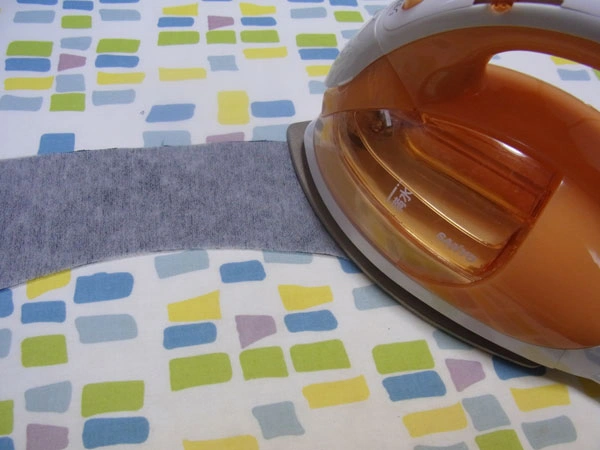
Iron the fusible interlining onto the back side of the lining. Be careful with the temperature, as nonwoven fusible interlining can sometimes melt at high heat.
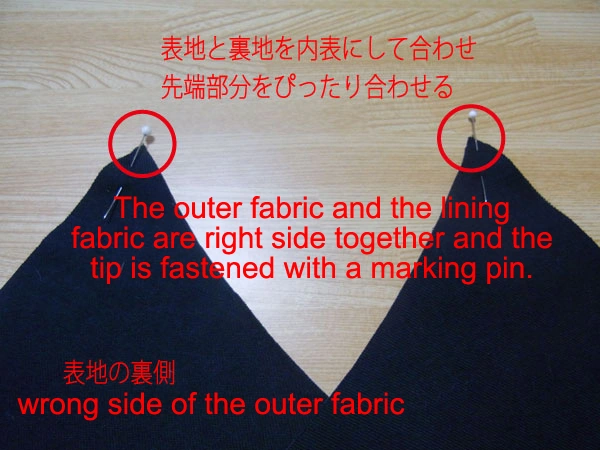
Next, place the outer and lining fabrics right sides together, and pin the tips first. Make sure the corners match exactly. Start sewing with the wrong side of the outer fabric facing up, as shown in the photo.
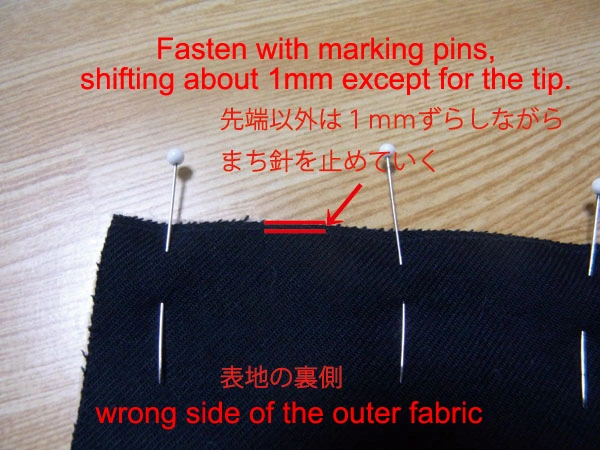
Here’s a little trick! It’s hard to see in the photo, but except at the tip, shift the fabric by about 1mm. You’ll see the reason later.
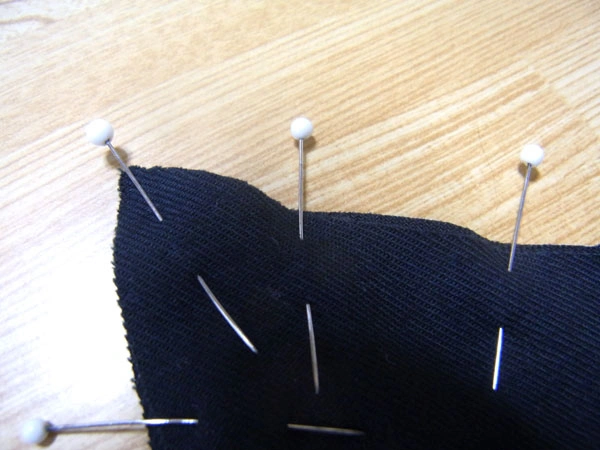
The difficult part is that the tip is pinned exactly, but the rest is shifted by about 1mm. It may be a little hard to notice.
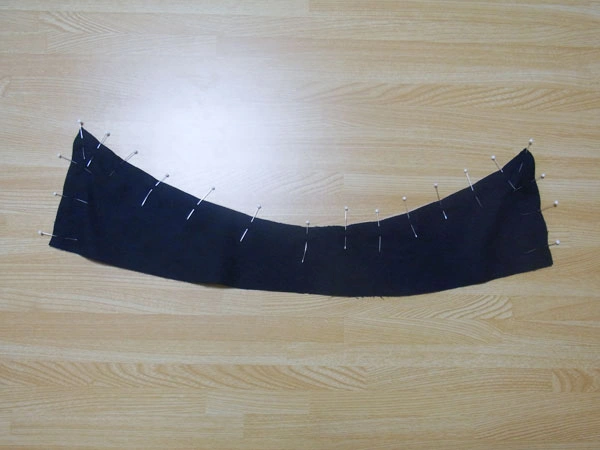
This is what it looks like after all the edges are pinned.
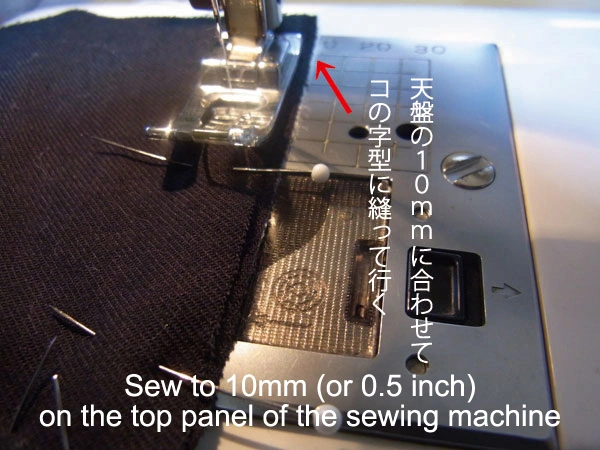
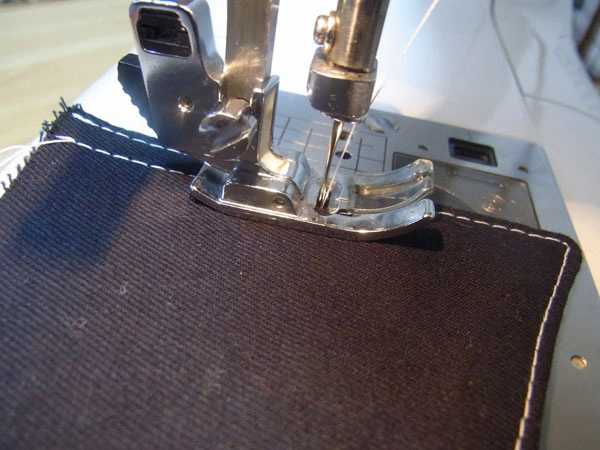
Sew the fabric along the 10mm (about 0.5 inch) seam allowance. Align the shifted lower fabric with the guide on the sewing machine.
Turn at the tip and continue sewing with a 10mm seam.
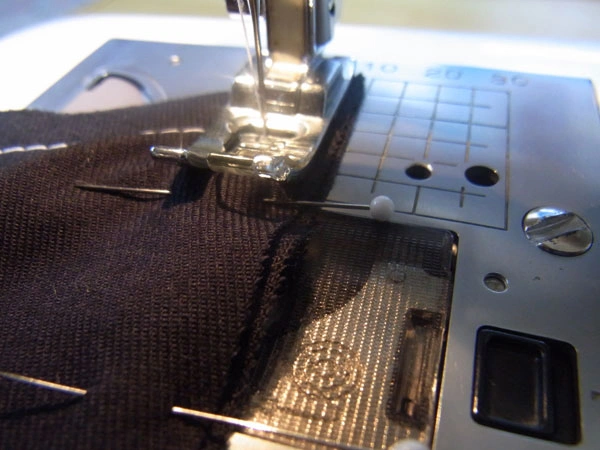
This is how it looks after sewing. Next, trim the seam allowance at the tip and clip the angled parts to prevent pulling when turned inside out. In the photo, the fabric is black and the thread is white for clarity, but always use matching thread.
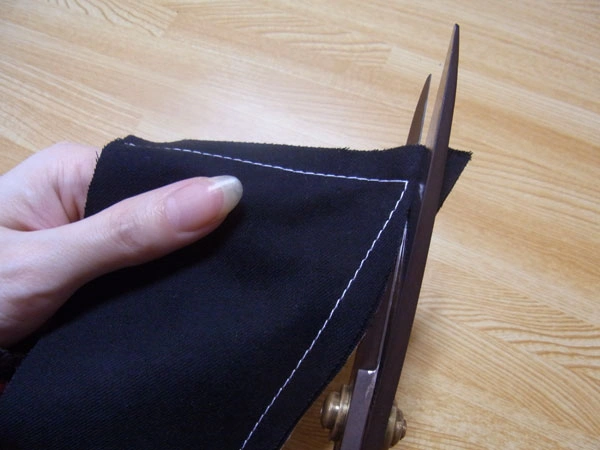
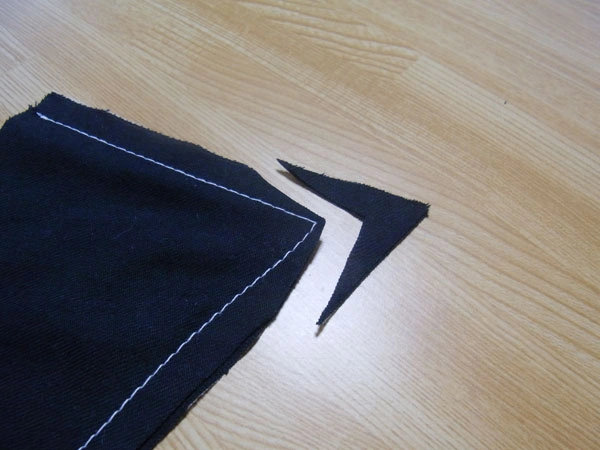
Cut off the tip, leaving 1–2mm of fabric. Don’t cut too deeply, or it may unravel when turned.
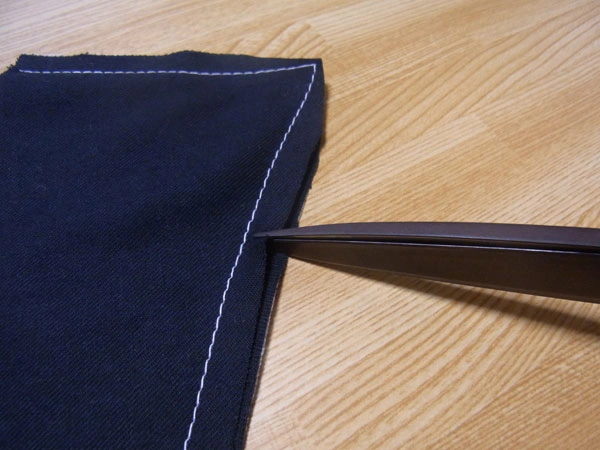
Next, clip into the seam allowance at the curved section. Another trick: cut one layer at a time instead of cutting both together.
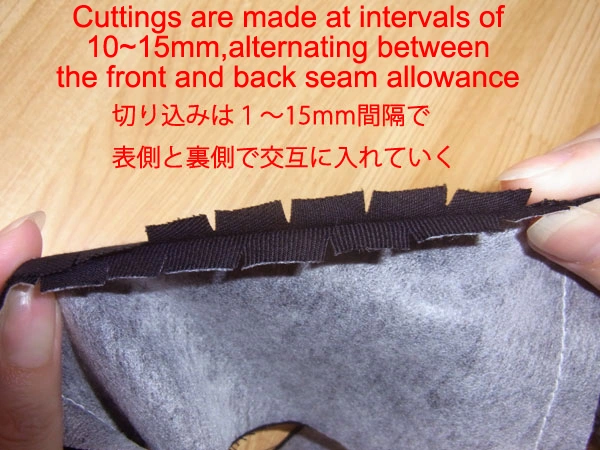
If you cut alternately like this, the curved seam will have a smooth and beautiful line. A neat finish is always better!
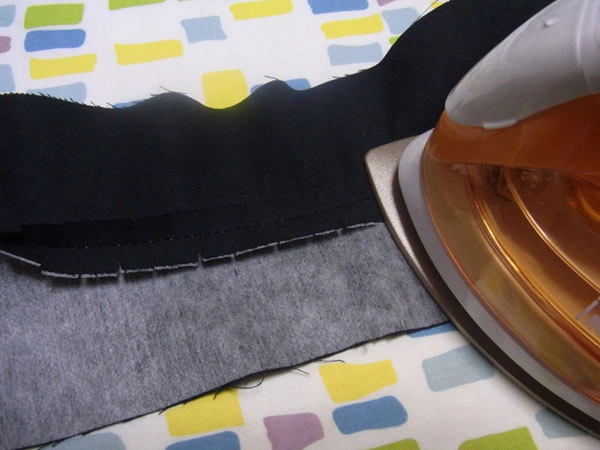
Press open the seam allowances with an iron where possible. This helps achieve a clean finish when turned. Skip the parts you can’t press.
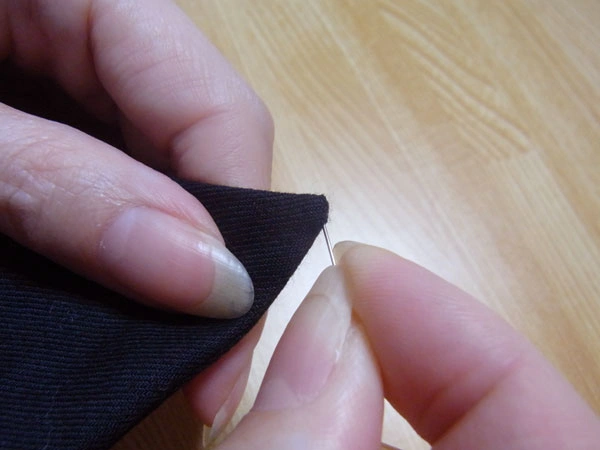
If the tip does not come out neatly, use a needle to gently push it out. After shaping, iron from the lining side so that the seam lies on the reverse side.
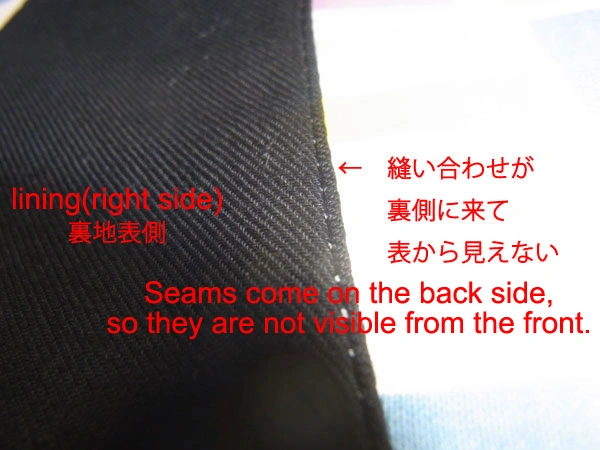
The reason we shifted the fabric earlier is so that this part comes out clean. This way, you can make a collar with no visible seams from the front. It’s already professional grade! This small detail is taught very seriously in sewing schools.
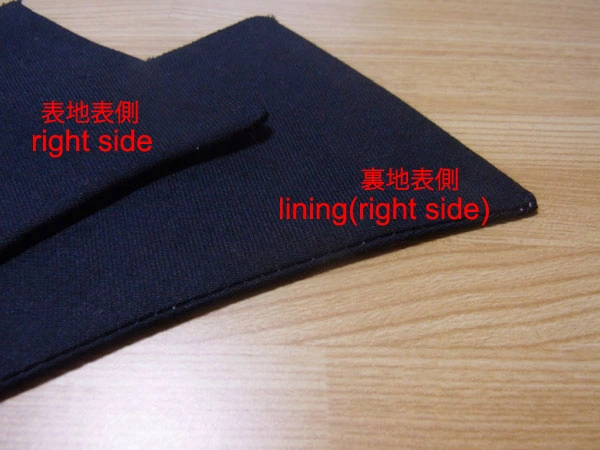
This is how it looks from the front and back. A properly made collar should look like this. If your shirt doesn’t—well… haha!


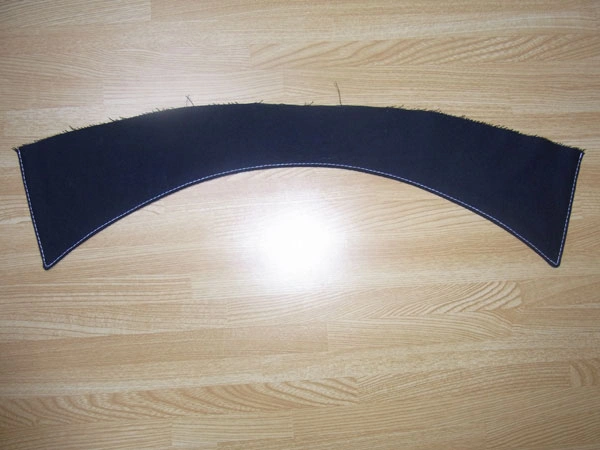
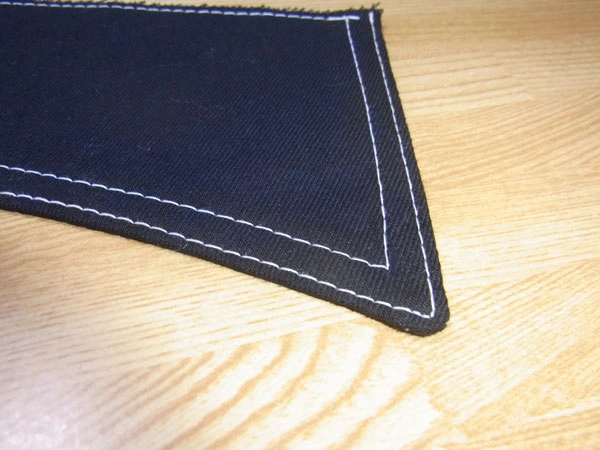
Next, topstitch around the perimeter to stabilize the shape. In the photo, cotton fabric is used, so it irons well and keeps its shape. For poly blends or polyester fabric, it may not hold as well, so we stabilize it with about 1mm topstitching.
After the first topstitching, add another one for extra firmness and design, also closing the opening. Sew the opening with a 3–5mm seam. It’s fine to leave it open, but closing it makes handling easier.


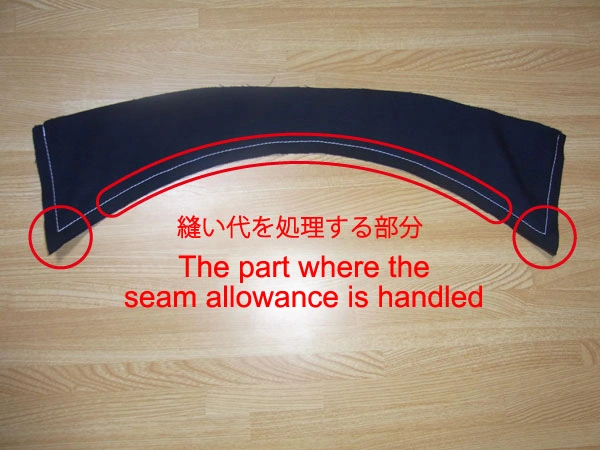
This is how it looks when finished. The collar is now complete!
A perfectly beautiful collar is completed, with no visible seams from the front side.


