This page shows the process of attaching the finished sleeves. For the process of making sleeves, please see How to sew sleeves and sleeve cuffs .
The part of the body where the sleeves are attached is called the "armhole," and the sleeve side is called the "cap center."
Both are curved and therefore difficult to sew together, but like the collar, it is a surprisingly noticeable part when worn.
Let's take our time and finish it slowly and carefully.
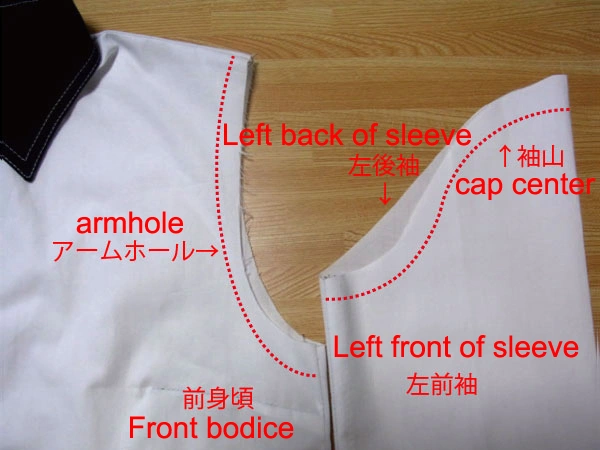
In the photo, the left sleeve is placed next to the body.
The left front of the sleeve is the side visible in the photo.
The side with the concave cap center is the front side of the sleeve.
Sew this side to the "armhole" at the front bodice.
Many beginners are unsure which sleeve is which. Please place them as shown in the photo and check carefully as you proceed.
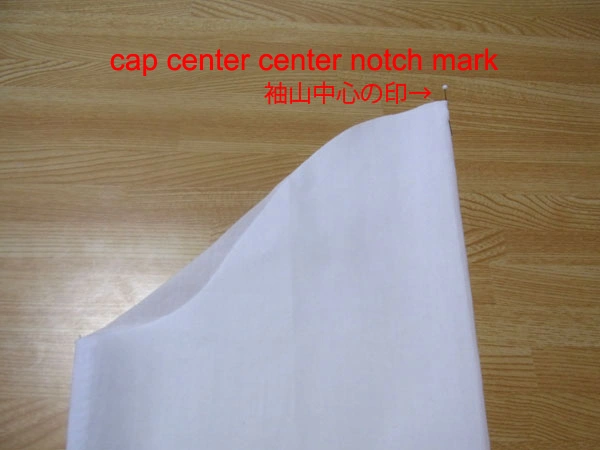
Fold the sleeve in half and mark the cap center with a pin.
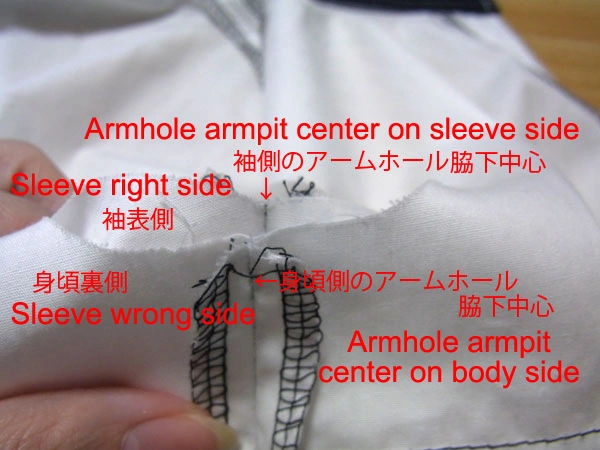
Align the underarm points of the body and sleeve as shown in the photo.
Fasten firmly with marking pins to prevent shifting.
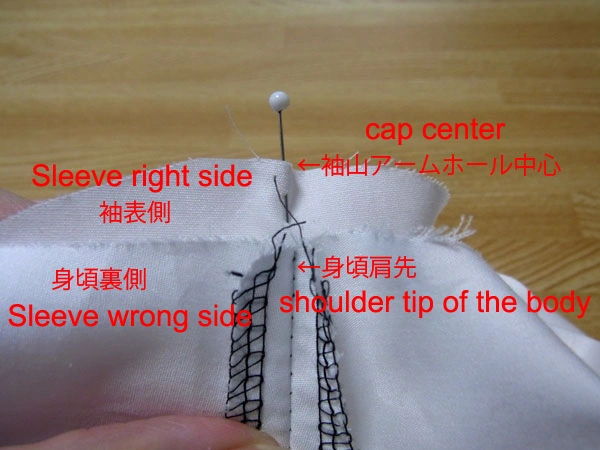
Next, match the cap center of the sleeve with the shoulder tip of the body.
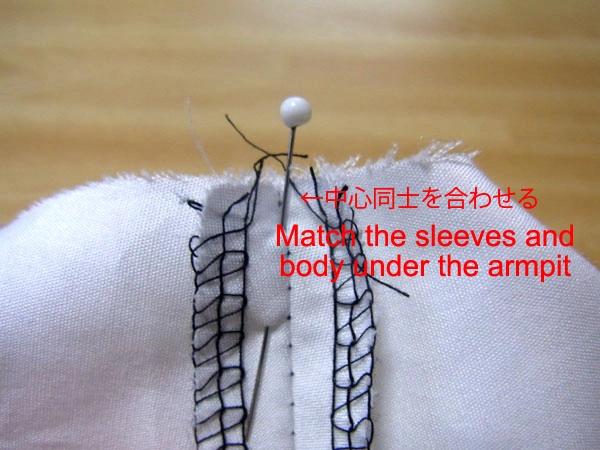
Be sure to fasten the pin securely so it does not come off.

Fasten the sleeve to the armhole with marking pins from the underarm side.
Do not pin too tight or too loose.
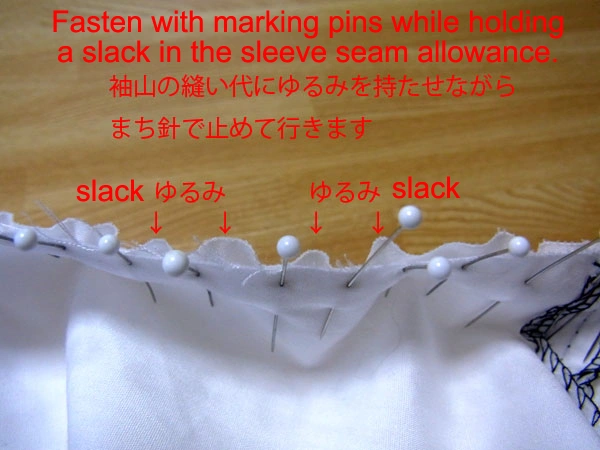
The sleeve cap has a round curve, making it difficult to match with the almost straight armhole at the shoulder tip.
Loosen the seam allowance of the cap center little by little while matching.
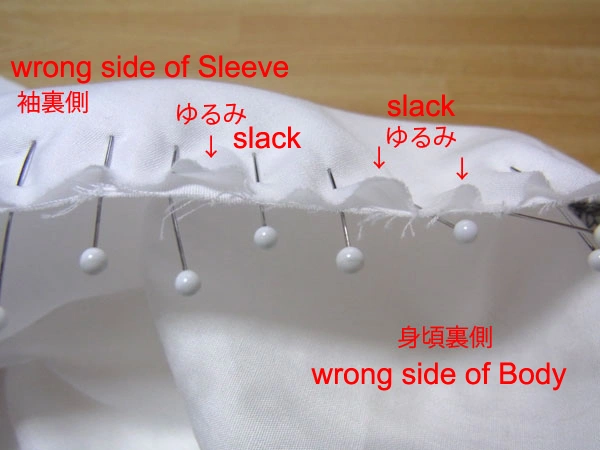
Only the seam allowance should have slack.
If slack reaches the sewing line, the fabric may be caught at the cap center when sewing with the machine.
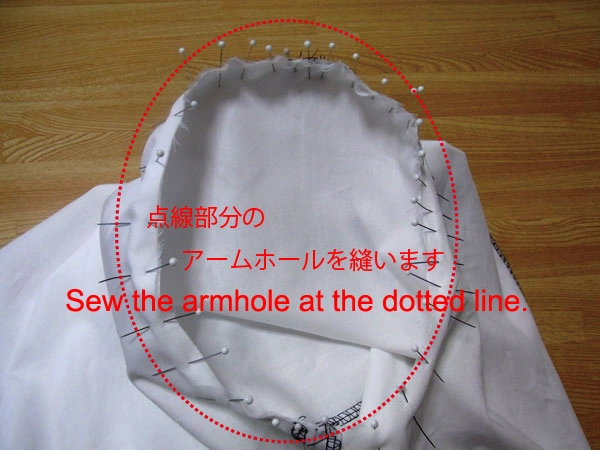
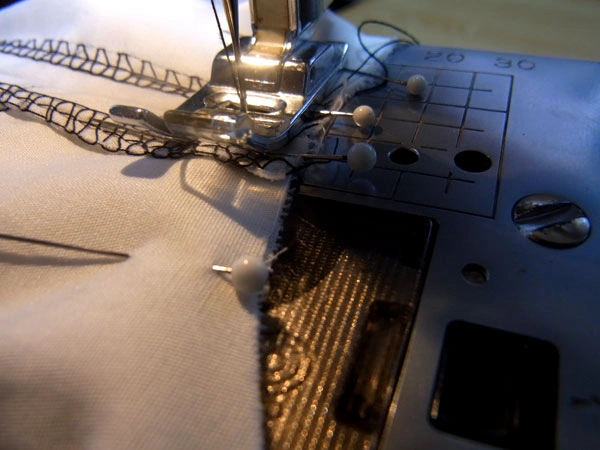
After all marking pins are placed, sew along the armhole.
The first backstitch is not needed since the seam goes around and meets the starting point.
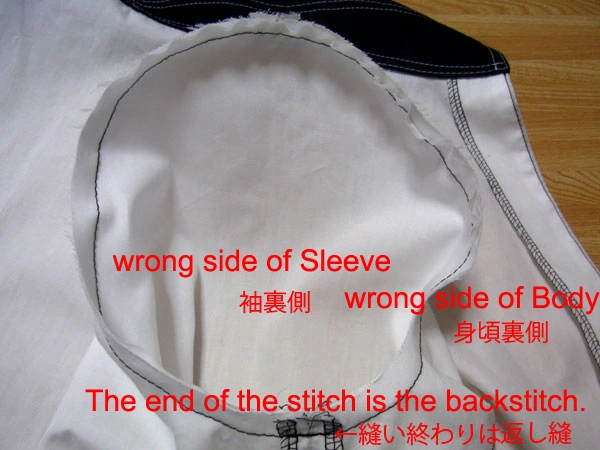
Finally, make a backstitch at the end. In the photo, black thread is used for clarity, but normally use thread matching the fabric color.
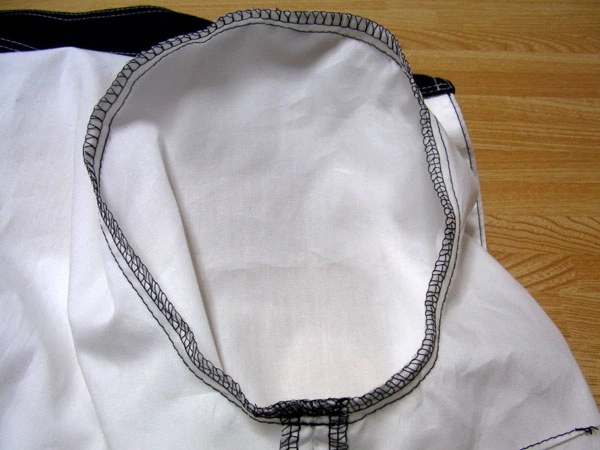
Serge/overlock the seam allowance. For details, see How to Serge/overlock (sewing machine & overlock sewing machine) .
The sleeves are now sewn. They look a bit rough because they have not been ironed yet.
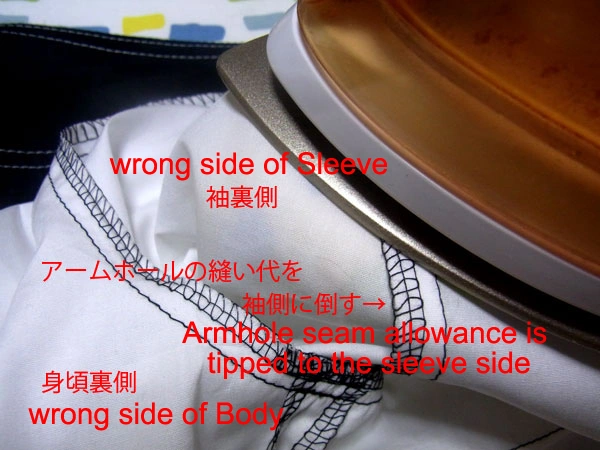
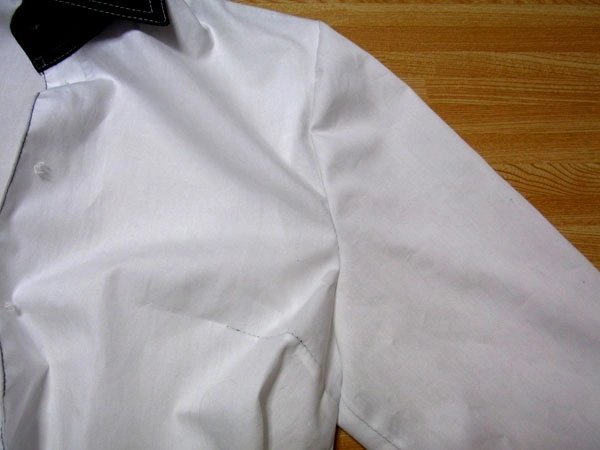
Ironing the armholes may feel troublesome, but let’s take one more step!
Use a sleeve ironing board to avoid making unwanted wrinkles on the body and sleeves.
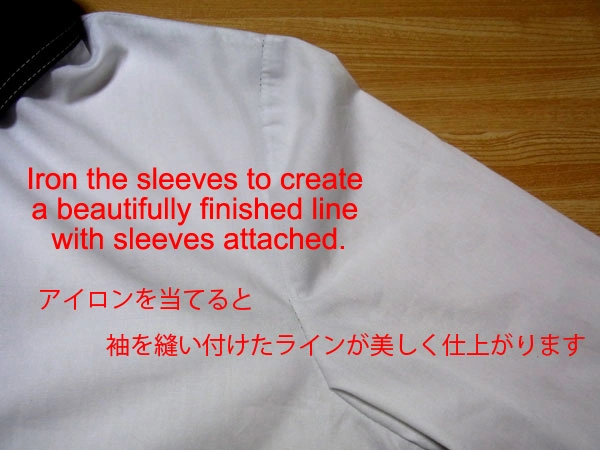
This completes the process.


