


![]()
Simple sewing instructions are written on the pattern.
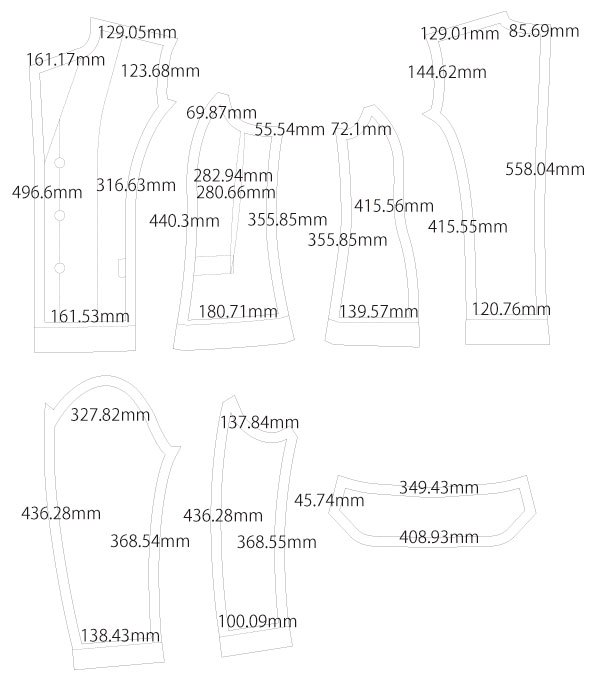
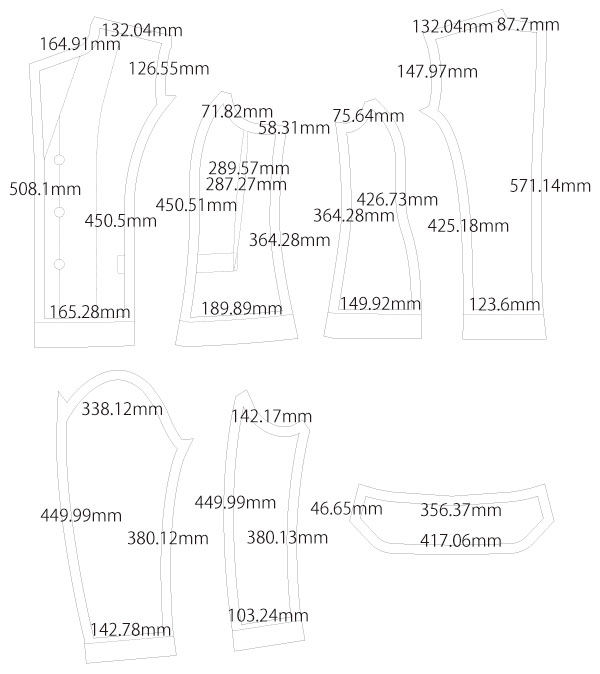
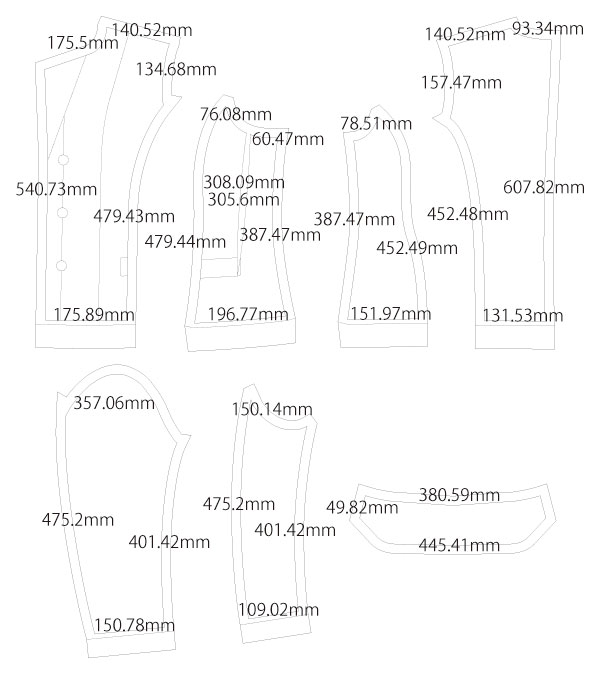
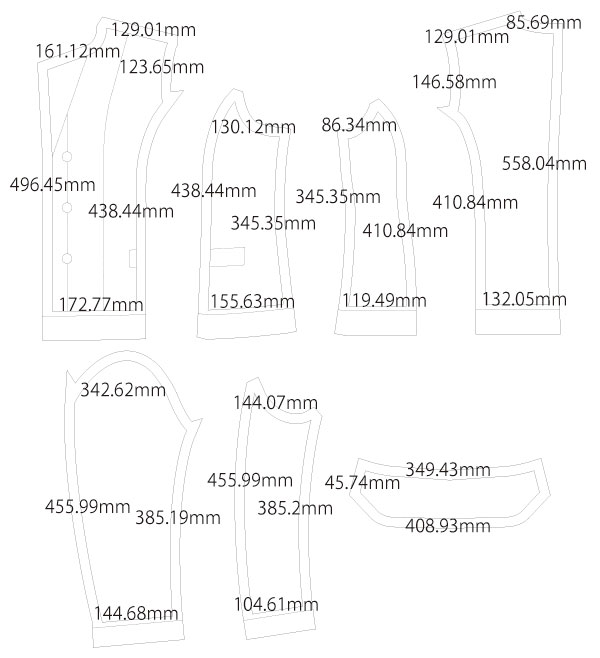
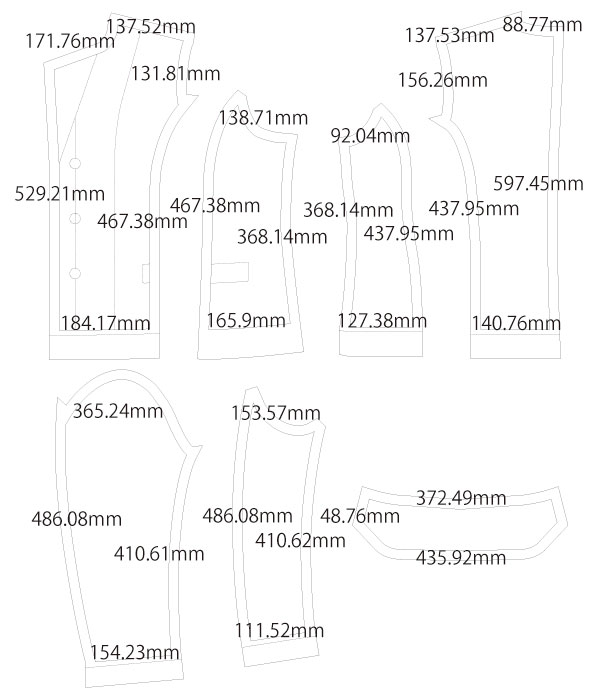
This is a tailored collar jacket pattern with sewing instructions. The pockets are dummy pockets with flap only.
This pattern is suitable for those who have experience sewing linings, facings, and tailored collar lapels.
This pattern is quite difficult for beginners or for those who have never made a tailored collar jacket.
This jacket shape is often used for cosplay costumes and can also be made as a school uniform jacket or blazer.
This is a basic jacket pattern, so please adjust the pattern lines as needed.
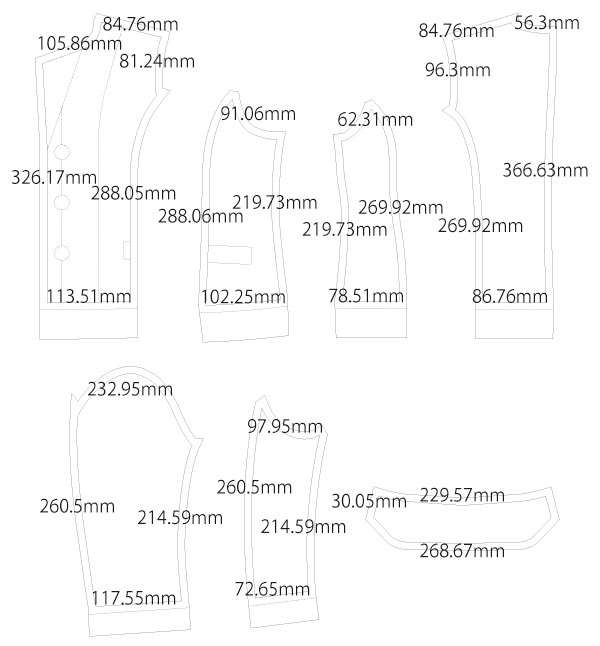
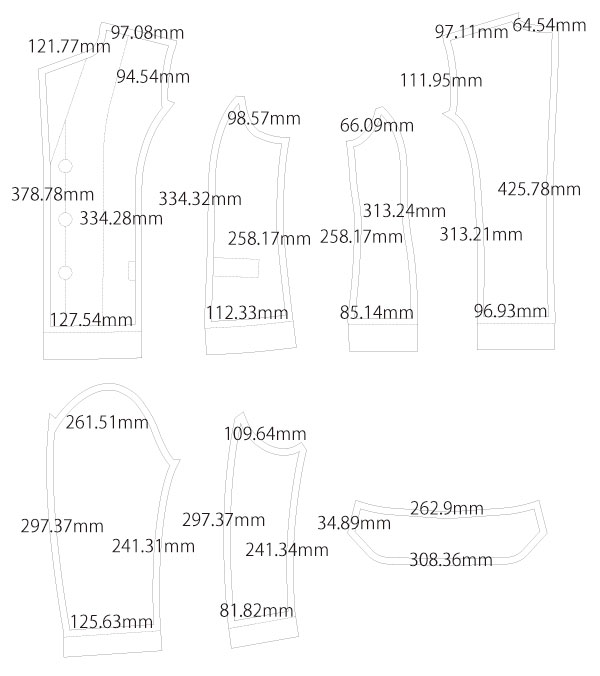
The sleeves are a full two-piece sleeve with curved lines.
There is no easing, but the lining construction is quite difficult, so we recommend sewing while referring to professional sewing books.
Instead of darts, the base is designed with princess-line style panels, making it easier to fit the female body line.
Please note that the dart positions are different from standard jackets.
Please also note that the placement of the lining and interfacing is different from usual.
Although it is difficult, this pattern creates a beautiful silhouette and is recommended as a women's jacket pattern.
By adding a chest pocket with a school emblem, it can be made into a student blazer.
For the men's version, the underarm darts are removed and the chest and waist lines are made more relaxed.
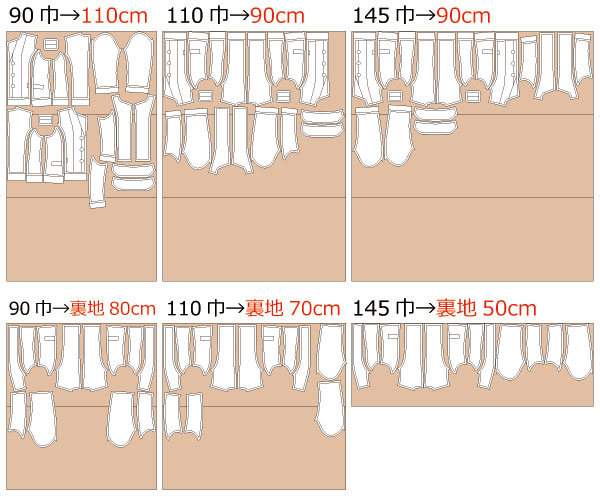
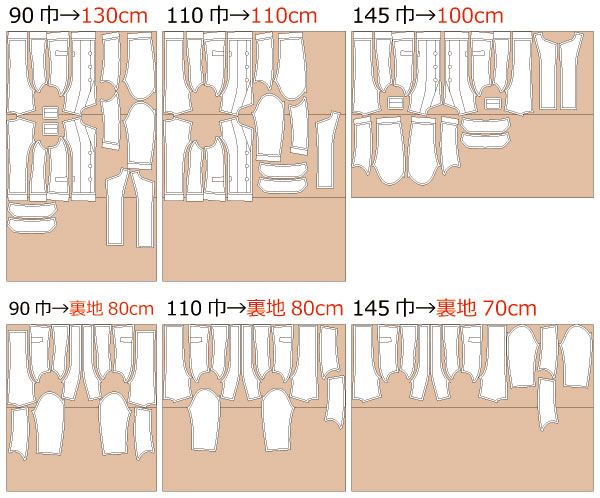
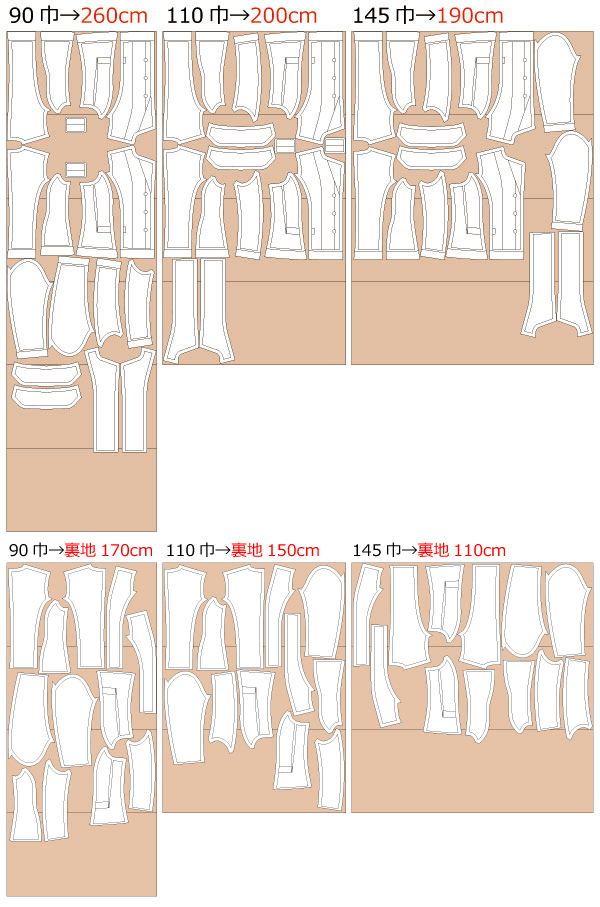
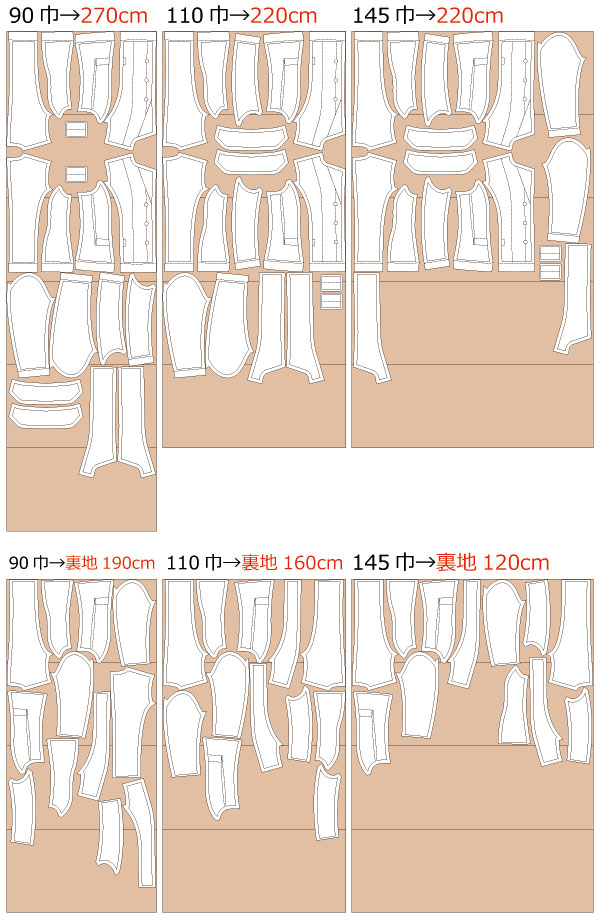
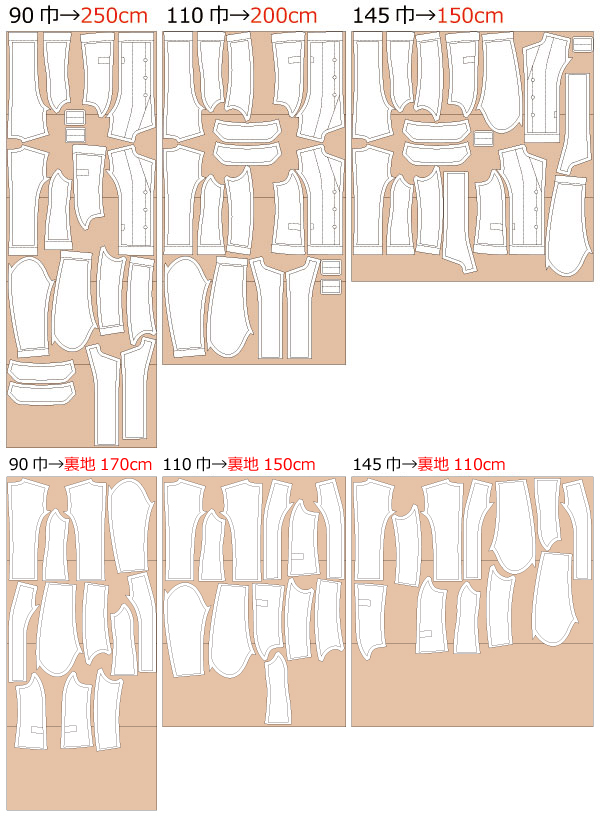
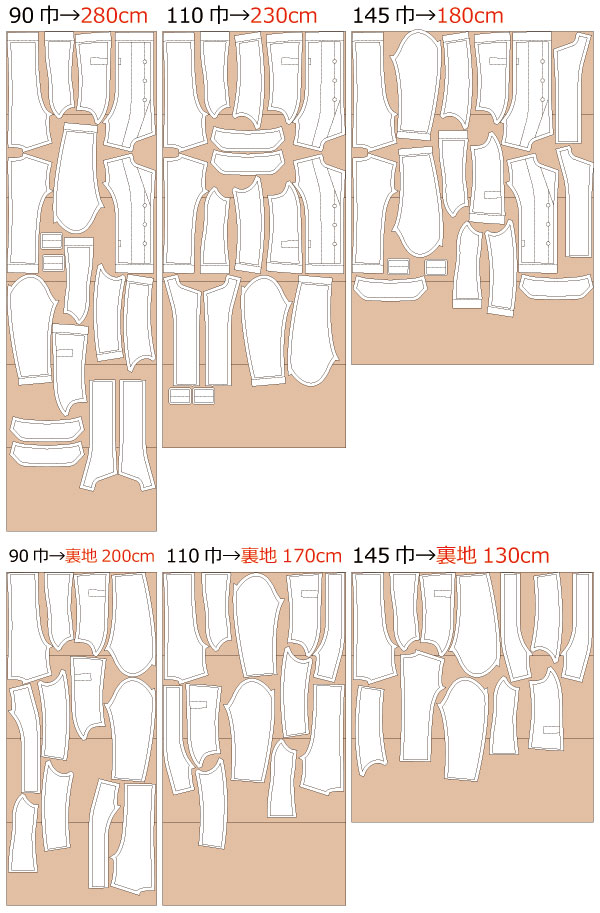
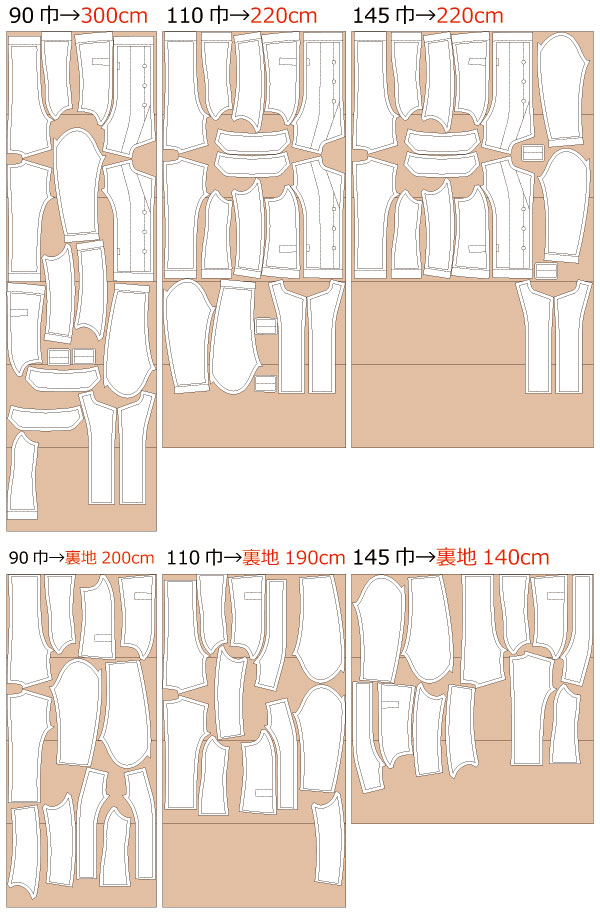
After printing, align the pages using the assembly marks, tape them together, and cut out the pattern. Seam allowances are included, so the pattern can be used as is.


*Please add about 3mm of ease to the lining.
(1) Make the sleeves. (The lining is finished with slip stitching.)
(2) Prepare the interfacing for the front and back body.
(3) Sew the body and side body pieces together to shape the jacket.
(4) Attach the interfacing to the body.
(5) Secure the lapel area.
(6) Attach the flaps.
*These are dummy pockets. If you want to make functional pockets, please create the pocket bag pattern yourself.
(7) Sew the lining.
(8) Join the facings to the front and back body.
(9) Shape the lapel and form the front overlap.
(10) Finish the facings.
(11) Sew the shoulder and side seams, then close the lining opening.
(12) Finish the hem.
(13) Attach the collar.
(14) Attach the sleeves.
![]()
Free Paper Patterns are possible because of your support.
If you use our patterns, please share them on social media and tell your friends.
Your support helps DRCOS continue to provide patterns in the future.
![]()
![]()
Children's-100
bust70cm waist64.5cm 11sheets of A4 size (or legal size)

Children's-4
bust26.4in length14.4in 12sheets of letter size

Children's-120
bust77cm waist71cm 14sheets of A4 size (or legal size)
Children's-8
bust29.5in length16.7in 15sheets of letter size
Children's-140
bust87cm waist80cm 21sheets of A4 size (or legal size)


Children's-10
bust33.5in length19.7in 20sheets of letter size
Ladies'-S
bust97cm waist85cm 23sheets of A4 size (or legal size)


Ladies'-S
bust37.8in length21.5in 22sheets of letter size
Ladies'-M
bust104cm waist93cm 24sheets of A4 size(or legal size)

Ladies'-M
bust40.4in length22.6in 25sheets of letter size
Ladies'-L
bust110cm waist97cm 25sheets of A4 size(or legal size)
Ladies'-L
bust44.1in length23.8in 25sheets of letter size
Ladies'-LL
bust117cm waist101.5cm 31sheets of A4 size(or legal size)
Ladies'-LL
bust46.5in length25in 27sheets of letter size
Men's-S
bust106cm waist98cm 26sheets of A4 size(or legal size)
Men's-S
bust39.4in length25.4in 25sheets of letter size
Men's-M
bust113cm waist104cm 32sheets of A4 size(or legal size)

Men's-M
bust42.7in length26in 25sheets of letter size
Men's-L
bust119cm waist110cm 30sheets of A4 size(or legal size)
Men's-L
bust46.1in length26.6in 28sheets of letter size
Men's-LL
bust125cm waist116cm 32sheets of A4 size(or legal size)
Men's-LL
bust48.6in length28.3in 31sheets of letter size


